Pole Shed Cost Estimator: Real DIY Budgets & Pricing Guide
Disclaimer: This calculator provides baseline structural material and labor estimates based on US national averages and standard site conditions. Actual costs will vary depending on your local permit/zoning requirements, ground snow/wind load engineering standards, soil conditions (e.g., clay, rock, or slope), and real-time lumber market volatility. Always obtain certified engineering stamps and quotes from licensed local contractors prior to purchasing materials or beginning excavation.
During my third major timber frame project on a rocky plot in upstate New York, I learned a brutal lesson about estimating errors.
Believing a generic online calculator gave me the absolute truth, I ordered materials without factoring in the severe clay content of our subsoil or the local frost line depth.
That oversight alone added three thousand dollars in unexpected concrete and extra excavation labor within the first forty-eight hours.
Accurate estimation requires looking past glossy brochure numbers and confronting the messy, gritty reality of site conditions and lumber price fluctuations.
Key Takeaways
- Foundational Realities – Online estimators routinely ignore sub-grade soil conditions and the steep price difference between gravel pads and reinforced concrete slabs.
- Lumber Specs – Choosing between UC4B ground-contact treated posts and laminated columns decides both initial upfront costs and forty-year structural longevity.
- Labor Multipliers – Constructing a pole shed yourself saves thousands in contractor overhead, but demands specialized equipment rental fees and hundreds of hours of grueling sweat equity.
- Hidden Expenses – Electrical sub-panels, municipal permitting fees, architectural engineering stamps, and contingency buffers regularly swallow fifteen percent of total project funds.
- Price Volatility – Regional supply chain shifts and lumber price spikes mean yesterday’s cost estimates require constant real-time recalibration before signing purchase orders.
Components Breakdown & Calculation of a Pole Shed Budget Estimate
Post-frame construction strips away traditional continuous foundation walls, transferring dead and live loads directly through laminated columns or solid timber posts.
When I break down each structural layer, it becomes painfully obvious where budgets stretch and where cheaping out guarantees catastrophic failure down the road.
Framing, roofing, and concrete do not exist in isolation. They form a single interconnected ecosystem where one cheaped-out component triggers a chain reaction of surprise bills.
Deep Dive Into Site Preparation and Foundation Sub-Base Engineering
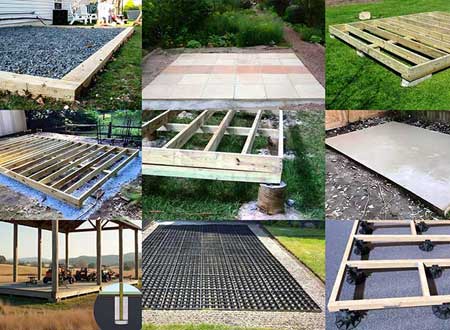
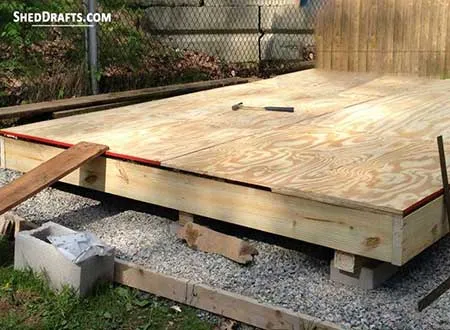
You cannot leave blacktop or native topsoil under your footprint. If you do, you’ll watch your structure settle and shift under load. Native clay requires total excavation and replacement with compacted crusher-run gravel to establish a stable load-bearing sub-base.
Skipping proper site drainage during excavation leads to water pooling directly against structural posts, accelerating wood rot even with pressure treatment.
Renting a tracked skid steer and a mini-excavator runs roughly four hundred dollars daily, making equipment transport logistics a critical budgeting factor.
Want a monolithic concrete slab instead? Get ready for heavy steel reinforcement costs and pump truck fees that make a compacted gravel floor look like pocket change.
Framing Materials Based On Lumber Grades and Post Treatment Standards
Never use above-ground rated pressure-treated wood for any structural member that touches or sits below the soil line. Southern Yellow Pine treated to UC4B ground-contact standards provides the necessary decay resistance for embedded post applications.
Laminated columns, often called glu-lams, eliminate the twisting and warping common in solid-sawn timbers by bonding kiln-dried lumber with waterproof structural adhesives.
Structural steel columns give you absolute immunity against rot and wood-eating bugs, but they bring steep material premiums and force you to use specialized fasteners.
For roof purlins and wall girts, do not buy anything below #2 grade or better southern yellow pine or Douglas fir. Anything less cannot handle wind shear forces and snaps under pressure.
Buying lower-grade utility lumber to save money introduces severe bowing, complicating sheet metal installation and creating wavy exterior walls.
Evaluating Roofing Gauges and Spray Foam Insulation Options
Standard twenty-nine-gauge corrugated metal panels offer budget-friendly durability, whereas twenty-six-gauge panels provide superior hail resistance and a stiffer profile for high-wind zones.
Trying to hang twenty-nine-gauge steel on a windy autumn afternoon is a nightmare. Those panels act like giant sails. You need at least three crew members on site just to position them safely without bending the metal ribs.
Architectural asphalt shingles give you a clean residential look, but they force you to install a full roof decking substrate made of plywood or oriented strand board beneath them. Closed-cell spray foam insulation seals air gaps and adds rigid structural shear strength, though applying it to a large pole shed can easily rival the framing package in total cost.
Sizing Up Commercial Overhead Doors With Custom Window Configurations
Sliding barn doors offer classic aesthetic appeal and lower hardware costs, but they struggle to seal tightly against driving rain and winter drafts.
Commercial-grade overhead garage doors give you real weather stripping and push-button convenience. The trade-off? They require rock-solid header framing and heavy-duty track mounting.
If you want natural light, skip floor-to-ceiling glass. I prefer installing smaller, high-wall transom windows. They flood the space with daylight, maintain your building security, and leave valuable interior wall space open for shelving.
Custom window placements enhance cross-ventilation and natural daylighting, requiring reinforced header assemblies to transfer roof loads around window rough openings.
DIY Pole Shed Kits Vs Pro Labor Rates: A Critical Cost and Effort Trade-Off
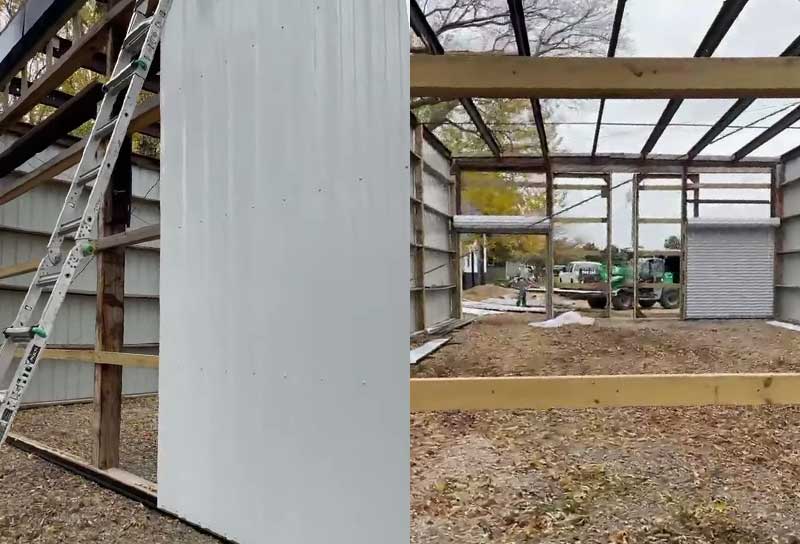
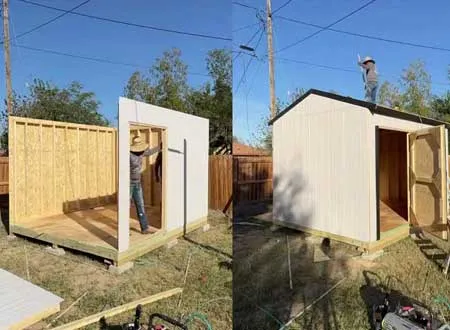
Material-only kits deliver pre-cut lumber, stamped engineered trusses, fasteners, and metal cladding directly to your driveway, leaving the heavy lifting entirely in your hands.
A turnkey professional crew handles the whole process from pulling permits to sweeping up the site, charging labor rates that cover their heavy equipment and speed.
Be totally honest with yourself about your skill level and available schedule. If you overestimate your time, you will end up stalled halfway through a build with an exposed frame facing a brutal winter.
Unpacking Material-Only Pole Barn Kits and Calculating Sweat Equity
Receiving a complete pole barn kit feels exhilarating until you face the massive stacks of lumber and bundles of steel siding sitting on your property. A basic kit covers engineered roof trusses, post-frame columns, girts, purlins, siding, roofing, and closure trim.
Foundation concrete and earthwork remain separate out-of-pocket costs you have to cover.
Kit manufacturers will tell you that a four-person DIY crew can erect a standard shell in one weekend, whereas real-world solo or dual-person builds frequently stretch across three to four weekends due to alignment adjustments and weather interruptions.
Tool rentals sneak up on you too. Renting a heavy-duty hydraulic earth auger for post holes and scaffolding for setting trusses adds hundreds in hidden costs. Spending every weekend wrestling steel and timber means facing physical exhaustion and a steep learning curve with metal-cutting tools.
Hiring Insured Turnkey Contractors for Precision Structural Framing
Professional labor rates typically range from fifteen to thirty-five dollars per square foot of floor space for framing and shell assembly alone. Insured framing crews bring specialized telehandlers and post-hole pounders that allows them to erect a complete structure in days rather than months.
Always check contractor licensing and liability insurance before signing anything. You want to avoid fly-by-night operations that cut corners on post depth or concrete collar sizing.
While paying twenty thousand dollars in contractor labor stings upfront, it saves hundreds of hours of personal time and eliminates the risk of catastrophic structural failure caused by amateur fastening mistakes.
Never release final payment until municipal building inspectors sign off on structural framing and electrical rough-in inspections.
Real-World Case Study: What an Actual 30x40 Pole Shed Cost Us to Build
On paper, a thirty-foot by forty-foot post-frame build with a twelve-foot eave height looked simple. In the field, reality hit us with unexpected friction at every turn.
We tracked every single expense from our initial excavator rental down to our last box of roofing screws.
Experienced builders know that estimating error margins widen dramatically once weather delays and inspection fees enter the equation.
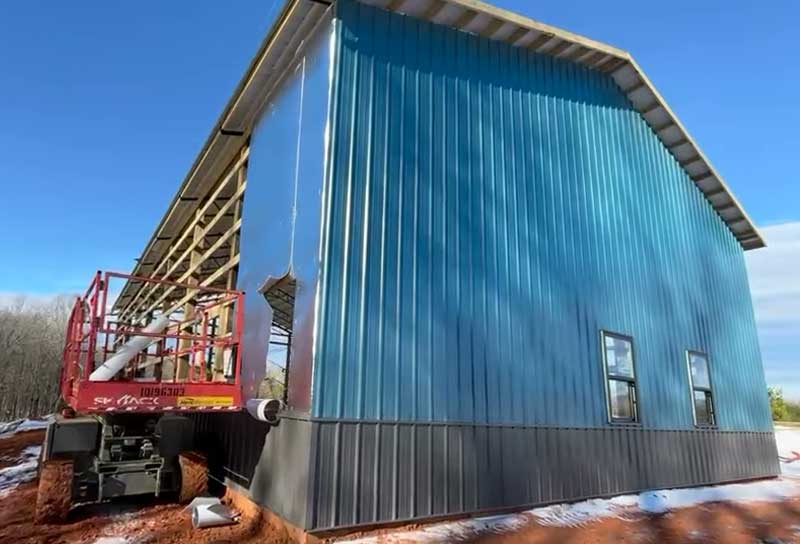
Deconstructing Our Initial Estimate Versus Final Budget Overrun Realities
Comparing our initial spreadsheet forecast against actual project ledger totals exposed a twelve percent cost variance that caught our management team off guard.
Initial software estimates put our shell cost at $22,000, assuming flat ground and basic freight fees. Trenching through unexpected shale ledges and paying extra shipping for rural delivery pushed our real cost up to $24,600.
To cover local labor shortages and sudden lumber price spikes during peak summer framing, we had to dip directly into our emergency contingency reserve.
We even hit a hidden agricultural drainage tile from an old farm field. That surprise forced us to redesign our southeast corner post depth and pour an engineer-approved larger concrete footing on the spot.
Unexpected Site Prep Challenges and Excavation Surprises
We stripped topsoil on what looked like a level pasture, only to find a layer of saturated grey clay with zero structural load-bearing capacity underneath. We had to dig down an extra eighteen inches and haul in forty tons of crushed #3 limestone just to build a solid working pad that heavy equipment would not sink into.
That wet ground also forced us to install a French drain system along the uphill side to direct subsurface water away from our posts. Skipping that drainage fix would have caused freeze-thaw cycles to heave and ruin our posts within three years.
Renting a tracked skid steer with a high-flow hydraulic hammer attachment saved the day when we hit the shale ledge, cutting our rock-breaking time in half.
Navigating Complex Municipal Permitting Fees and Engineering Stamps
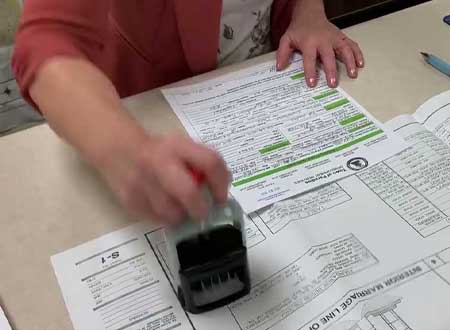
Securing municipal building permits for a rural commercial-grade pole shed required submitting certified structural engineering blueprints accounting for local snow and wind load thresholds.
Local county zoning boards charged a baseline square-footage permit fee of $1200, plus an additional $400 for environmental septic setback verification.
We paid structural engineers an extra $600 for stamped truss calculations that met local seventy-pound ground snow load codes. If we had delayed permit submittal by even two weeks, our foundation pour would have slipped into freezing weather, multiplying our costs with concrete anti-freeze additives.
Hidden Costs and Extras Most Estimators Leave Out
Uncovering expenses that standard calculators conveniently omit prevents post-purchase buyer remorse and catastrophic budget shortfalls midway through construction.
Turning an open-air pole barn shell into a functional, climate-controlled workshop demands massive secondary investments in electrical wiring and insulation. Standard cost estimators list the basic shell package while ignoring the thousand-dollar incidentals that accumulate every single day at the lumberyard counter.
Veteran builders always add a fifteen percent buffer to cover specialty fasteners and minor architectural adjustments.
Upgrading To Full Climate Control Electrical Sub Panels And Spray Foam
Running year-round heat inside a cold-storage pole shed requires dedicated underground electrical service and high-performance closed-cell spray foam insulation. Heating a poorly insulated pole shed during winter months burns through propane or electric utility budgets at an alarming rate if thermal bridging along the posts is left unaddressed.
Do not fall for the myth that fiberglass batt insulation works just as well here. Batt insulation sags down between wall girts over time and turns into a breeding ground for rodents.
Trenching a hundred feet of underground conduit for a hundred-amp sub-panel runs roughly $2200 in materials and utility hookup fees.
Spraying three inches of closed-cell polyurethane foam across the ceiling and wall cavities sealed every air leak and gave us an R-21 thermal rating. Just make sure your installers run proper ventilation during application. If moisture gets trapped inside, it will corrode your steel siding fasteners from the inside out over time.
Analyzing Long Term Regional Price Variations And Material Market Volatility
Your exact job site address dictates your final project expenditure through fluctuating shipping distances and regional timber market tariffs.
Building in remote rural zones adds substantial trucking surcharges for heavy roof trusses and bulk steel panel bundles traveling hundreds of miles from the nearest manufacturing plant.
I regularly monitor lumber futures and buy structural materials during seasonal market dips, which saves thousands compared to buying during the spring rush. Regional supply chain bottlenecks often force sudden material substitutions that throw budgets off track and push completion back by weeks.
Selecting sustainably harvested timber certified by forestry associations guarantees long-term structural viability while minimizing the environmental footprint of your backyard project.
Step-by-Step Budgeting Checklist
Post-frame construction rewards meticulous planning, whereas impulsive purchasing leads to costly rework and wasted building materials.
Work through this checklist before signing contracts or buying supplies to keep your project anchored to real numbers. Treat your budget spreadsheet as a living document that must adapt when site conditions change.
Phase 1: Site Preparation & Earthworks
A – Boundary Survey & Zoning Verification ($300 – $1,500)
B – Excavation, Topsoil Stripping, & Grading ($1,000 – $4,500)
C – Sub-base Gravel Pad & Geotextile Fabric ($1,500 – $5,000)
D – Trenching for Utilities & Drainage ($800 – $2,500)
Phase 2: Foundation & Structural Shell
A – Concrete Footings, Collars, or Monolithic Slab ($2,500 – $12,000)
B – Posts, Lumber Framing, & Laminated Columns ($4,000 – $15,000)
C – Engineered Roof Trusses & Hardware ($3,000 – $10,000)
D – Metal Siding, Roofing, & Trim Packages ($3,500 – $12,000)
Phase 3: Openings, Finishes, & Systems
A – Overhead Doors, Walk-in Doors, & Windows ($1,500 – $6,000)
B – Electrical Sub-panel, Wiring, & Lighting ($2,000 – $7,000)
C – Insulation & Interior Wall Sheathing ($2,500 – $9,000)
D – Permitting, Engineering Stamps, & Inspections ($400 – $2,500)
Phase 4: Contingency Buffer
Mandatory 15% Unforeseen Expense Reserve ($3,500 – $10,000)

Read Next
 Cost To Build a Shed: 2026 Price Guide & DIY Budget Checklist
 Shed Roof Load Calculator With DIY Framing Guide
 Shed Roof Guide: How To Frame & Sheathe For Weatherproofing
 Shed Rafters vs. Trusses Comparison: Pro-Tested DIY Guide
 Shed Building Codes and Permit Guide For DIY Builders
 How To Wire a Shed for Electricity: Code-Compliant DIY Guide
Framing-to-Finish Roadmap: DIY Guides For Every Step of The Build