How To Build a Gable Shed Roof With DIY Trusses
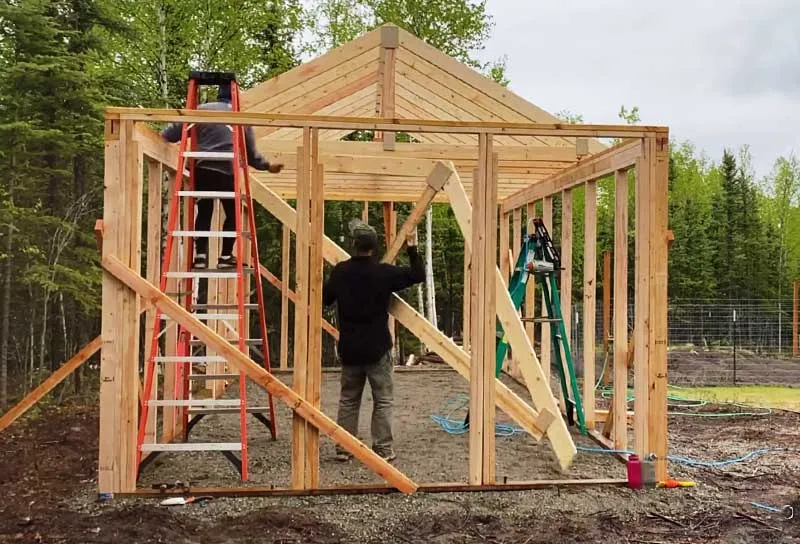
Three years into running my own framing crew, I made the costly mistake of eyeballing top chord angles on an 8:12 pitch gable frame for a local client.
Two heavy winter snowstorms later, the ridge had sagged three inches.
That pushed the top wall plates outward and popped the drywall joints inside the attached workshop.
I paid for the repairs myself.
That structural failure taught me that field-built rafters cannot compete with structural trusses when it comes to load distribution and lateral stability.
Key Takeaways
To build a gable shed roof with trusses, calculate the roof span and pitch, then build a jig on the subfloor to match those dimensions. Batch-cut the top and bottom chords, internal braces, and gussets, then assemble every truss on the jig. Hoist and plumb the end-gable trusses first, install the intermediate trusses, secure them with hurricane ties, and finish with staggered roof sheathing, synthetic underlayment, and shingles.
– Building a master framing jig on your plywood subfloor guarantees every truss matches to within a 1/16th inch margin.
– 1/2-inch exterior-grade CDX plywood gussets glued with construction adhesive provide maximum joint shear strength.
– A 4:12 to 6:12 pitch offers the ideal slope for shedding water and handling snow accumulation.
– Temporary lateral bracing along the king posts prevents the domino effect during truss hoist and alignment.
– Structural wall tie-downs and hurricane clips are non-negotiable for securing roof framing directly to top plates in high-wind regions.
Pre-Construction Essentials: Planning A Code-Compliant Gable Truss Roof
Building codes are not optional suggestions; they establish minimum live-load requirements for winter snow and maximum building heights for accessory structures.
Ignoring those requirements can mean expensive changes later or insurance headaches after a major storm.
Regional snow loads vary wildly, from roughly 20 pounds per square foot in mild coastal areas to well over 70 pounds per square foot in mountain territories.
Your pitch directly impacts how effectively that snow slides off versus overloading your structure. For most suburban builds, stick to a 4:12 to 6:12 roof slope. This gives you adequate water runoff and usable overhead storage without turning your roof into a giant sail.
Determining Roof Pitch and Regional Snow Load Capacity
Roof pitch measures vertical rise for every 12 inches of horizontal run. Steeper slopes like an 8:12 pitch shed rain instantly, but they act like giant wind-blockers that put massive stress on your shear-wall anchors.
On the flip side, anything below 3:12 is asking for leaks and requires full ice-and-water shield membranes across the entire deck to block wind-driven rain backup. Before you cut a single piece of lumber, visit your local building department and pull the exact live load, dead load, and basic wind-speed specs for your zip code.
I like to double up the end-gable wall top plates with straight, dry Douglas Fir or Southern Yellow Pine rather than relying on cheap Spruce-Pine-Fir studs.
The extra lumber depth gives the truss bottom chords a better bearing surface. It also makes toe-nailing and connector installation easier and reduces the chance of splitting.
Always design your top chord spans and roof pitch around the absolute worst historical winter weather for your zip code. Never trust generic online framing charts blindly.
Essential Tools Checklist for Roofing
A framing square and speed square are essential for precision and speed.
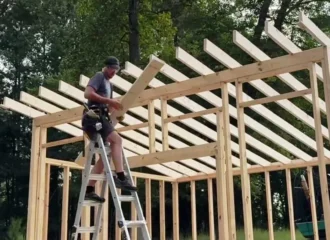
Lifting heavy 2×4 framing components overhead while balancing on an A-frame ladder is a fast track to an emergency room visit. Set up full-length baker scaffolding inside the floor frame so you have a solid, stable working platform at your chest line.
For repeatable structural cuts, I prefer a compound miter saw with a 60-tooth fine-finish blade. It produces clean, consistent angle cuts, which matters when you’re making a dozen or more identical trusses.
Layout and Cutting Tools – 10-inch or 12-inch compound miter saw, 7-1/4 inch circular saw with carbide blade, heavy-duty speed square, 100-foot steel tape measure, snap-line chalk box with blue chalk.
Fastening Equipment – Pneumatic framing nailer (21-degree or 30-degree), positive-placement metal connector nailer, heavy-duty cordless impact driver, subfloor construction adhesive cartridges with high-yield caulk gun.
Safety and Staging Setup – OSHA-compliant fall-arrest harness with anchored roof ridge plate, ANSI Z87.1 safety glasses, heavy-duty leather work gloves, non-slip rubber-soled work boots, scaffold staging towers or Type IA fiberglass stepladders.
Calculating Truss Quantity Based On Spacing
Spacing roof trusses at 24 inches on-center (O.C.) can reduce material use and dead load. However, it requires thicker roof sheathing, such as 5/8-inch panels, to reduce visible sag between supports.
I always prefer 16-inch centers: it increases framing density, lets you use standard 1/2-inch sheathing, and yields a substantially stiffer roof. It allows 1/2-inch sheathing and provides more frequent support for roof loads.
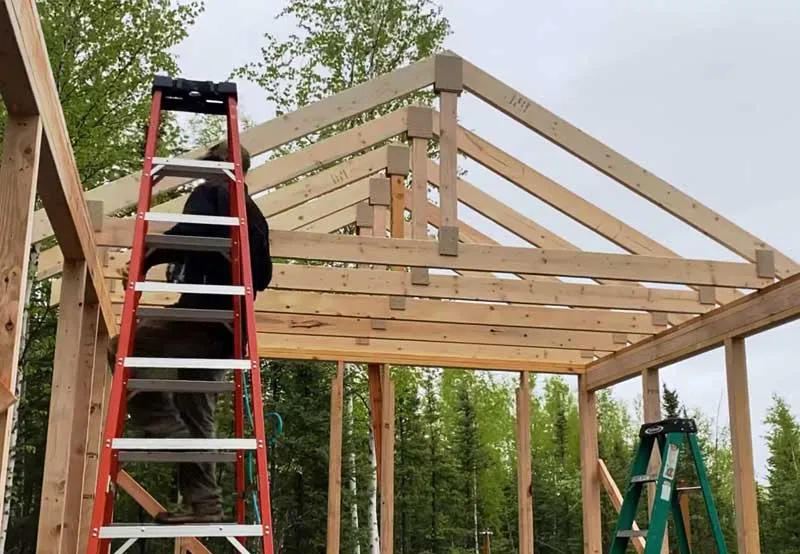
To calculate the number of trusses, divide the building length in inches by your chosen center-to-center spacing. Round up to the nearest whole number and add one final unit for the end wall.
For example:
16-foot shed = 192 inches
192 ÷ 24 = 8
8 + 1 = 9 trusses
So a 16-foot shed with trusses spaced 24 inches O.C. requires 9 complete truss assemblies.
Don’t forget to order extra stock for barge rafters (fly rafters) if you plan on extended gable overhangs.
Measuring Top Chord and Ridge Plumb Deductions
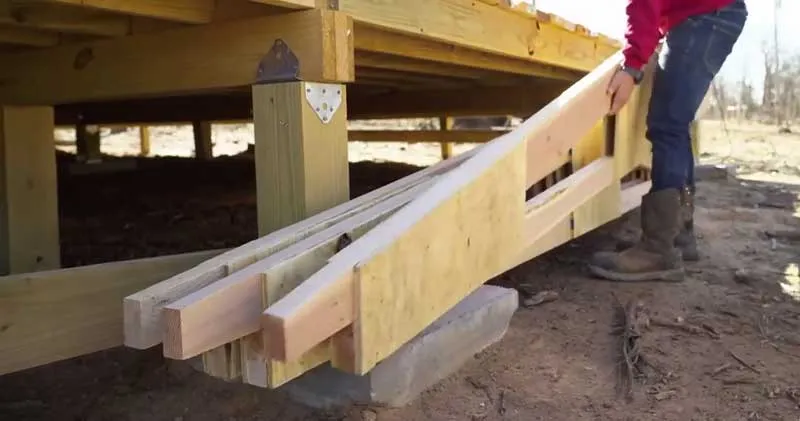
Calculate your top chord length using the Pythagorean theorem (A² + B² = C²) or a pitch diagonal multiplier.
For a 12-foot-wide shed, the total span is 144 inches. Half of that gives you a horizontal run of 72 inches, or 6 feet.
With a 5:12 roof pitch, the roof rises 5 inches for every 12 inches of horizontal run. That gives you a total vertical rise of 30 inches from the top of the bottom chord to the apex.
Pitch Multipliers for Finding Top Chord Length
|
Pitch Ratio
|
Multiplier
|
Calculation E.g., 6-ft Run
|
|---|---|---|
|
3:12
|
1.0308
|
6' × 1.0308 = 6.18 ft, 74-3/16"
|
|
4:12
|
1.0541
|
6' × 1.0541 = 6.32 ft, 75-7/8"
|
|
5:12
|
1.0833
|
6' × 1.0833 = 6.50 ft, 78"
|
|
6:12
|
1.1180
|
6' × 1.1180 = 6.70 ft, 80-7/16"
|
|
8:12
|
1.2019
|
6' × 1.2019 = 7.21 ft, 86-1/2"
|
|
10:12
|
1.3017
|
6' × 1.3017 = 7.81 ft, 93-11/16"
|
|
12:12
|
1.4142
|
6' × 1.4142 = 8.48 ft, 101-3/4"
|
Here is the step beginner framers always forget: because top chords butt together along a central plumb line at the peak, you must subtract half the actual lumber thickness (0.75 inches for standard 1.5-inch 2×4 stock) measured perpendicular to the plumb cut.
Skip this 0.75-inch deduction, and your entire truss assembly will bow outward, throwing off your ridge line and turning plywood sheathing into a nightmare.
Choose Dry, Straight Lumber
Do not frame with wet, fresh-off-the-truck lumber. Order your dimensional 2x4s 5 to 7 days in advance. Stack them off the wet ground using wooden spacers (stickers) between every layer, and band the pile tight under a tarp.
Fresh, high-moisture lumber can create problems after the roof is finished. As wet wood dries beneath asphalt shingles, it shrinks across its width. That movement can loosen plywood gussets and distort an otherwise straight roofline.
And don’t assume the lumberyard’s stack contains nothing but perfectly straight boards.
Sight down the edge of every 2×4 and identify its natural crown. The crown is the slight upward curve along the narrow edge of the board. Orient the crown upward toward the sky when cutting your top chords.
As the roof carries load, gravity works against the crown. Installing crowned boards upside down can contribute to an unwanted sag in the roofline.
Measuring and Marking Wall Plates for Accurate Spacing
Accurate truss layout starts on the wall plates. Snap clear layout lines while standing safely on the subfloor. This helps keep the roof framing plumb and aligns roof sheathing with the wall studs below.
Before erecting the walls, clamp the front and back top plates together on the subfloor. Mark the truss locations across both plates at the same time using a wide framing square. This creates identical layouts on both sides of the building and helps keep the roof structure square.
Long walls almost always bow under load. Stretch a tight mason line end-to-end along the outer plate edge to spot hidden warps. Push or pull the plates straight using internal diagonal wall braces before locking down your first truss.
Pull your tape continuously along the plate. Mark the first interior truss at 15-1/4 inches, then mark every 16 inches after that: 31-1/4″, 47-1/4″, 63-1/4″, and so on.
Use a speed square to extend the layout lines across both top plates. Place an X on the side of each line where the truss timber will sit.
End-Gable and Interior Truss Assembly on a Precision Jig
Stop building trusses on wobbly sawhorses. The flat subfloor deck of your shed is the single most accurate, dead-level jig surface you will ever get.
I once rushed a 14-foot shed job by cutting parts on sawhorses without building a floor jig. Minor 1/8-inch errors accumulated across 12 trusses, creating a wavy ridge line that took two miserable days of shimming and trimming to fix before the sheathing would lay flat.
Lay out your top chords and bottom chord directly over the subfloor OSB according to your exact calculated dimensions. Snap bright chalk lines representing the outer boundaries, including your overhang tails.
Fasten 2×4 scrap blocks securely to the subfloor along the outside edge of those chalk lines to form a heavy-duty perimeter cradle.
Drop your cut lumber inside those guide blocks and clamp everything tight. This locks your geometry so every single truss comes out identical to within 1/16th of an inch.
Batch Cutting Top & Bottom Chords With Web Braces
Cut your very first top chord with precision. Verify its miter angles and plumb cuts directly against your floor chalk lines. Once it is flawless, use it as your master template or set a fixed wooden stop block on your miter saw stand fence for mass production.
A long miter saw table with flip-stops lets you crank out dozens of identical parts in minutes. Ensure your peak cuts, seat cuts, and internal web miters fit bone-tight.
Tight wood-to-wood contact transfers heavy snow loads through direct structural compression rather than relying entirely on fasteners. Label all cut parts immediately to keep assembly rolling smoothly.
Pre-cut every top chord, horizontal bottom chord, vertical support, and plywood gusset plate before starting the main assembly. This eliminates constant tool changes.
Stack the finished components beside your subfloor jig so every part stays within easy reach.
Fabricating Structural Gusset Plates Using Plywood
Structural gussets connect the truss components and distribute forces across the joints.
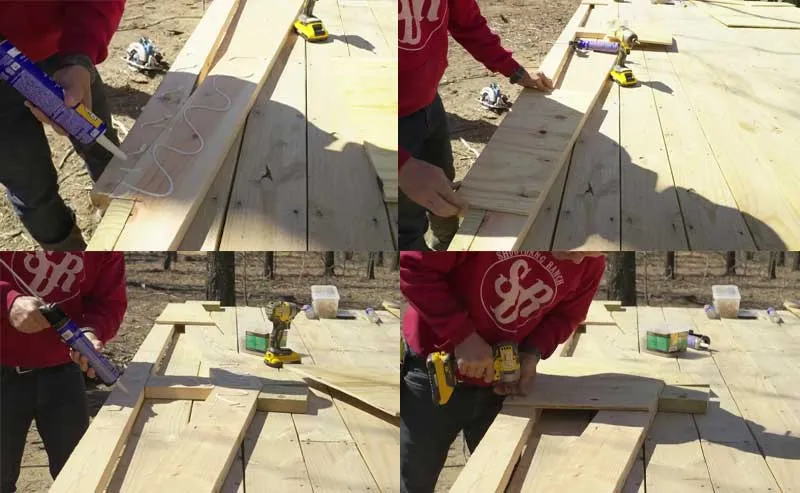
Cut custom gussets from 1/2-inch exterior-grade CDX plywood or 7/16-inch OSB. Apply a thick, continuous zigzag bead of heavy-duty polyurethane construction adhesive between the gusset backer and framing lumber. This creates a strong permanent bond between the materials.
Nail the gusset down using ring-shank framing nails or structural screws driven in a staggered pattern. Staggering your fasteners prevents splitting the underlying 2×4 framing while locking the joint permanently.
Final Assembly
Assemble every truss right inside your wooden floor jig. Glue and fasten the top gussets, flip the whole assembly over, and install gussets on the back face. Stack completed units flat on ground blocks to prevent twisting while you finish the rest.
Frame your two solid end-gable trusses first, complete with vertical studs spaced 16 inches on-center. Then batch-produce your open interior units. Using those finished end-gable trusses as the baseline for your jig setup ensures every intermediate truss matches the end walls perfectly.
Raising and Bracing Gable End Trusses for Solo Builders
Hoisting the first end-gable truss solo is nerve-wracking because it has zero structural support until braced. Lift the gable assembly upside down onto the wall plates, then rotate the peak skyward using a long 2×4 push-pole.
Screw temporary guide blocks to the wall plates to keep the lower seat cuts from slipping off the edge as you pivot the frame up. Once vertical, plumb the gable with a 4-foot spirit level or plumb bob, then lock it down with long diagonal 2×4 sway braces anchored to ground stakes or floor joists.
Never walk or stand directly on open, unbraced top plates while holding framing overhead. Lay solid scaffolding planks across the top wall plates inside the shed to create a safe, wide staging area.
Installing And Aligning the Ridge
Cut temporary wooden spacer blocks to match your layout gap (a 14-1/2 inch block for 16-inch O.C. spacing). Run a bright mason string taut between the peaks of your two end gables.
As you raise each intermediate truss, align its apex to the mason line. Insert your spacer block between the top chords and tack a continuous 1×4 12-foot runner board across the chords near the peak to hold the assembly in line.
Do not pull down your temporary top-chord diagonal braces until your roof sheathing is fully nailed off. Removing brace boards too early can trigger a domino collapse, sending your entire truss layout crashing down.
Rack-Proof Interior Lateral Bracing
Stand on the floor deck and look up along the bottom chords and ridge line. Eyeball any noticeable bowing or lean, and tweak your temporary diagonal braces to straighten the frame before driving permanent nails into the deck.
Fix secondary diagonal 2×4 braces to the undersides of the top chords inside the attic space. These internal braces prevent wind-induced racking while your build is under construction.
Mechanical Anchoring: Hurricane Ties, Toe-Nailing, and Shear Walls
Simple toe-nailing through a bottom chord into a wall plate is not enough for serious wind uplift.
Modern building codes demand an unbroken load path down to the foundation. Heavy-duty structural connectors like Simpson Strong-Tie H2.5A hurricane ties or hurricane clips physically tie the truss bottom chord directly to the wall studs.

Never use standard drywall screws or cabinet screws for structural ties or gussets. Drywall screws are brittle; they snap instantly under lateral shear stress or wind vibration.
Warn sub-contractors or helpers never to cut or drill through your truss chords or internal web braces to pass wiring or piping. Modifying even one web member destroys the structural integrity of a clear-span truss.
End-Gable Wall Studs and Shear Sheathing
Install vertical 2×4 studs inside the outer gable triangle at 16 inches on-center. These studs provide solid backing for exterior siding.
Install them with their broad face parallel to the wall line to increase resistance to wind pressure. Then sheath the gable assembly continuously with OSB or plywood.
The continuous sheathing ties the roof line into the lower wall sheathing. It also helps turn the end walls into strong shear panels that resist building movement.
Framing Gable Overhangs Including Fly Rafters
Ladder-style overhangs, also called barge rafters or fly rafters, protect gable end walls from vertical rain runoff. They also give the shed a more finished architectural appearance.Build the ladder-style overhang assembly on the ground using 2×4 lumber.
The outer stringer becomes the exposed fly rafter. The internal horizontal members become the lookouts. These lookouts extend from the first interior truss to support the fly rafter.
Notch the top edge of the end-gable truss chords by 1-1/2 inches so the 2×4 lookout members can pass flush across the gable wall. Clean, accurate notches make the overhang easier to assemble. They also create a straighter trim line.
Cleanly notched lookouts and tied-in barge rafters elevate the look of your build, giving it a crisp, professional architectural trim line instead of looking like a cheap utility box.
Trimming Rafter Tails and Installing the Sub-Fascia Board
Stretch a mason line across your rafter tails to catch length inconsistencies before hanging sub-fascia. Trim uneven tails flush using a vertical plumb cut so your sub-fascia mounts square.
Fasten rot-resistant 2×4 or 2×6 sub-fascia boards across the rafter tails to lock the eaves straight, then cover them with finished composite or clear-grain wood fascia for a clean, paint-ready surface.
For HOA-controlled neighborhoods, match the fascia depth, overhang width, and shingle shade to your main house. Spending an extra fifty bucks on matching trim keeps the neighbors happy and creates a cohesive property layout.
Sheathing and Weatherproofing the Roof System
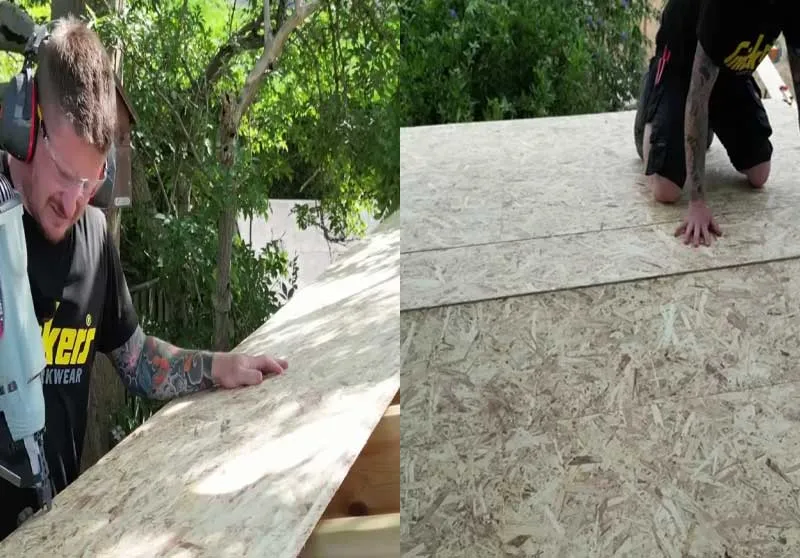
Roof sheathing needs room to breathe. Always install 7/16-inch or 1/2-inch OSB structural panels with the strength axis running perpendicular to your trusses.
Maintain a 1/8-inch expansion gap between panel edges so the OSB can expand in summer humidity without buckling.
Slide metal H-clips between unsupported panel edges between trusses to prevent flexing under foot pressure, and stagger your panel end joints in a brick-bond pattern to distribute seams across the framing.
Never leave unpackaged OSB sheets resting on damp ground. They absorb moisture fast, expanding before they are even installed. Butt damp OSB sheets tightly together without that 1/8-inch gap, and they will buckle into ugly ridges right under your shingles.
Deck Fastener Schedules: Nailing Patterns for Panels
Space 8d ring-shank framing nails every 6 inches along panel perimeter edges and every 12 inches along interior field supports. The small mechanical ridges along ring-shank nail shafts increase pull-out resistance compared with smooth framing nails.
Drive the fasteners flush with the OSB surface without crushing the top wood fibers. This preserves the panel’s shear strength. Secure the panel corners firmly to prevent lifting and eliminate squeaks when walking across the roof deck.
A pneumatic coil roofing nailer or framing nailer with a flush-drive nose attachment can dramatically speed up sheathing installation. Set the air pressure so the ring-shank nail heads sit flush without breaking through the top veneer. This preserves the structural shear strength of the panel.
Installing Drip Edge Flashing With Underlayment and Ice Barriers
Mount aluminum or steel drip edge flashing along the lower eaves first to route water away from the fascia and into the gutters. Roll synthetic roof underlayment horizontally across the roof deck starting from the bottom eaves up toward the ridge.
Synthetic underlayment provides better tear resistance than standard felt paper.Overlap lower courses by at least 4 inches and end seams by 6 inches, or follow the product manufacturer’s requirements.
Secure the underlayment with plastic-cap roofing nails designed for the product.Then install the second drip-edge flashing pass along the sloping gable rake edges. This helps seal the roof against side-driven rain.
In cold regions, install a self-adhered ice-and-water membrane along the eaves where required. This helps protect against leaks caused by ice dams.
Shingle or Metal Roof Application
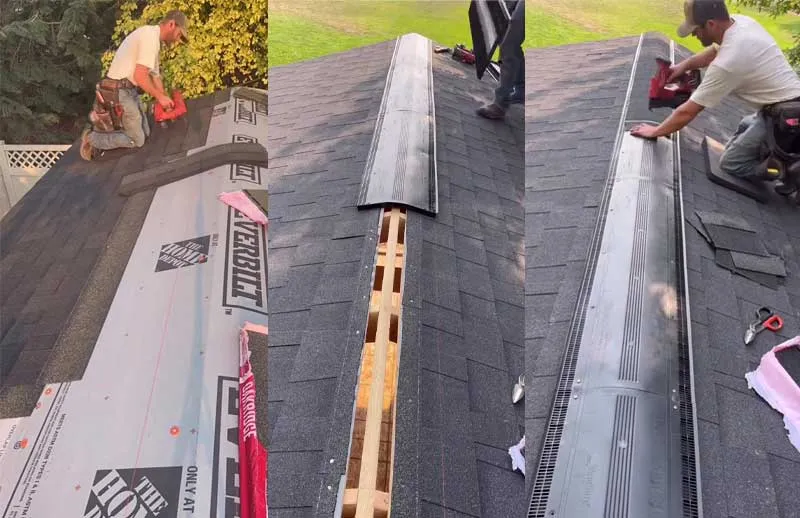
For asphalt shingles, start with a starter strip along the eaves. The starter course seals the first row and helps protect against wind lift.
Use dedicated 1-1/4-inch galvanized roofing nails driven through the manufacturer’s designated nail line.
Offset standard shingle seams by 6 inches between courses. This keeps vertical joints from lining up and reduces the chance of water finding a path into the building.
For exposed-fastener ribbed metal roofing, drive screws equipped with neoprene washers into the flat pans of the panels directly into the truss chords below. Drive them snug so the rubber washers compress evenly to form a watertight seal without crushing the metal profile.

Read Next
 How To Build Shed Roof Trusses On A DIY Jig In One Weekend
 Shed Rafters vs. Trusses Comparison: Pro-Tested DIY Guide
 Shed Roof Load Calculator With DIY Framing Guide
 Cost To Build a Shed: 2026 Price Guide & DIY Budget Checklist
 Shed Roof Guide: How To Frame & Sheathe For Weatherproofing
 Shed Roof Slope: Guide To Find the Right Weather-Proof Pitch
Framing-to-Finish Roadmap: DIY Guides For Every Step of The Build