
Frame Shed Walls: A Step-by-Step Guide For Rock-Solid Builds

I can’t forget one of the first shed’s I framed. I was cocky, skipped the double top plate because I wanted to save twenty bucks on lumber. And I didn’t bother checking my wall frame’s diagonal measurements for square after the first few studs were in.
Three years later, the owner called me back because the door wouldn’t close.
The roof load had slightly bowed the single plate, and the whole structure had racked two inches to the left. I had to tear off the siding and jack up a finished building just to fix a mistake that would have taken ten minutes during the framing stage.
Use 16-inch on-center (OC) spacing for structural integrity and to make siding installation easier.
Always use pressure-treated lumber for the bottom plate (sill), as it is close to the ground.
Calculate your diagonals. If they aren’t identical to the 1/16th of an inch, your wall isn’t square.
Don’t skimp on door headers. Use doubled 2x6s or 2x8s even for small spans to prevent sagging over time.
That’s why wall framing is a critical phase of your build. It’s the skeleton. If the bones are crooked, the skin (siding) will look like garbage, and the organs (doors and windows) will never function. We are engineering a vertical diaphragm that has to withstand wind shears and the inevitable settling of the earth.
Breakdown Of A Wall That Doesn’t Rack or Sag
The wall is made up of horizontal plates and vertical studs. When you look at a wall frame, you’re looking at a complex load-path system designed to transfer the weight of the roof down to the foundation. If you miss one component, the path breaks.
Here is the breakdown of every component you’ll handle when framing your wall.
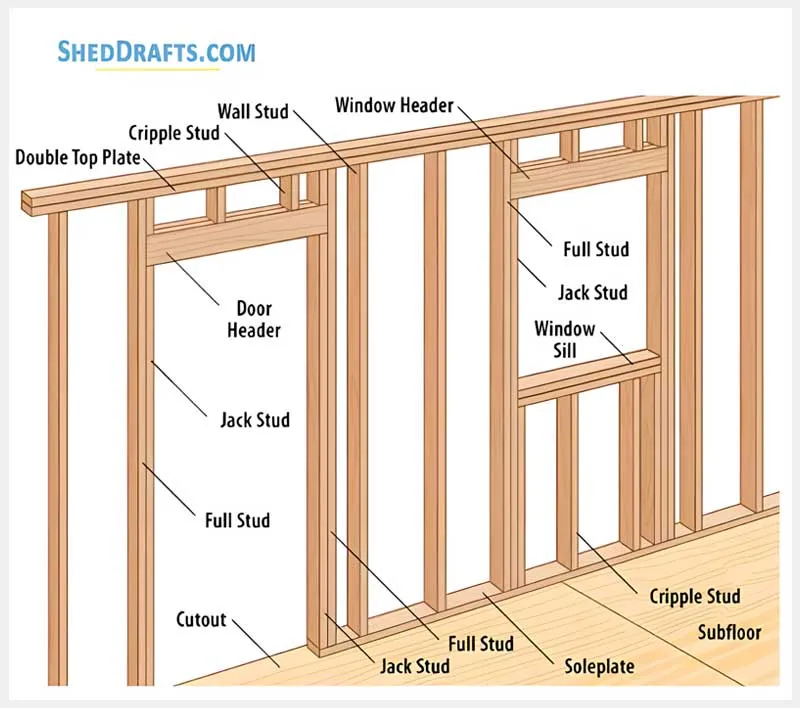
Sole Plate
The sole plate (also called the bottom plate) is the horizontal member that anchors your wall to the floor. This is the most vulnerable part of your shed. It sits in the “splash zone” where moisture collects. Always use pressure-treated lumber here. It is the very first piece you lay down on your chalk lines to begin your layout.
Full / Common Studs
These are your standard vertical boards. A Full or Common stud runs the entire distance from the top of the sole plate to the bottom of the first top plate. They don’t have any special jobs like supporting a window; their only task is to carry the vertical load of the roof and provide a flat plane for your walls.
Rough Openings
Before you can nail in the rest of the studs, you have to define your Rough Openings (RO). This isn’t a piece of wood, but rather the empty space where your doors and windows will live. You must box out these areas before you finish the rest of the wall framing.
King Studs
A King stud is a full-length stud that stands on the immediate left and right sides of every door and window opening. Think of these as the outer guards. They are nailed to the plates just like common studs, but their specific job is to provide lateral stability to the opening and give you a place to nail your headers and Jack studs
Door and Window Headers

The header is the heavy lifter. Because you’ve cut out common studs to make a hole for a door or window, the weight of the roof is now floating over that gap. The header is a thick beam (usually two 2x6s or 2x8s sandwiched together) that spans across the top of the opening. It catches that roof load and transfers it sideways into the studs.
Header Flush Trap
When you build a header out of 2x6s, the actual thickness is 3 inches (1.5″ + 1.5″). However, a 2×4 wall is 3.5 inches thick. If you just nail those two 2x6s together, you’ll have a 1/2-inch gap. Rookies leave this gap, which makes the siding wavy or the interior trim impossible to nail. Always sandwich a 1/2-inch piece of OSB or plywood between your header boards. This brings the header to a perfect 3.5-inch thickness, flush with your studs.
Jack / Trimmer Studs
The Jack stud (often called a Trimmer) is the inner guard. It is shorter than a King stud because it sits underneath the header. You nail the Jack stud directly to the King stud. The header then rests on the top of the Jack stud. This creates a bearing point, which is a solid path of wood-on-wood all the way to the floor.
Window Sill
The sill is the horizontal piece that forms the bottom of a window opening. It doesn’t carry much weight from above, but it has to support the weight of the window unit itself. In high-quality builds, we often double these up to provide a wider base for flashing and to prevent the wood from bowing over time.
Cripple Studs
Cripple studs are the short pieces of wood that fill the gaps. You’ll find them above a header (running to the top plate) or below a window sill (running to the sole plate). They don’t do much heavy lifting, but they are vital because they maintain that 16-inch rhythm. Without them, your siding would have a “soft spot” with nothing to nail into.
Double Top Plate
The final piece of the puzzle is the double top plate. Once your wall is built with a single top plate and all the studs are in place, you add a second 2×4 on top. This is where the strength of the box comes from. We stagger the joints so the second plate overlaps the corners of the walls, essentially tying the shed together into a single, rigid structure.
Framing Kit Of Tools And Materials To Bang It Together
Walking onto a job site without the right kit is like trying to eat soup with a fork. You’ll eventually finish, but you’ll look like an amateur and feel twice as tired. In my early days, I used to try to “make do” with a standard 16-oz finish hammer and a dull circular saw.
By noon, my forearm was on fire, and my cuts looked like they’d been chewed off by a beaver. To frame a shed that is actually square, you’ll need a specific set of tools.
Layout and Prep
Tape Measure: You’ll use it to mark your plate lengths and, more importantly, to lay out your 16-inch on-center stud positions. I recommend a 25-foot “FatMax” style for the blade rigidity.
Pencils: You’ll lose ten of these a day. Use carpenter pencils; they don’t roll away, and the thick lead handles rough lumber without snapping.
Chalk Line: Once your floor is built, you use the chalk line to snap “control lines.” This tells you exactly where the edge of your wall plates will sit, so your walls aren’t zigzagging across the floor.
Framing Square (L-Square): While the speed square is for quick cuts, the big framing square is for checking the “big picture.” Use it to ensure your sole plate and end studs are perfectly 90 degrees before you drive the first nail.
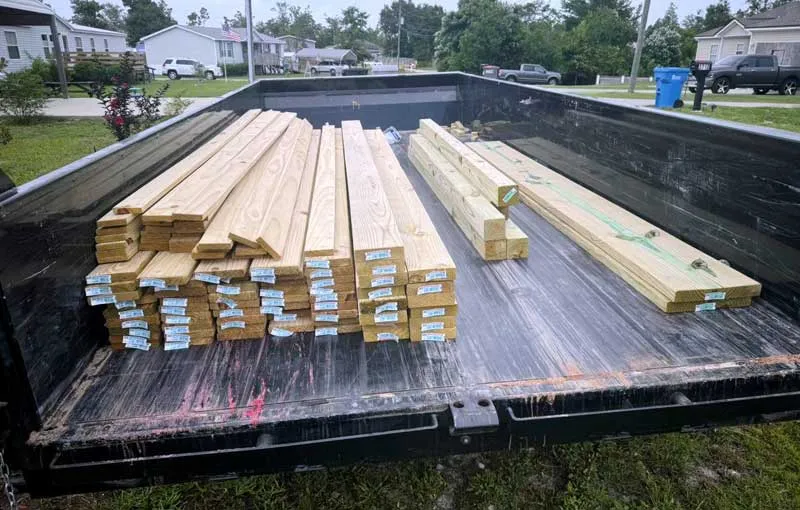
Manage The Lumber Pile
Pressure-Treated Lumber (PT): This is your base. Any wood touching concrete or a floor system must be PT to resist rot. If you skip this, the bottom of your wall will turn to mush in five years.
Framing Lumber (2×4 or 2×6): Your vertical studs and top plates. We use 2x4s for standard sheds, but if you’re building a massive workshop or plan to insulate heavily, 2x6s give you more meat.
One-by-Fours (1×4): These are often overlooked but vital for temporary bracing. When you tip a wall up, you’ll nail a 1×4 diagonally to hold it plumb while you work on the next wall.
Saw Horses: Don’t cut on the ground. A good pair of horses keeps your lumber at waist height, saving your back and ensuring your circular saw doesn’t kick back on a pinch.
Cut and Assembly
Circular Saw: The workhorse. You’ll use this for cross-cutting studs and ganging your plates. Keep a sharp 24-tooth carbide blade on it for fast, clean framing cuts.
Speed Square: During cutting, this acts as a fence for your circular saw to ensure every stud end is perfectly square. A 1/8-degree error here multiplies over a 10-foot wall.
Chisels: You’ll need these for notching. If a header is slightly too proud or a stud has a knot right where a king stud needs to sit flush, a sharp 1-inch wood chisel is the only way to clean it up.
Framing Nailer: If you value your time, rent or buy a pneumatic nailer. It allows you to hold a stud perfectly on your mark with one hand and fire a nail with the other.
Framing Nails: Use 3-inch or 3.25-inch bright or galvanized nails. For the sole plate (if going into PT wood), ensure they are ACQ-rated so the chemicals in the wood don’t eat the metal.
D Nail Dilemma
In the world of pneumatic framing, you’ll see clipped head or D-head nails. While they let you fit more nails in a strip, some strict local codes in high-wind zones (looking at you, Florida and the Coast) don’t like them because they can pull through the wood under extreme stress.
I always opt for Full Round Head 3-inch .131-gauge nails. They have more holding meat, and I’ve never had a wall pull apart during a hoist when using them.
Set and Square

4-foot Level: Once the wall is vertical, the 4-foot level is king. You’ll check the plumb (vertical) on the ends and the level (horizontal) on the top plates.
Drill (Cordless or Plug-in): I use a drill to pre-drill holes at the ends of my plates if I’m worried about splitting, or for driving heavy-duty structural screws into the floor.
Screwgun: While framing is mostly nails, a screwgun is essential for those temporary braces. It’s much easier to back a screw out of a brace than to pull a 16d nail once the wall is set.
Hammer: Even with a nail gun, you need a 22-oz framing hammer. You’ll use it to persuade stubborn studs into alignment (what we call “blunt force calibration”).
Grade All Studs
When your lumber delivery arrives, don’t just pile it up. Spend thirty minutes grading your studs. Put the straightest ones aside for your corners and door kings. Save the slightly bowed ones for common studs where the siding will pull them straight. Use the ugliest boards for your short cripples and blocking. This prevents you from reaching the end of the build and realizing your only remaining board for a critical corner looks like a banana.
Steps To Stick-Frame A Rock-Solid Skeleton
Assembly begins by cutting and marking plates in pairs to ensure alignment. You then cut your studs to length. Then lay out the rough openings, and nail the components while the wall is flat on the floor. After squaring the frame using diagonal measurements, you hoist and brace the wall in its final vertical position.
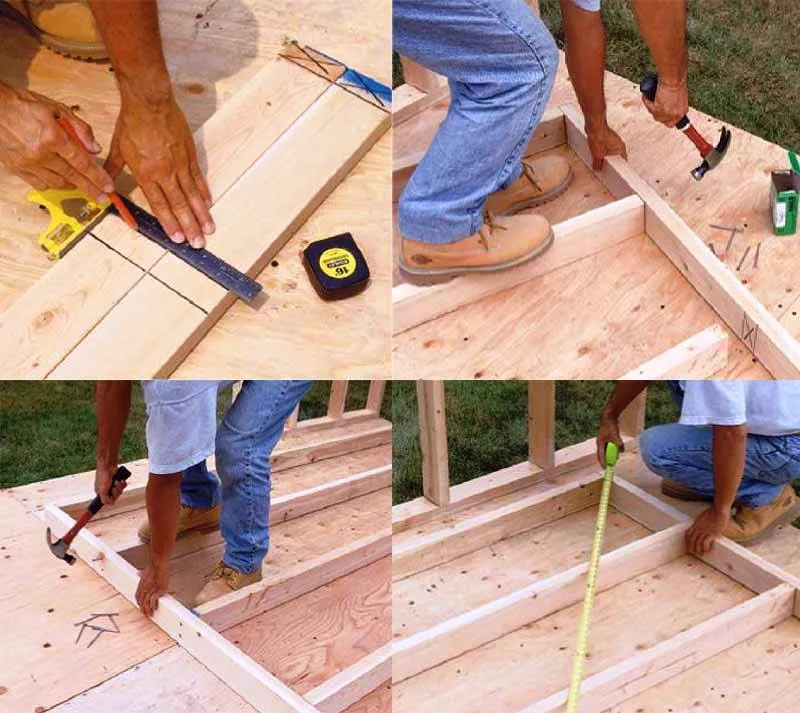
1. Craft Top And Bottom Plates
First, select your straightest lumber. Measure the length of your wall and cut two boards to that exact dimension. One will be your sole plate (pressure-treated), and one will be your first top plate (kiln-dried).
It is vital that these two boards are identical in length. If one is even 1/8-inch longer, your studs will lean, and you’ll fight the frame when it comes time to install the second top plate later. Lay them on their narrow edges, side-by-side, on the shed floor. Ensure the ends are perfectly flush with each other.
2. Mark Stud Positions On Plates
With the plates side-by-side, use your tape measure to mark the stud locations. By marking both plates at once, you guarantee that the top and bottom of every stud will be perfectly aligned. Start from one end and mark at 15 1/4 inches, then every 16 inches after that.
Draw a line across both plates using your speed square and put an “X” on the side of the line where the stud will sit. This ensures your 4×8 siding sheets will always land in the center of a stud. Don’t forget to mark your “K” for King studs and “J” for Jacks where your doors and windows will go.
3. Craft the Studs
Now, cut to length. When building an 8-foot wall, remember that your total height includes the thickness of the sole plate (1.5″) and two top plates (3″). To get a true 8-foot (96-inch) wall, you must subtract the 4.5 inches of plate thickness, meaning your studs should be cut to 91.5 inches.
Use your first cut as a master template to ensure every subsequent stud is the exact same length. If there is a miter saw station set up, use a stop-block. Hand-cutting each one to a separate measurement is a recipe for a wavy top plate.
The Crown Check
As you cut and lay out your studs, sight the wood. Look down the edge of the board like you’re aiming a rifle. If the board curves to the left or right, that’s the crown. When you lay the studs down to nail them, make sure every single crown is facing the sky.
When you position the studs crown up, it makes it easy to flush up the stud to the plates for nailing. This also makes it possible to sheath the wall smoothly when you attach siding later on.
4. Stud Assembly for Solid Walls
For a “blank” wall, the process is rhythmic. Lay your studs between the plates at your “X” marks. Drive two 16d nails (3.5-inch) through the outside of the sole plate into the end of the stud. Move to the top and do the same through the top plate. I like to “toenail” the studs if the wood is particularly prone to twisting, but generally, end-nailing is the standard.
Ensure the stud stays flush with the edges of the plates; if the stud is recessed or proud, your siding will have a “bump” or a “dip” that shows up prominently under sunlight.
5. Fasten Jacks, Kings, and Cripples
For doors and windows, you aren’t just following the 16-inch rhythm. First, nail your king studs into place. Then, nail your jack studs to the inside of the kings. Slide your pre-assembled header on top of the jacks and nail through the king studs into the ends of the header. Finally, add your cripple studs above the header to bridge the gap to the top plate.
This box within a box provides the structural integrity needed to keep the opening from sagging under the weight of the roof rafters.
If you don’t nail your jack studs tight to your king studs before you stand the wall up, you’ll get a bounce when you try to nail them later. This makes it impossible to get a tight fit for your door casing. I once had to use a 5-ton bottle jack to squeeze a header up because I didn’t fasten my jacks correctly on the ground. Always glue and nail your kings and jacks while they are horizontal!
When framing a window, the sill plate should be doubled up if the window is wider than 4 feet. This prevents the bottom of the window frame from sagging, which can cause the window to bind or leak over time.
6. Square Each Wall
Once the wall is nailed together but still lying flat on the floor, it’s likely a parallelogram rather than a rectangle. Pull a tape measure from the top-left corner to the bottom-right corner. Note the number. Then measure from the top-right to the bottom-left. If the numbers are different, the wall is out of square. Have a partner push the long corner until the measurements match. This step is very critical. Once the measurements are identical, the wall is perfectly square.
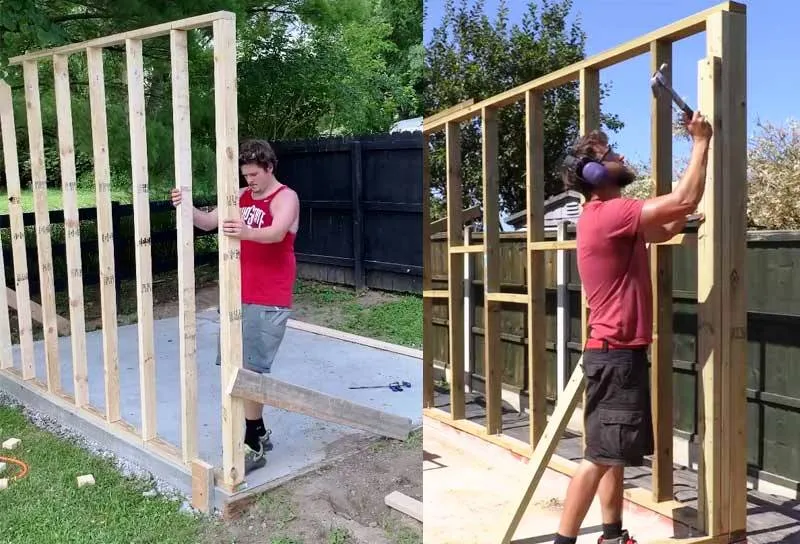
7. Hoist And Secure Each Wall
Clear the floor of any debris or tools. Tripping while holding a 300-pound wall is a bad day. With a partner (or two), lift the wall from the top plate and walk it up until it’s vertical.
Align the sole plate with your chalk lines on the floor. Once it’s in position, drive a few 3-inch screws or 16d nails through the sole plate into the floor joists or slab. Do not nail it permanently yet! Just tack it so it doesn’t slide. You need a little bit of play for the next step.
8. Square Again, Then Plumb and Level
A wall can be square (a perfect rectangle) but still be leaning (not plumb). Take your 4-foot level and place it against the face of the end studs. Move the top of the wall left or right until the bubble is centered. This makes it plumb. Then, check the top plate to ensure it’s level. If the floor was built correctly, the wall should be level, but if not, you may need to shim the bottom plate. Once the wall is plumb in both directions, it’s time to lock it down.
9. Install Diagonal Bracing
Until you install siding (which acts as a permanent brace), your wall is floppy. While the wall is plumb, nail a long 1×4 or a scrap 2×4 diagonally from the top plate down to the sole plate or the floor. This sway brace prevents the wall from racking while you’re building the rest of the shed.
I usually keep these braces on the inside of the shed so they don’t interfere with the siding installation. Don’t remove them until the roof trusses are on and the exterior sheathing is fully nailed.
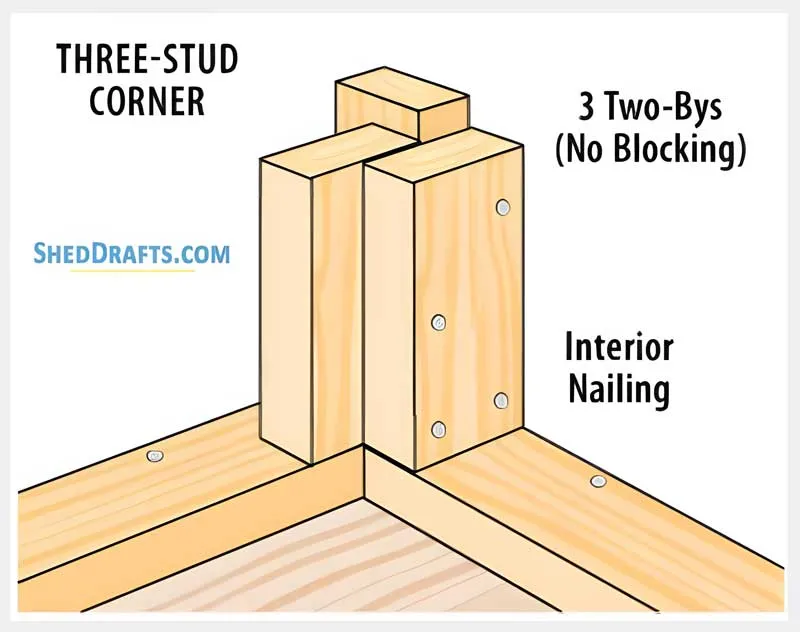
10. Align And Reinforce Corner Studs
Now you have to join the walls. This is where your corner choice matters.
Two-Stud Corner: The simplest, but it offers no interior nailing meat for the adjacent wall. Use this only if you don’t plan to finish the interior.
Stud-and-Block Corner: You nail blocking (scrap 2x4s) horizontally between the last two studs of Wall A to provide a nailing surface for Wall B. It’s a great way to use up scrap wood.
Three-Stud “California” Corner: My personal favorite. You create a L-shaped channel with three studs. It’s the strongest and gives you a perfect 90-degree pocket for interior wall panels.
11. Fasten The Second Top Plate
The second top plate is now installed after the walls are standing and the corners are fastened. Why? Because the second plate is the tie that binds the entire building into a single structural unit. If you nail the second plate on while the wall is on the floor, you lose the ability to lap the corners.
I’ve seen too many DIYers build four independent walls, each with two top plates already attached. When they stand them up, they just have four separate corners touching each other. That’s a weak point.
You cut this plate so that it bridges the corner. For example, the cap plate from Wall A should extend 3.5 inches past its own corner and nail directly into the top plate of Wall B.
This lapping technique acts like a giant staple, locking the two walls together so they can never pull apart. I once saw a shed that had been rolled over by a small tornado; the walls were still locked together at the corners because the builder had properly lapped his double top plates. The floor was gone, but the box of the walls held firm.
When you’re lapping your cap plates, make sure you don’t have a joint in the second plate sitting directly over a joint in the first plate. We call this stacking the seams, and it creates a hinge point that can cause the wall to bow. Always offset your top plate joints by at least two stud bays (32 inches).
Ultimate Framing Pre-Flight Checklist
Before you move on to siding the walls, walk through this checklist. If you can’t check every box, put the hammer down. This list is designed to catch the mistakes that decades of experience have taught me the hard way.
Phase 1: Material Verification
- Is my bottom plate pressure-treated (ACQ)?
- Do I have hot-dipped galvanized nails for the treated lumber?
- Have I “crowned” all my studs and marked the hump with a pencil?
- Are my headers sized correctly for the spans (e.g., 2×6 for 3ft, 2×8 for 6ft+)?
Phase 2: Layout & Geometry
- Are the top and bottom plates laid out together to ensure identical spacing?
- Did I mark X for studs and J for jacks?
- Have I accounted for the 1/2 inch plywood sandwich in my headers?
- Are my window/door rough openings 2 inches wider than the unit?
- Are the diagonal measurements within 1/16th of an inch?
Phase 3: Plumb & Brace
- Is the wall braced in two directions (X and Y axis)?
- Have I checked for “wall wave” (looking down the length of the top plate to ensure it’s straight)?
- Are the double top plates overlapping at the corners to lock the walls together?
Building a shed is easy; building a shed that stays straight for thirty years is an art form. Most people rush the framing because it’s the ugly part that gets covered up. But the frame is the only part of the building that can’t be easily fixed once the project is done.
Getting your shed wall framing right is about the discipline of the tape measure and the patience to check your level twice. Shortcuts always come back to haunt you. If you’ve followed this guide, your walls are now square and ready to install siding. Now let’s build the roof.


Read Next
 Shed Floor Framing: Step-By-Step Guide To A Sag-Proof Base
 How To Build A Durable Shed: Complete Step By Step Guide
 Shed Foundation Guide: 11 Durable Builds And Traps To Avoid
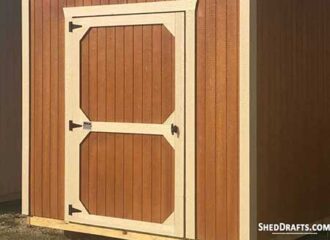 Build Single Shed Doors With Step-By-Step Plans
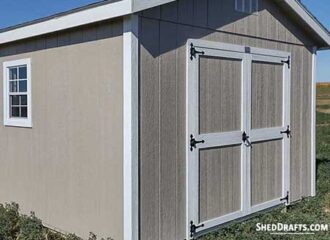 Build Double Shed Doors From Plans Step-By-Step
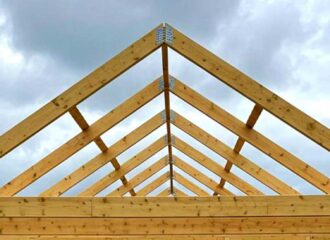 Shed Roof Guide: How To Frame & Sheathe For Weatherproofing
Framing-to-Finish Roadmap: DIY Guides For Every Step of The Build


