
Index Of 17 Lean To Shed Plans With DIY Pictures
Once I spent three weeks fixing a DIY disaster where a homeowner tried to build a full gable shed against his fence. The drainage was so poor it turned his yard into a swamp and rotted his sill plates within six months. He lost four grand because he didn’t understand how water moves.
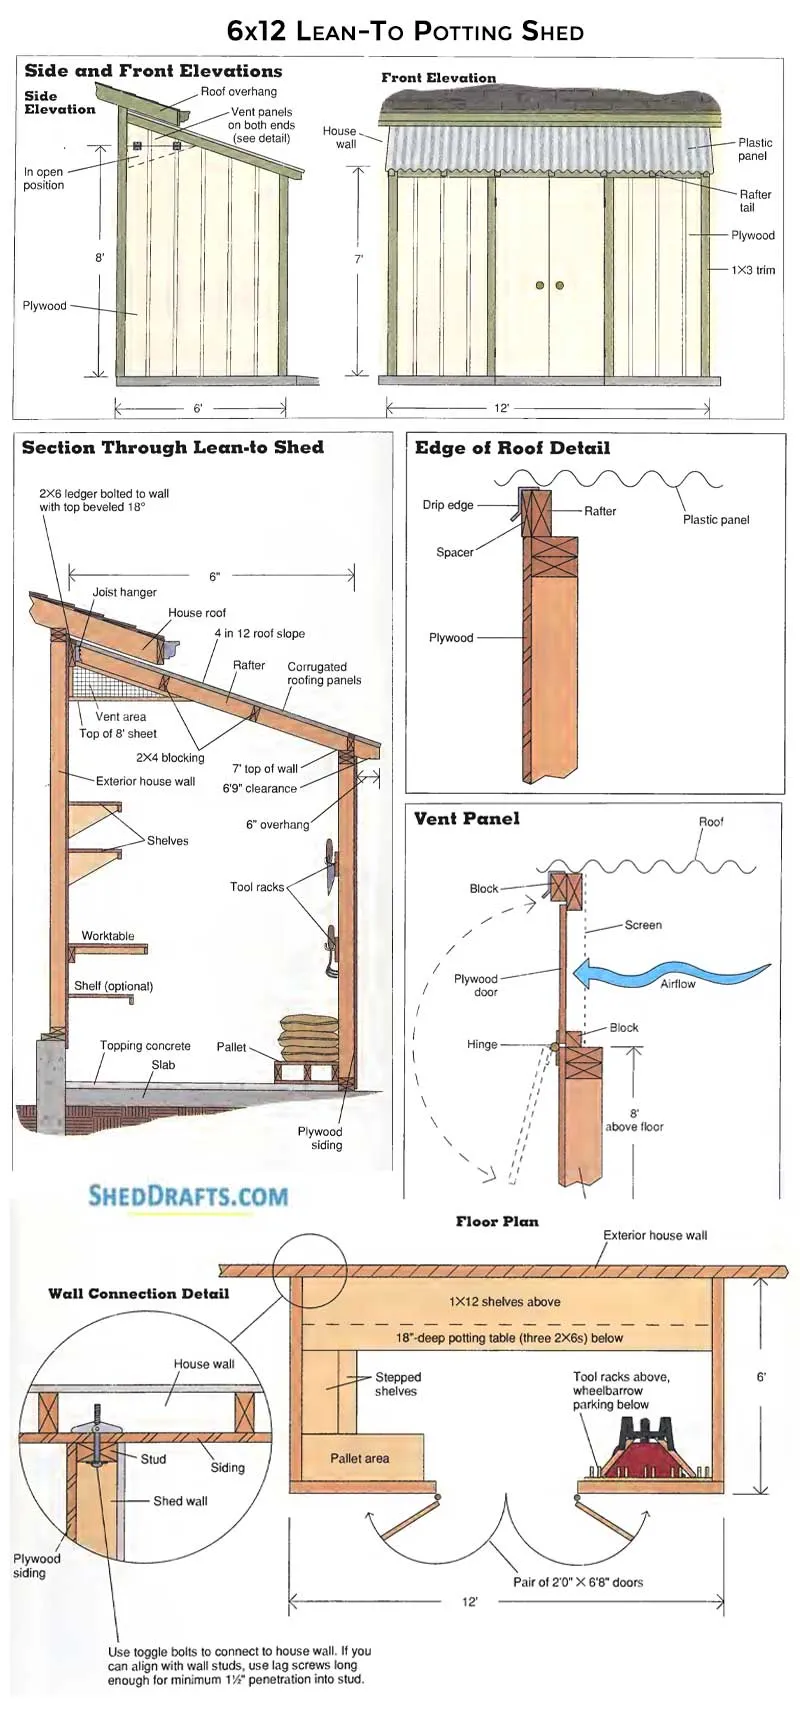
That is why the lean-to is the most efficient and beginner-approachable structure you can put on your property. Whether you are tucking it against the garage or letting it stand solo, here is the no-fluff blueprint to doing it right the first time.
- A single-slope roof shed that sheds water in one direction has fewer complex rafter cuts and lower material costs.
- Don’t skip the gravel pad; it is the guardian of your shed that prevents rot.
- Aim for a 3/12 minimum pitch to ensure your shingles actually work.
- Build it freestanding if you can to avoid house-flashing headaches, but lean it if space is tight.
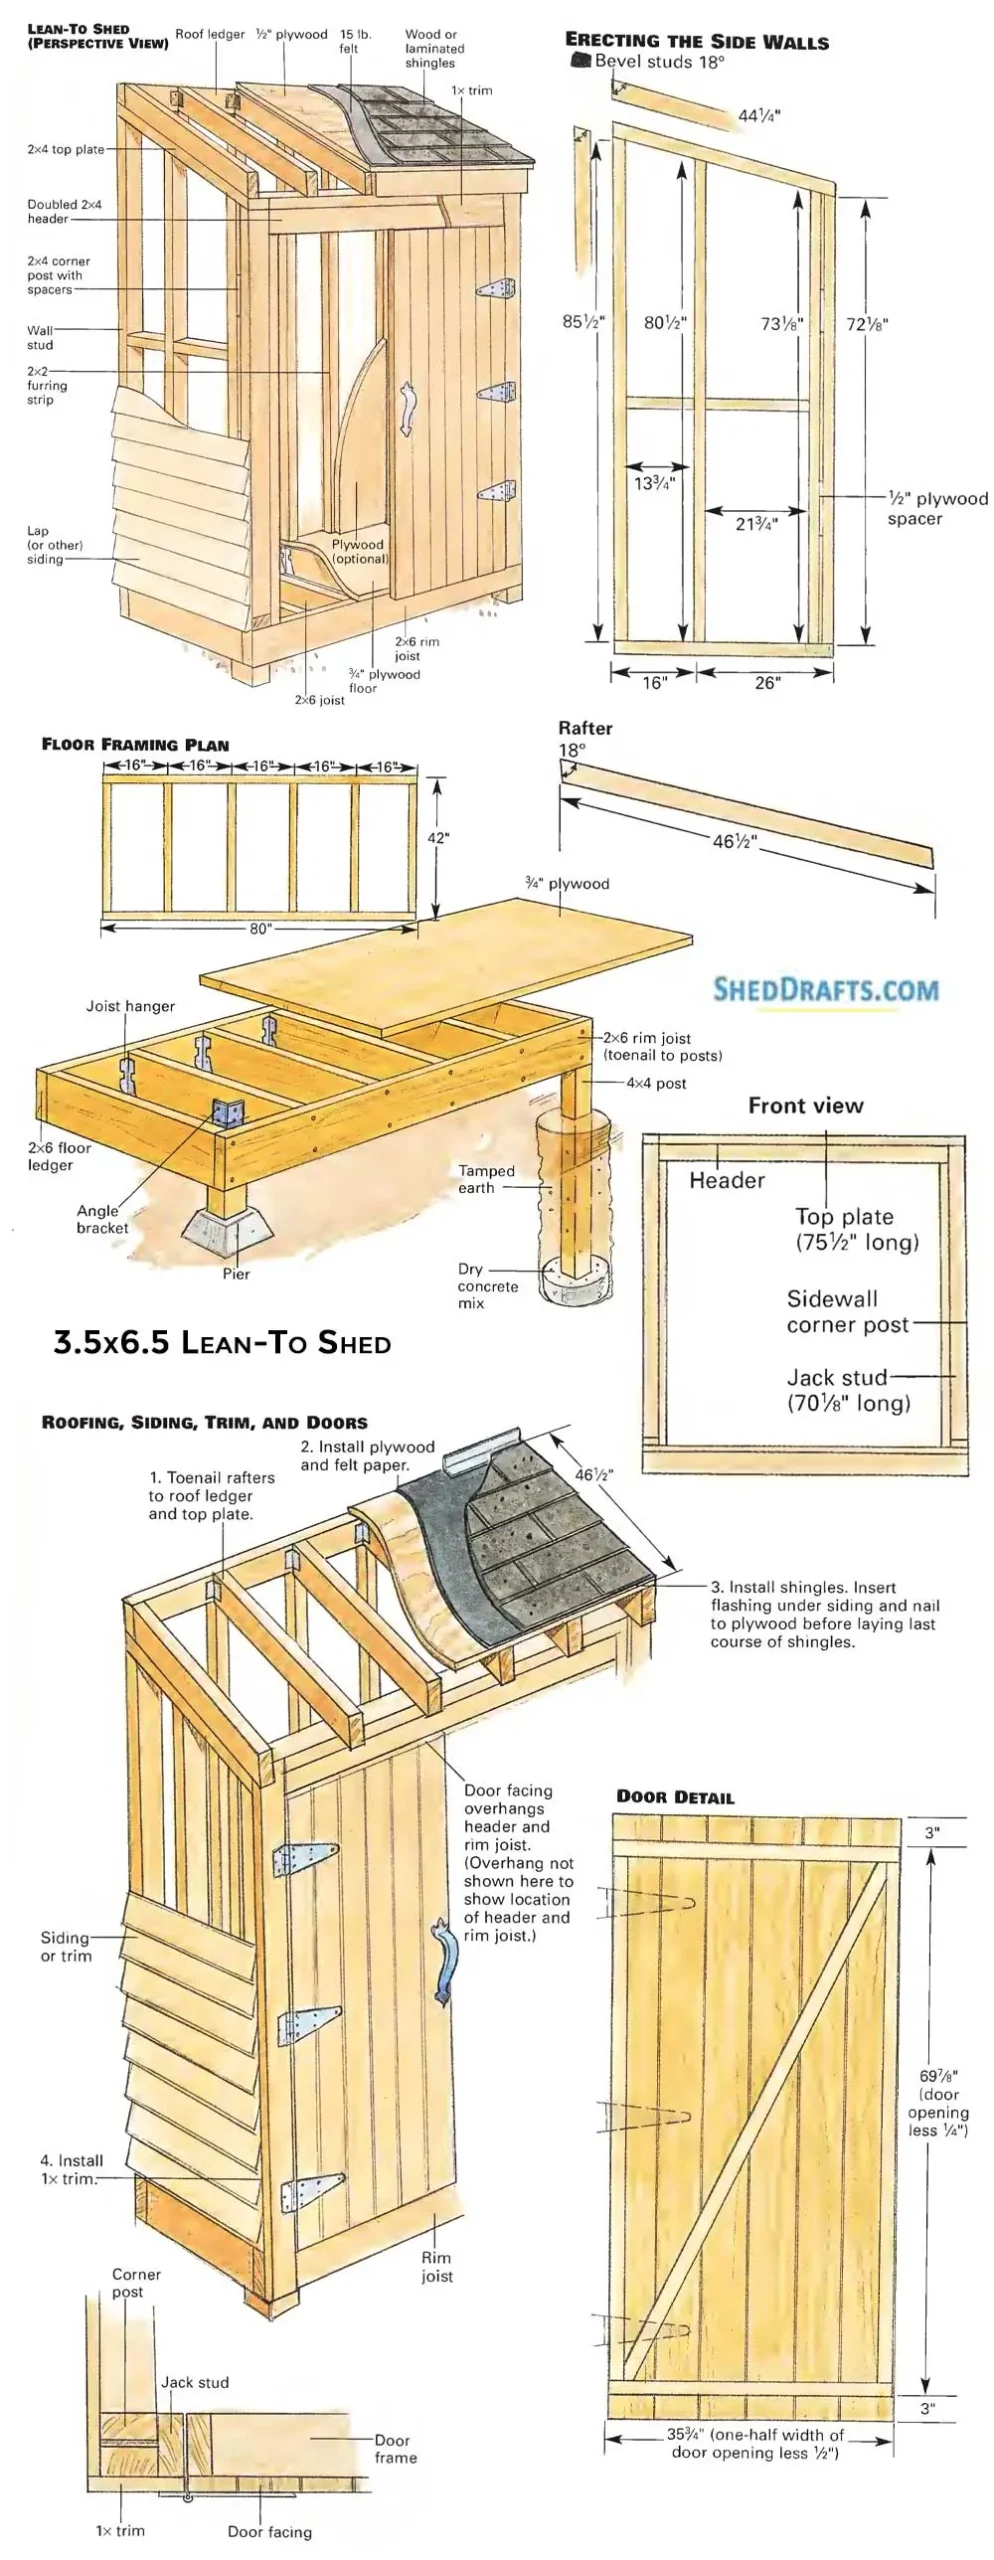
Gallery Of Slant Roofed Blueprints
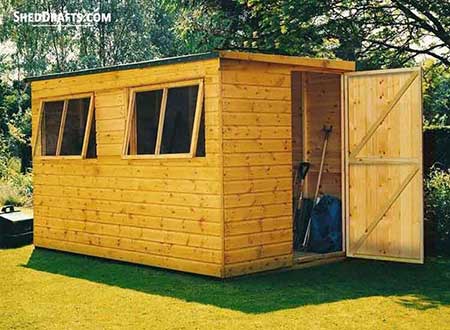
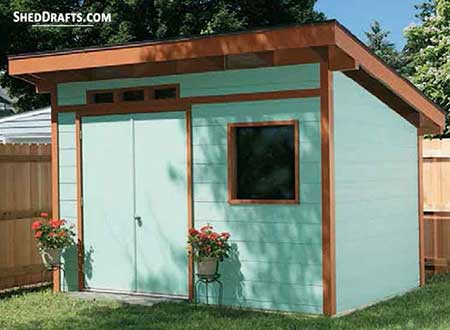
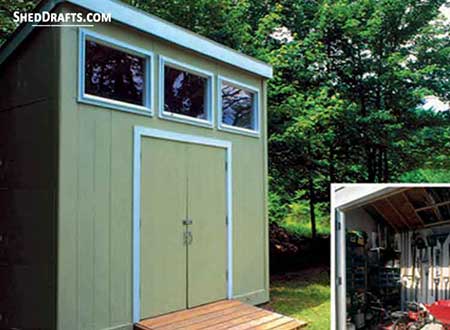
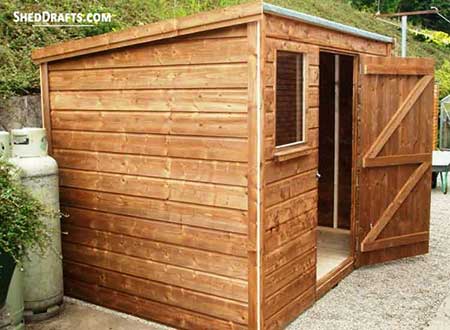
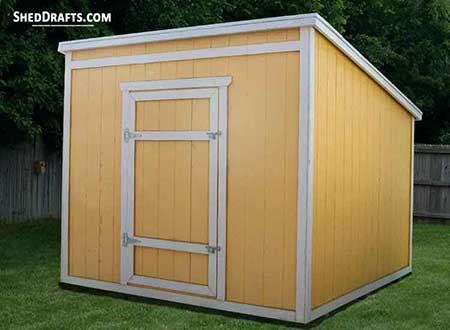
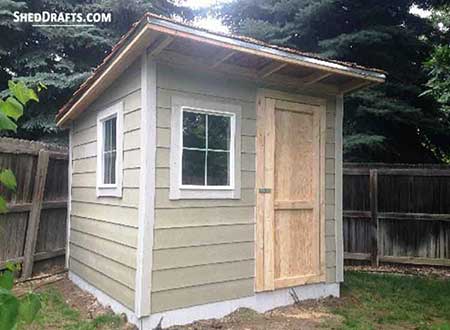
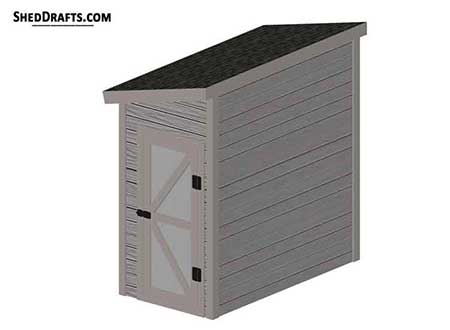
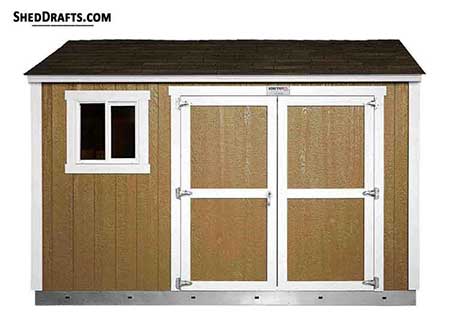
These DIY lean to shed blueprints will help you construct a wooden storage building quickly and within your budget.
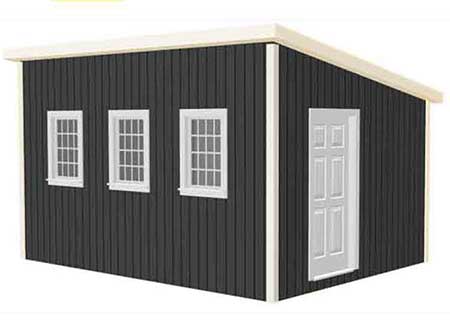
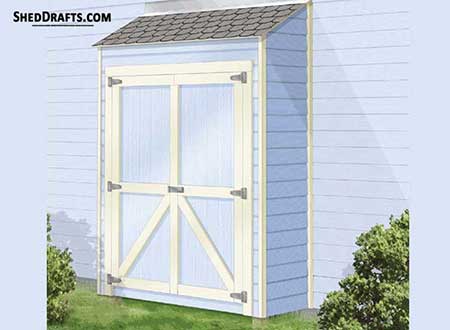
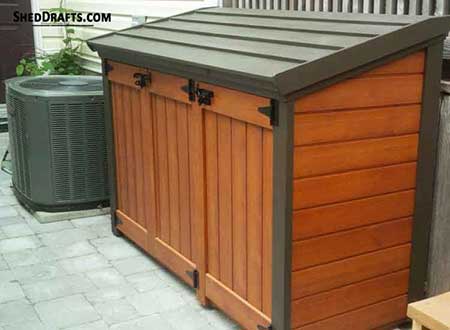
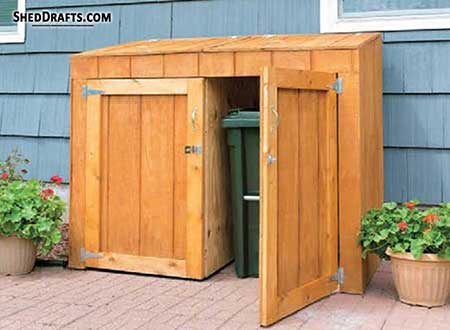
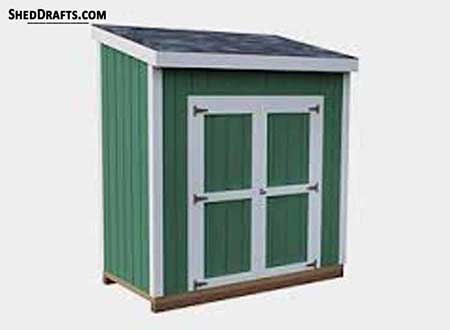
Large Size Designs
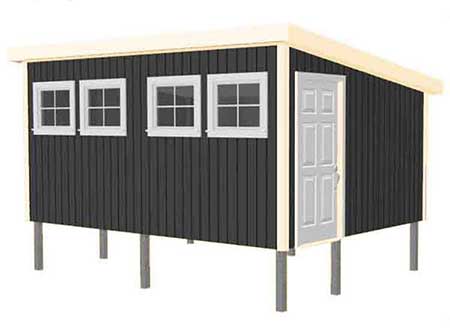
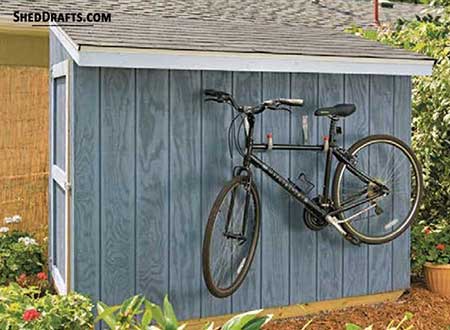
Medium Size Layouts
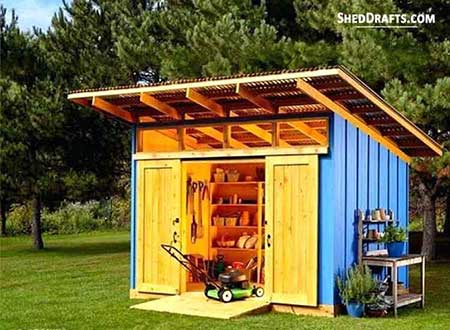
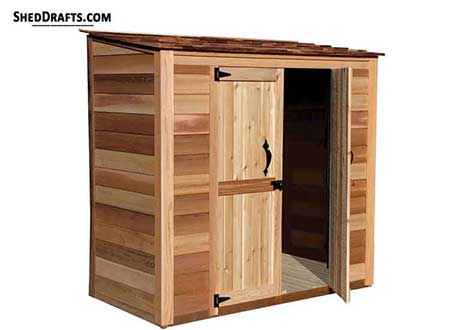
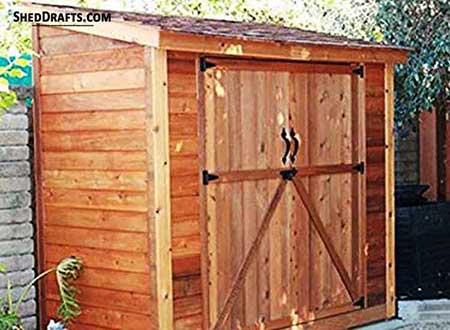
Small Size Structures

Why Lean-To Design Beats Other Backyard Structures
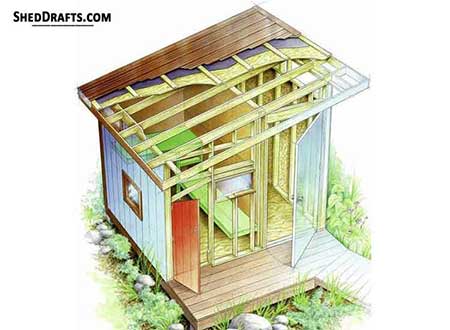
Unlike gable roofs that require complex birdsmouth cuts on two different angles and a ridge board that usually needs a second pair of hands to steady, the lean-to relies on a single-slope rafter system. Gravity does most of the heavy lifting here.
This design allows you to tuck the structure into dead space along a fence line or against a garage wall where a traditional peak would look bulky or violate height restrictions. Space efficiency is the primary driver for most of my clients. They want the storage capacity of a 10×12 shed without losing half their lawn.
When you build a gable shed, you are buying double the trim and dealing with more complex siding transitions at the peaks. The lean-to uses one tall wall and one short wall, meaning your layout is intuitive and fast. I have found that for a solo builder, manageability is the deciding factor. Lifting a 10-foot tall wall by yourself is doable with some bracing, but lifting a massive ridge beam for a barn-style shed often requires a crane or four buddies who you will have to feed with beer and pizza.
The Trade-off Between Single Slope and Traditional Peaks
You will have to sacrifice some loft storage space when you pick a lean-to styled roof. Gable or gambrel designs are great if you plan on storing long ladders or lumber overhead, but for 90% of suburban storage needs, that extra height just becomes a haven for spiders and dust.
A lean-to keeps everything at arm’s reach. Comparing a lean-to to a gable shed, the lean-to wins at shed-roof drainage and directing all water to one side, away from your house or walkway.
Avoid building a lean-to with the low side facing a fence that is less than two feet away. During heavy rain or snow, that runoff will dump directly into the narrow gap, creating a swamp that rots your lower plates and attracts termites. Always ensure you have a splash zone or a gutter system on the low side to manage the concentrated water volume.
Maximum Backyard Utility
Tucking the high side against a south-facing wall allows you to install transom windows above the doors, flooding the interior with natural light without sacrificing wall space for shelves. This monopitch design is also the most resilient against high winds if the low side is oriented toward the prevailing wind direction.
Planning A Future-Proof Footprint To Avoid Later Regrets
An 8×10 footprint is the sweet spot for many DIYers because it utilizes standard 4×8 sheet goods (plywood and siding) with minimal waste. Once you jump to a 9-foot depth, every sheet of flooring and siding requires a rip and a patch, which doubles your labor and creates more seams for water to penetrate. I always tell my apprentices to build to the material. If you are using T1-11 siding, stay in 4-foot increments whenever possible.
Do not build your shed in a low spot of the yard just because it is out of the way. If water pools there after a storm, your floor joists will be toast in five years, regardless of how much ground contact treatment they have. Elevate the site or pick a different spot.
Deciphering the Local Permit Laws
Standard building codes in many US jurisdictions allow for utility structures under 120 or 200 square feet without a full building permit, but do not take that as gospel. Zoning is the real killer. I once saw a homeowner forced to tear down a beautiful 8×12 lean-to because it was 12 inches too close to the property line. Setback requirements are non-negotiable. Checking with your local building department takes twenty minutes and can save you $2,000 in fines.
Mastering Roof Pitch to Prevent Leaks and Structural Sag
I personally aim for a 3:12 or 4:12 pitch on most builds. It provides enough grunt to shed snow quickly but is not so steep that it is dangerous to stand on during construction. Calculating this is simple: if your shed is 8 feet deep (run) and you want a 3:12 pitch, your front wall needs to be 24 inches taller than your back wall. This slope also dictates your headroom. Make sure your low wall is still tall enough to stand in (at least 72–75 inches) so you are not constantly hunching over like a gargoyle when you are looking for your hedge trimmers.
Physics of Runoff and Overhang Management
Managing the water once it leaves the roof is equally important. A lean-to naturally concentrates all its runoff to one side. I usually insist on a 12-inch overhang on the low side and at least a 6-inch rake (the sides) overhang. Without these, rain will run down your siding and dwell on the trim. This eventually rots the sills. If you are building against a house, the high side needs to be flashed perfectly so water from the house roof does not dive-bomb behind the shed’s ledger board.
Most people install drip edges incorrectly on lean-tos. On the high side (if it is freestanding), the drip edge goes under the underlayment. On the rakes (sides), it goes over the underlayment. This specific layering creates a shingle-like effect that prevents water from ever touching the wooden fascia boards.
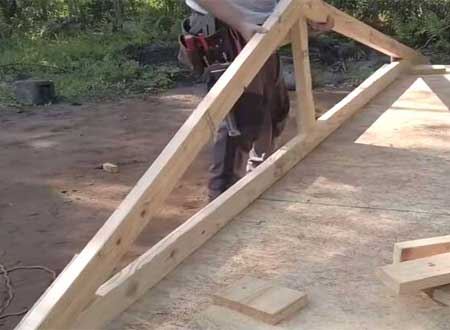
Calculating Rafter Lengths and Birdsmouth Cuts
Cutting rafters is where most DIYers get the shakes. The birdsmouth cut, the little notch that allows the rafter to sit flat on the top plate, is crucial. I have seen people skip this and just toenail the rafters on top, but that offers zero resistance against wind uplift. Using a framing square to mark these cuts ensures that the weight of the roof is transferred vertically through the wall studs, not just resting on the shear strength of a few nails.
Instead of calculating the rafter length using complex trigonometry, use a master rafter. Cut one rafter to what you think is the right length, hold it up to the walls, mark your birdsmouths, and then test fit it. Once it is perfect, use it as a template for all the others. This eliminates cumulative errors from measuring each board individually.
Hard Truths About the Cost of a Quality Shed Build
A real wood-framed 8×10 lean-to will cost over $1,800, depending on choice of siding and roofing. Lumber is the biggest variable. Pressure-treated (PT) lumber is essential for everything within 18 inches of the ground, and that stuff carries a 20-30% premium over standard whitewood.
People often try to save money by using exterior grade plywood instead of actual siding. Don’t do it. T1-11 or LP SmartSide has a resin-saturated overlay designed to take a beating. Standard plywood will delaminate and peel within three years.
Another hidden cost is fasteners. You will spend over $150 just on high-quality 3-inch deck screws, galvanized framing nails, and roofing coils. Cheap nails will rust and leave weeping streaks down a beautiful paint job.
Where to Invest and Where to Pinch Pennies
Spending more on a heavy-duty floor is the best investment a builder can make. I use 3/4-inch pressure-treated tongue-and-groove plywood for the floor. It’s rock solid and won’t bounce when a riding mower is driven inside. Where can savings be found? Windows.
Brand new construction windows are expensive. I often source mis-ordered windows from local supply yards or use reclaimed ones from architectural salvage shops. Just make sure they are flashed correctly.
A proper gravel pad requires about 2 to 3 tons of crushed stone. If a builder does not have a truck, delivery fees can cost as much as the gravel itself. Then there’s the mental overhead.
When your time is valued at $50/hour, that free DIY shed suddenly has a $2,000 labor cost attached to it. Be realistic about the trade-off.
How Much of Life Will This Project Actually Consume?
For a solo DIYer with a moderate tool kit, a 10×12 lean-to is a four-to-five-day commitment. I categorize the timeline into four distinct phases:
- Site Prep & Foundation (Day 1)
- Floor & Wall Framing (Day 2)
- Rafters & Sheathing (Day 3)
- Roofing & Finishing (Day 4/5)
If working alone, just moving the 4×8 sheets of plywood from a driveway to the backyard will take two hours and cause exhaustion before a nail is even driven.
Weather is the ultimate project manager. I’ve had four-day builds turn into three-week sagas because of a rainy spring. You cannot sheath a shed or install shingles when the wood is soaking wet; moisture will be trapped in the grain, leading to mold and blistering shingles.
My advice? Take a week off work if possible. The momentum of working consecutive days prevents measurement drift, which is that annoying phenomenon where a person forgets exactly how they were measuring something the week before and ends up with a 1/4-inch gap in the siding.
Beginner’s Learning Curve vs. The Pro’s Pace
Experienced crews can slap together a lean-to in 8 hours because they don’t have to read the level twice or check a YouTube video to remember how to cut a common rafter. For a DIYer, the head scratching time is significant.
An hour will be spent at the hardware store because the wrong size joist hangers were purchased. Another hour will be spent figuring out why walls aren’t square (hint: check the diagonals). Accept that frustration is part of the process.
Efficiency Strategies for the Solo Builder
Batch-cutting studs is the greatest time-saver available. If a wall is 8 feet tall, cut every single stud at once. Don’t measure-cut-install-repeat. Use a story pole, which is a scrap piece of wood marked with all heights (sill, header, top plate), to ensure every wall matches perfectly without dragging out the tape measure every five minutes.
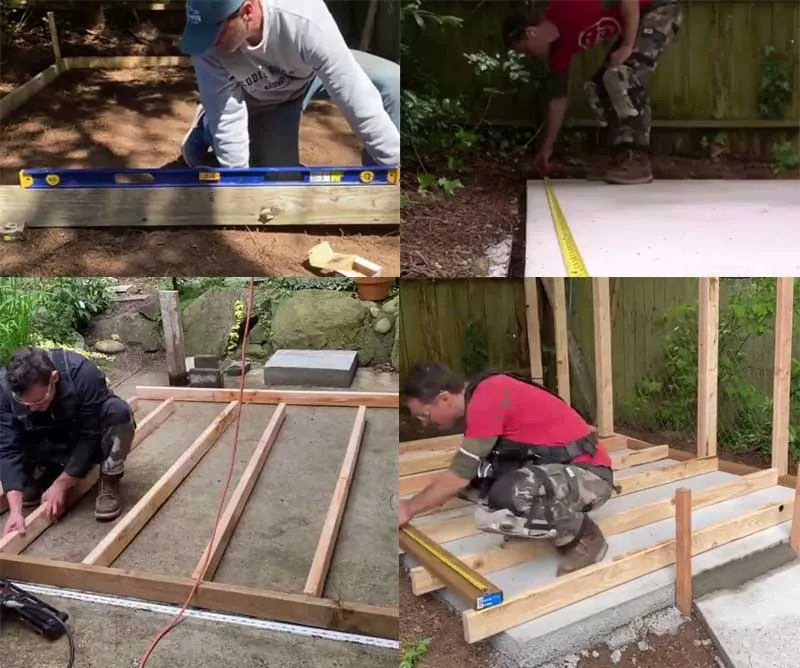
You will know they are on track if the floor is perfectly level and square (diagonals match within 1/8 inch) by the end of Day 1. If the foundation is off, every single step after it will be a nightmare of shimming and cursing.
I once tried to power through a roof install as a thunderstorm rolled in. I was rushed, didn’t overlap the felt paper correctly, and finished just as the downpour hit. The next morning, I found the interior framing soaked because water had wicked up the backwards-lapped paper. I had to rip off $200 worth of material and start over. Respect the process, or the process will punish you.
Tools and Materials: What It Takes to Get the Job Done
For a standard lean-to, ground contact rated 4x4s for the skids and 2x6s for the floor joists are required. Why 2×6? Because 2x4s will bounce when walked on, eventually loosening the nails in the floor sheathing. For the walls, standard 2x4s are fine, but ensure they are hand-selected. Modern lumber quality is variable. If a board looks like a hockey stick or a corkscrew, leave it on the rack.
A tool kit doesn’t need to be professional-grade, but cheap tools will make the job harder.
A decent miter saw is non-negotiable for clean, square end-cuts on studs.
A circular saw for ripping plywood, a 4-foot level (don’t trust those tiny torpedo levels for a 12-foot wall).
A speed square is also necessary. The speed square is the most important tool in a pouch; it’s a guide for 90-degree cuts and the secret weapon for marking roof pitch angles.
Buy a chalk line. It’s a $10 tool that allows you to snap perfectly straight lines across 8 or 12 feet of plywood. A straight line cannot be cut on a floor deck without one.
Also, get a pneumatic framing nailer if the budget allows. It turns a 4-hour framing job into a 45-minute breeze and saves an elbow from carpenter’s tendonitis.
Nails vs. Screws
I’m a screw guy for floors and a nail guy for framing. Screws have incredible pull-down power, which is what is desired for floor sheathing to prevent squeaks. However, screws are brittle under shear stress (side-to-side pressure). Framing nails are made of softer steel that bends rather than snaps, making them superior for holding walls together during a windstorm. Use hot-dipped galvanized nails for anything exterior, as standard bright nails will rust and fail within years.
Right Sheathing for the Climate
Asphalt shingles are classic and cheap but heavy. Metal panels (like R-Panel) are incredibly fast to install on a lean-to and last 40+ years, but they’re noisy in the rain. For potting sheds, polycarbonate clear panels can turn a roof into a giant skylight. Just remember: more light means more heat.
Step-by-Step Breakdown of The Build
The most critical transition in the build is between the floor and the walls. If your floor isn’t Dead Level and Perfectly Square, every error will be magnified as you go up. A 1/8-inch error at the base can become a 1-inch gap at the roofline.
Site preparation and leveling for a rock-solid base
Clear the vegetation first. Scrape away the grass and at least 4 inches of topsoil in an area two feet larger than the shed footprint. Lay down a heavy-duty landscape fabric (the woven stuff, not the cheap felt) to prevent weeds from growing up through the floor. Filling this area with 4 inches of compacted 3/4-inch crushed stone provides a stable, self-draining base. Use a long straight-edge board and a level to get the gravel perfectly flat.
Foundation options and why skids are a smart choice
Using pressure-treated 4×4 skids helps distribute the weight and allows the shed to be towed if a move is ever necessary. I space my skids every 4 feet on center for an 8-foot deep shed. This means no part of your floor frame is ever more than two feet away from a rock-solid support beam.
If you’re planning on storing something truly heavy, like a vintage motorcycle or a bank of lead-acid batteries for a solar setup then drop that spacing to 3 feet. If you ever move houses or realize the shed is blocking your view of the sunset, you can literally jack it up, slide some pipes under it, and tow it to a new spot. You can’t do that with a concrete slab
If the build is on a slope, solid concrete blocks (not the hollow ones!) can be used to level the skids. Make sure to use shims made of pressure-treated scraps or composite shims; never use cedar or pine shims on a foundation, as they will compress and rot.
Floor framing and decking that doesn’t bounce
Construct the floor frame with 2×6 joists spaced 16 inches on center. If a builder goes 24 inches on center to save money, the floor will feel like a trampoline. Double-check the diagonals; if the distance from the back-left corner to the front-right corner is exactly the same as the other diagonal, the floor is square. Nail down the 3/4-inch plywood with 8d galvanized nails or 2-1/2 inch deck screws every 6 inches along the edges.
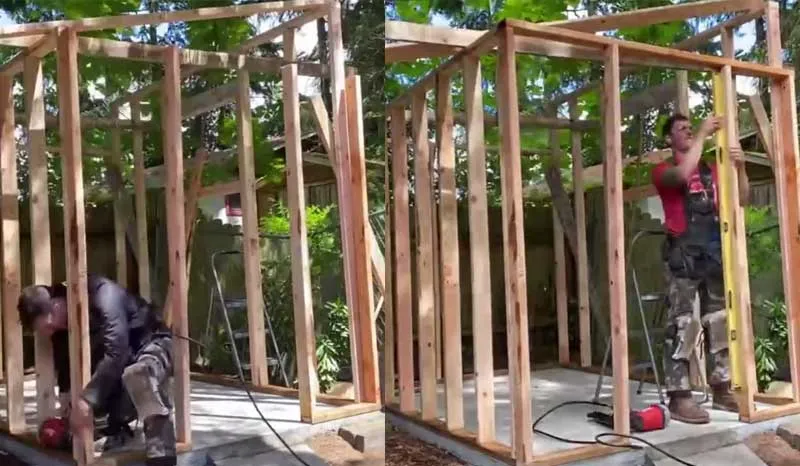
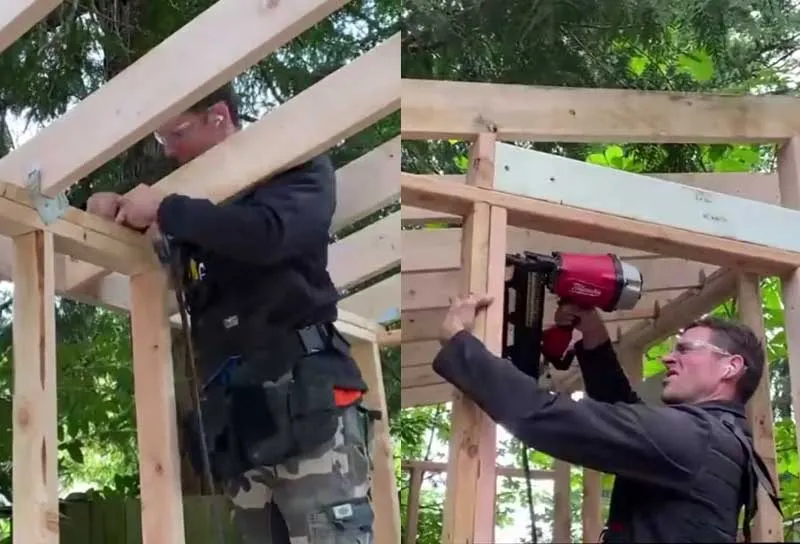
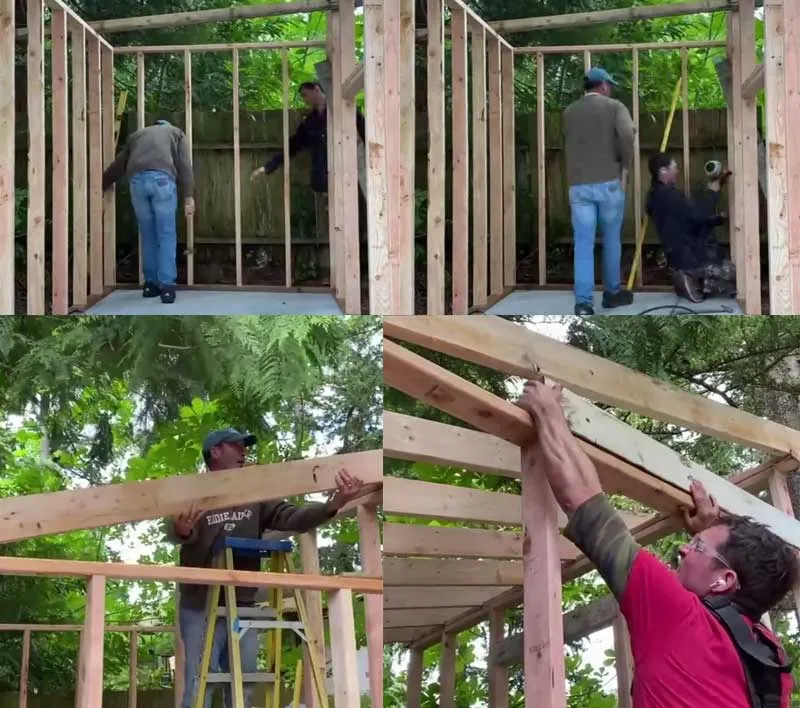
Wall framing with the tall front, short back strategy
Assembling the walls on the flat floor deck is much easier than trying to build them in the air. Start by cutting your top and bottom plates to the exact same length. Build the back wall first because it’s shorter and easier to handle, which builds your confidence before you tackle the heavier front wall.
For a standard 8×10, I usually make the back wall 75 inches and the front wall 96 inches. This creates a natural pitch. Use double top plates on both walls; this overlaps the corners and ties the whole structure together, preventing the walls from bowing out under the weight of the roof.
Attaching to an existing structure without causing leaks
A strip of siding must be removed to bolt the 2×6 ledger directly to the house rim joist or studs using 1/2-inch lag bolts. Use a galvanized Z-flashing that tucks under the house siding and over the ledger. Without this, water will run down the house wall, get trapped behind the ledger, and rot the home framing. I prefer a freestanding build for beginners to avoid this liability.
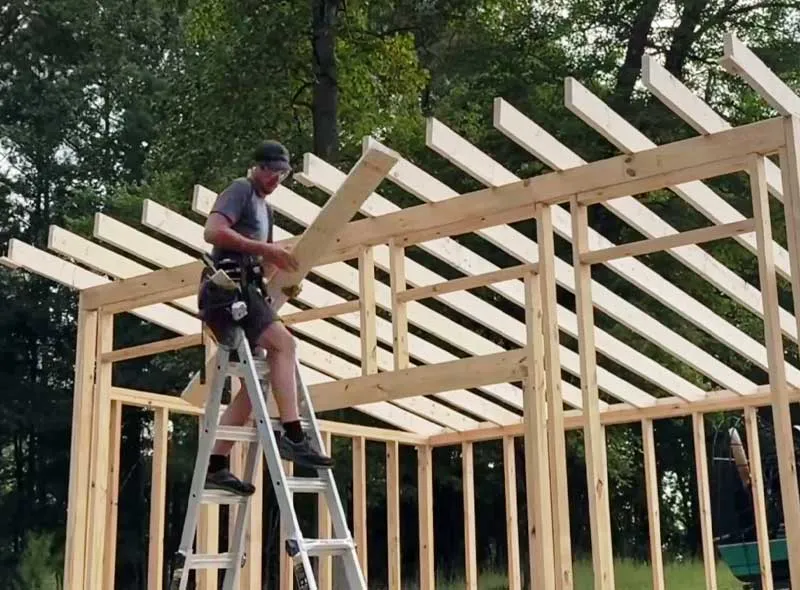
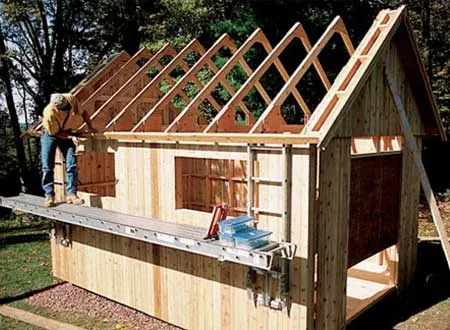
Roof framing and the overhang secret
Birdsmouth notches are cut where the rafter sits on the front and back walls. I like to leave a 12-inch tail on both sides. This creates an overhang that keeps rain away from the doors and siding. Securing these rafters is where you really need to show some muscle. I never rely on just driving nails at an angle through the rafter into the plate as the sole connection. Over time, wood shrinks and swells, and those nails can back out or split the grain.
Use H2.5A hurricane ties. These galvanized steel clips wrap around the rafter and the top plate, creating a mechanical bond that resists uplift. In a high wind event, a lean-to roof acts exactly like an airplane wing; it wants to lift off. These ties keep the roof pinned down so your shed doesn’t end up in your neighbor’s pool.
Installing roofing material
Starting at the bottom edge, install the drip edge first, then the underlayment (synthetic felt is better than the old paper stuff). For shingles, the first row is a starter strip that hangs over the drip edge by about 1/2 inch. Nail shingles in the nail zone, usually a 1-inch strip in the middle. If nails are too high, the shingles will slide off in the heat; too low, and the nails will be visible and leak.
Siding and exterior finish for curb appeal
Hanging siding like T1-11 requires a 1/8-inch gap between sheets to allow for seasonal expansion. If they are butted tight, they will buckle in the humidity. I use a couple of 8d nails as temporary spacers between sheets to get that gap consistent across the entire run. Once the gap is set, you fill it with a high-quality, permanently flexible caulk before painting, which gives the wood room to grow without destroying the joint.
Use Z-bar flashing at any horizontal seams. Install a skirt board at the bottom. This is a horizontal trim piece that can be easily replaced in 10 years when the splash-back from the ground eventually causes some rot.
Driving nails into siding requires a delicate touch that most framing hammers don’t naturally possess. If you over-drive the nail and break the surface of the siding’s resin coating, you’ve just created a tiny bucket that will hold water and rot the core of the plywood.
I set my compressor to a lower PSI so the nail head sits just flush with the surface. If a nail goes too deep, I immediately dab a bit of caulk over it. It sounds tedious, but protecting the face of the siding is the difference between a 10-year shed and a 30-year shed.
Doors and ventilation
Use a Z-brace on the back of the door; the diagonal part of the Z must point down toward the bottom hinge side. This transfers the weight of the door into the hinges. Finally, install soffit vents on the low side and gable vents near the top of the side walls. Sheds get incredibly hot and humid; without airflow, tools will rust and plywood will delaminate.
When framing a door opening, double the king studs and use a solid 2×6 header. Most DIYers just use a single 2×4 above the door, and within a year, the weight of the roof causes the door frame to pinch, making the door impossible to open.
Navigate the Landmines To Avoid Common Mistakes
I have walked onto many job sites to rescue a shed that was bowing in the middle because the owner thought a 2×4 floor joist was sufficient for a 10-foot span. It isn’t. Physics doesn’t care about a budget. The most frequent failure I see is the settling lean, where a shed starts out level but sinks four inches into the dirt by the following spring.
This usually happens because the builder didn’t remove the duff, that soft, organic layer of grass and roots, before dumping the gravel. The build is essentially on a sponge that will compress and rot, eventually transferring that moisture directly into the rim joists.
Nailing siding directly to the studs without a house wrap or a moisture barrier is a gamble that rarely pays off in humid climates. While a shed isn’t a house, it still experiences solar drive, where the sun hits wet siding and pushes that moisture inward. Without a layer of synthetic wrap, that water gets trapped against the 2x4s. I have seen brand-new framing look like it is 50 years old after just three seasons because of this hidden rot.
Another silent killer is the unvented roof. If a path for hot air to escape at the highest point of the lean-to is not provided, condensation will form on the underside of the roof sheathing every single night, dripping onto tools like a slow leak that never ends.
Sinking Feeling of Poor Foundation Work
Ground contact (UC4A) rated lumber is designed to resist rot, but it isn’t designed to sit in a puddle.
I always advocate for a perched foundation, where the shed is elevated at least 6 inches off the surrounding grade. This allows wind to whistle underneath the joists, keeping the wood dry and discouraging rodents from setting up a condo complex under the floorboards.
The Sticky Door Syndrome And Others
Most beginners build the door, then realize the opening is a parallelogram rather than a rectangle. Correcting this requires cross-bracing the back wall before the siding goes on.
Using a 2×4 let-in brace or a metal T-strap across the studs ensures the shed stays rigid. Without this, the weight of the roof will naturally want to rack the structure toward the low side, pinching the door shut and forcing the edges of the wood to be shaved every six months just to get inside.
Never use interior grade screws or fasteners anywhere on a shed, even if they are under the roof. The humidity in a backyard structure is significantly higher than in a conditioned house. Those black phosphate drywall screws will snap or rust through in less than two years, leading to catastrophic failure of shelving or trim.
Don’t skip the drip edge on the rake edges (the sloping sides) of the roof. People think water only runs down the slope, but wind-driven rain will blow sideways and soak the top edge of the fascia boards. Within two years, that beautiful trim will be soft as a banana peel. Always wrap the drip edge around all four sides.


Read Next
No related posts.
Framing-to-Finish Roadmap: DIY Guides For Every Step of The Build


