Shed Roof Load Calculator With DIY Framing Guide
Shed Roof Load Calculator
1 Roof Details & Dimensions
2 Snow Load
3 Equipment Load
Roof Load Capacity Analysis
WITHIN CAPACITYLoad Breakdown (PSF)
Pounds / Sq FtTotal Structural Weight on Walls
Safety Disclaimer: Roof framing involves complex structural mechanics and strict regional safety regulations. Construction must comply with the current International Residential Code (IRC) and your municipal building authority’s requirements. The load estimates and framing techniques presented in this guide are for general informational and educational purposes only. Before beginning any framing project or making material selections, always verify your design, pitch, rafter spans, and load paths with a licensed structural engineer or qualified building contractor.
Early in my career framing custom outbuildings, I built a 12×16 lean-to storage shed for a client in upstate New York.
I used 2×4 SPF rafters spaced 24 inches on center to keep material costs down. Four months later, an early spring blizzard dumped 28 inches of heavy, water-logged snow onto the roof.
The ridge line buckled and the entire roof assembly pancaked onto a set of expensive riding lawnmowers.
Modern building codes, environmental forces, and lumber physics do not care about your budget or your best estimates. Every piece of timber in a roof assembly constantly fights gravity and wind.
Key Takeaways
- Total Roof Load Formula – Combine the Live Load (snow, wind, maintenance crew) and Dead Load (framing materials, sheathing, shingles) to determine the Total Design Load in pounds per square foot (PSF).
- Rafter Span Limits – Span length is measured along the horizontal projection of the building, not along the sloped length of the rafter board itself.
- Pitch Impact – Roof pitches under 3:12 retain significantly more snow weight, requiring higher live load assumptions than steep-pitched structures.
- Lumber Selection Matters – SPF (Spruce-Pine-Fir) No. 2 offers different structural span capabilities compared to Southern Yellow Pine or Douglas Fir-Larch.
- Continuous load paths must transfer forces safely from rafter peaks, down through top plates and studs, into the floor assembly, and ultimately onto solid footings or concrete piers.
- Using hurricane ties and mechanical anchors prevent structural uplift during high-wind events or local storms.
Roof Load Calculation: Dead vs Live vs Environmental Load
If you aren’t calculating your total roof design load down to the exact pound, you’re playing Russian roulette with gravity. The total weight your roof carries is a straightforward sum:
Total Load = Dead Load + Live Load + Environmental Loads
Dead load is every piece of permanent hardware, lumber, and cladding hanging on your frame.
Rafters, ceiling joists, 5/8-inch plywood sheathing, architectural shingles, underlayment, solar panels, and interior drywall or insulation all contribute to this static downward force.
A standard light-frame shed will usually sit around a baseline dead load of 10 to 15 pounds per square foot (PSF). But here’s where DIYers shoot themselves in the foot: they start with a light roof, then decide to throw on heavy slate tiles or double-layered dimensional asphalt shingles later. Your dead load instantly jumps past 20 PSF, and your framing is operating well past its comfort zone.
Live loads are the transient forces your roof deals with over its lifetime. Think construction workers walking across the sheathing, stacked bundles of shingles waiting for installation, maintenance gear, or heavy storage hoists hanging inside the rafters.
Then come environmental loads, which are the ultimate wild card. Snow accumulation, drifting snow patterns, ice dams, and wind uplift forces will ruin your day if you don’t account for them properly.
The American Society of Civil Engineers (ASCE 7 structural standards) publishes strict guidelines based on regional weather patterns, and ignoring them is pure stubbornness.
Building Code Compliance For Long-Term Durability
Your local municipal building codes set mandatory minimum ground snow loads and ultimate design wind speeds for your exact zip code.
In mountain regions, code might demand a massive 90 PSF snow load capacity, while coastal zones in Florida demand hurricane-resistant wind uplift bracing capable of withstanding 140 mph gusts.
Build an outbuilding without checking local code amendments, and you’re not just risking a collapse; you’re guaranteeing failed inspections and legal headaches when you try to sell the property.
Dead loads act on your framing continuously, 24 hours a day, 365 days a year. Douglas Fir-Larch lumber weighs roughly 34 pounds per cubic foot, while #2 Southern Yellow Pine sits near 40 pounds per cubic foot.
Tacking on 3/4-inch CDX plywood sheathing adds about 2.2 PSF. Slapping down 30-pound felt paper alongside high-grade 3-tab asphalt shingles adds another 2.5 to 3.0 PSF.
Metal roofing is one of the smartest choices you can make. It’s incredibly light at just 1.0 to 1.5 PSF, compared to concrete tiles that can easily crush a roof at over 10 PSF.
Wind Uplift and Localized Snow Drifts
Unheated storage sheds retain snow far longer than heated houses because there’s zero heat escaping through the roof deck to melt the bottom layer.
Cold roof surfaces cause ice dams along cold eave overhangs, backing up meltwater under shingles and dumping heavy, concentrated point loads right over your lookout framing.
Wind forces act like a pair of pliers on your structure and push down on the windward slope while pulling an intense suction vacuum on the leeward side and low-pressure eave edges. That upward suction vector will literally rip an un-anchored roof deck off the top wall plates.
And please, don’t ignore localized snow drift factors on lean-tos or multi-level roofs attached to a main house. Snow sliding off a two-story home onto a lower shed roof can pile up three times higher, dumping a brutal 100 PSF impact load that will snap under-engineered 2×4 framing like toothpicks.
Textbook formulas love to assume snow sits in a neat, uniform blanket across your roof. Real-world winters don’t work like that. You get violent drifts, freeze-thaw cycles that form massive ice ledges on the eaves, and wind eddies that pile six feet of snow on one side while stripping the other completely bare.
Finding Maximum Rafter Clear Span without Structural Sag
Clear span is the horizontal distance between the inside edges of your top plates, NOT the sloped board length. The most common amateur mistake I encounter is measuring along the top sloped edge when reading span tables. Do that, and you’ll over-span your lumber by 10 to 30 percent every single time.
Deflection is just the technical term for roof sag. Codes control this using ratios like L/240 or L/360, where L is your horizontal span in inches. An L/240 deflection limit on a 12-foot (144-inch) span permits a maximum center sag of 0.6 inches under full design load (144/240=0.6).
And if you plan to finish the ceiling inside with drywall, you need to tighten up to an L/360 limit (max 0.4-inch sag), or the slightest flex will crack your drywall joints.
Lumber Species & Bending Strength: SPF vs. Douglas Fir vs. Southern Pine
Wood species, grain density, knot size, and moisture levels completely dictate how much weight a board handles. In my shop, Douglas Fir-Larch (DF-L) and Southern Yellow Pine (SYP) are the undisputed kings of structural strength, packing high Modulus of Elasticity and Extreme Fiber Stress in Bending ratings.
On the other hand, Hem-Fir (HF) and Spruce-Pine-Fir (SPF) are noticeably weaker, meaning you’ll need larger dimensions or tighter spacing to match Douglas Fir.
Grade matters just as much as species. Select Structural grade lumber has straight grain and minimal knots, making it top choice for heavy snow zones.
Standard #2 grade allows larger knots and slight grain slopes, dropping allowable span limits by 10 to 15 percent compared to #1 grade.
And let me be clear: stud-grade or utility boards have no business being used as roof rafters. Period.
Wet-treated framing boards are noticeably softer and less stiff until they dry down below 19 percent moisture content. Building a roof with soaking wet lumber leads to twisted rafters, pulled nails, and buckled sheathing as the wood shrinks under the summer sun.
I see DIYers buy cheap #2 SPF framing boards at big-box stores all the time, assuming they match published Douglas Fir span tables. They don’t.
SPF has significantly lower bending strength, and using a 2×6 SPF rafter on a 14-foot span where Douglas Fir is required is a recipe for a sagging, failed roof.
Buy a $30 digital moisture meter. Test your lumber before taking a saw to it to make sure moisture content is below 19 percent. It takes 10 seconds and saves you from popped fasteners and buckled sheathing later.
Rafter Spacing vs Sheathing Thickness Trade-off
Designing a cost-effective shed roof means balancing rafter spacing against sheathing thickness. Spacing rafters at 16 inches on center lets you use thinner 1/2-inch OSB sheathing while keeping the deck stiff.
Opening spacing up to 24 inches saves lumber costs, but you must upgrade to 5/8-inch or 3/4-inch CDX plywood so the roof deck doesn’t flex under your feet.
Thin 7/16-inch OSB laid across 24-inch rafter spacing will sag between boards over time, creating noticeable dips along shingle rows. Slipping metal H-clips between sheathing panel edges locks adjacent sheets together, bridging spans and preventing panel edge flex under live loads.
Always leave a 1/8-inch gap between sheathing sheets using H-clips. Jamming OSB panels tight against each other causes edges to swell when humidity climbs, creating unsightly ridges that show right through asphalt shingles.
Marking rafter centers on top plates using a framing square pre-marked for 16-inch centers is a great speed trick. Marking both sides of the plate at once stops layout drift and keeps rafters square across the building span.
Tie-Down Systems and Continuous Load Paths for Coastal Sheds
High winds sweeping over a roof create dynamic uplift forces that easily rip toe-nailed rafters right off wall plates.
Wind strikes the vertical wall, shoots upward, and accelerates over the roof pitch, creating a massive low-pressure vacuum on top of the roof deck. This acts exactly like an airplane wing. In strong storms, uplift forces routinely outweigh gravity, turning an un-anchored shed roof into a giant sail.
Defending against wind uplift means building an unbroken, continuous load path.
A continuous load path locks every framing layer together, transferring uplift forces from the rafter tops, down through wall plates and vertical studs, into the floor frame, and straight into ground footings or concrete piers. Skimp on fasteners at a single joint, and you break the whole chain.
Wind Pressure Turns Roofs Into Aerodynamic Sails
Eave overhangs suffer the worst uplift pressure on the entire building. Wind hitting the wall gets forced up underneath the soffit, creating positive upward pressure from below while high-speed air creates suction from above.
These combined vectors double the uplift forces along overhang edges, making eave tails the first place roofs tear apart during storms.
Box in your eaves with solid soffit blocking. Fully enclosing the soffit prevents wind from trapping high-pressure air pockets underneath rafter tails during severe weather.
Toe-nailing rafters with three 16d nails gives you under 250 pounds of uplift resistance per joint. That’s a joke in a real storm. Upgrading to heavy-duty hurricane ties cranks uplift capacity past 1,000 pounds per rafter for less than $2.00 a bracket.
Mechanical Connectors: Hurricane Clips, Straps, and Hold-Down Anchors
Relying on toe-nails to hold a roof down is asking for trouble. Quality metal connectors from manufacturers like Simpson Strong-Tie or USP give you engineered, lab-tested load ratings. Hurricane ties (like H2.5A or H9 clips) wrap over the rafter and nail into top plates, handling both wind uplift and lateral shear forces effortlessly.
Fastener selection is critical here. Never, ever use drywall screws or smooth finish nails in hurricane clips. Drywall screws are brittle and snap instantly under shear loads, while finish nails slip right out.
Use dedicated hot-dipped galvanized structural connector nails (1 1/2-inch x 0.148-inch shank) or load-rated structural timber screws designed specifically for metal connectors.
Finish your load path at the foundation. Structural wedge anchors, cast J-bolts, or heavy-duty masonry screws lock your bottom mudsill to the concrete. Spacing 1/2-inch anchor bolts every 4 feet along perimeter plates, and within 12 inches of every corner, ensures the weight of the foundation keeps the building grounded.
Overhang Safety Using Eave Deflection and Cantilever Math
Eave overhangs protect your walls from rain, but extended overhangs act as cantilevered beams. Long overhangs face downward snow weight and massive wind suction from below.
Excessive flex distorts fascia boards and cracks soffit panels along roof edges. To prevent sag, you must match the cantilever length to interior rafter span. Structural codes set strict cantilever limits to ensure the interior section counterbalances the exposed tail.
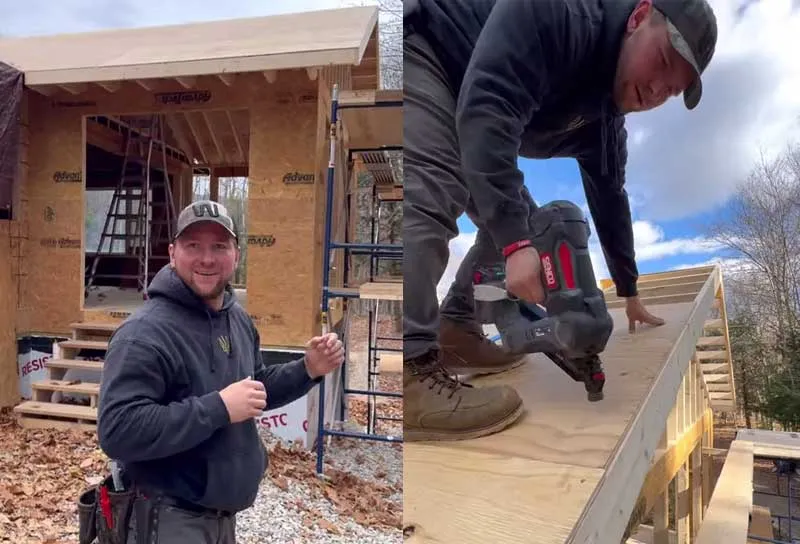
3 to 1 Cantilever Rule and Birds-Mouth Cut Depth Limits
The standard guideline for overhang safety is the 3:1 Cantilever Rule. For every 1 foot of cantilevered overhang past the exterior wall, you must have at least 3 feet of continuous rafter back-spanned inside the building footprint. An overhang extending 2 feet requires a minimum 6-foot interior rafter run back to the ridge.
When cutting birds-mouth notches to seat rafters on top wall plates, never notch deeper than one-third (1/3) the vertical depth of the rafter board.
Cutting deeper destroys cross-sectional strength, turning a sturdy 2×6 rafter into a weak 2×4 member right at the point of maximum shear stress.
Deep notches create brutal stress points right at the inside corner of the cut. Downward snow weight concentrates force at that sharp corner, splitting the wood grain horizontally down the board.
When you have to over-notch to clear an obstacle, reinforce the cut by scabbing structural plywood gussets or metal tie plates across the notch.
I made this exact mistake early in my career. I over-notched 2×6 rafters on a garden shed to meet a strict 10-foot HOA height cap, cutting almost half the board depth away at the plates. The following winter, an ice storm loaded the eaves, and six rafter tails snapped clean off at the notch line, dropping the fascia and soffit straight onto the driveway.
Engineering Gable End Lookouts and Ladder Overhangs
Short gable overhangs under 8 inches can hang off the fascia nailed into sheathing. Overhangs extending 12 to 24 inches require structural ladder assemblies framed with horizontal lookouts that cantilever over the end wall rafter.
Framing proper lookouts requires dropping the top edge of the gable end rafter down by 3.5 inches. The 2×4 lookouts pass over this dropped rafter, extending outward to support the fly rafter and reaching back inside to fasten against the first interior rafter.
Always install lookouts on-edge, never flat, so they resist bending under snow and wind. Lookouts must follow a 2:1 back-span leverage ratio. An 18-inch gable overhang requires lookouts reaching back 36 inches into the roof framing.
Fasten lookouts securely to the fly rafter, dropped end rafter, and interior rafter to prevent the overhang from drooping over time.
Analysis of a Lean-To Shed Snow Load Collapse
When a roof fails, it almost never snaps in the middle of a clear board span. Failures happen at weak connection points or deep cuts where concentrated stress exceeds the ultimate shear capacity of the timber.
Field inspections show that ignoring moisture and rot accelerates structural sag fast. Chronic roof leaks drive wood rot that destroys the strength of 2×6 framing lumber, cutting bending strength by up to 80 percent in just two seasons. Proper underlayment, flashing, and attic ventilation are just as crucial to roof survival as rafter sizing math.
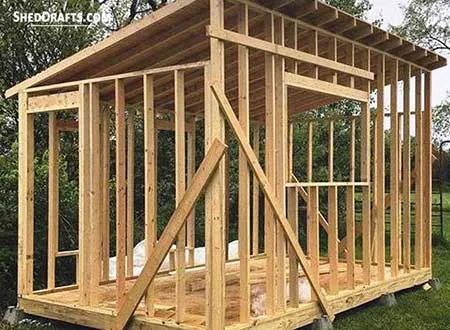
A 12×16 lean-to collapse in northern Vermont is a textbook example of fastener failure under load. The shed had a low 2:12 pitch, spanned 12 feet, and used 2×6 SPF #2 rafters spaced 24 inches on center.
The owner installed 3/4-inch CDX sheathing and two layers of asphalt shingles, creating a baseline dead load around 14 PSF.
A late-winter blizzard dumped 32 inches of wet snow onto the deck, adding a live load of 55 PSF. Total load hit 69 PSF, putting over 13,000 pounds of weight on that roof.
The 2×6 rafters were near their limit, but the actual breakdown happened at the high ledger board. The builder had mounted rafter hangers using standard 1-1/2-inch drywall screws instead of structural connector nails.
The shear load from that 13,000-pound snow pack snapped the brittle drywall screws along the ledger. The rafter tops dropped, kicking outward against the front wall, snapping wall studs at mid-height and pancaking the roof inside the building. The rafters didn’t break; the cheap screws did.
A field teardown confirmed that spending $15 on proper structural connector screws would have provided over 8,000 pounds of shear capacity along the ledger, completely preventing a $6,500 building collapse.
The hard truth is that your roof framing is only as strong as its cheapest fastener. You can buy 2×10 Douglas Fir lumber, but if you secure it with drywall screws or cheap nails, your roof has the load capacity of a cardboard box.

Read Next
 Shed Rafters vs. Trusses Comparison: Pro-Tested DIY Guide
 Shed Roof Guide: How To Frame & Sheathe For Weatherproofing
 Shed Roof Slope: Guide To Find the Right Weather-Proof Pitch
 How To Install Shingles On A Shed Roof: Step-By-Step Guide
 How to Build a Gable Shed Roof With DIY Trusses
 How To Build Shed Roof Trusses On A DIY Jig In One Weekend
Framing-to-Finish Roadmap: DIY Guides For Every Step of The Build