
Shed Building Codes and Permit Guide For DIY Builders
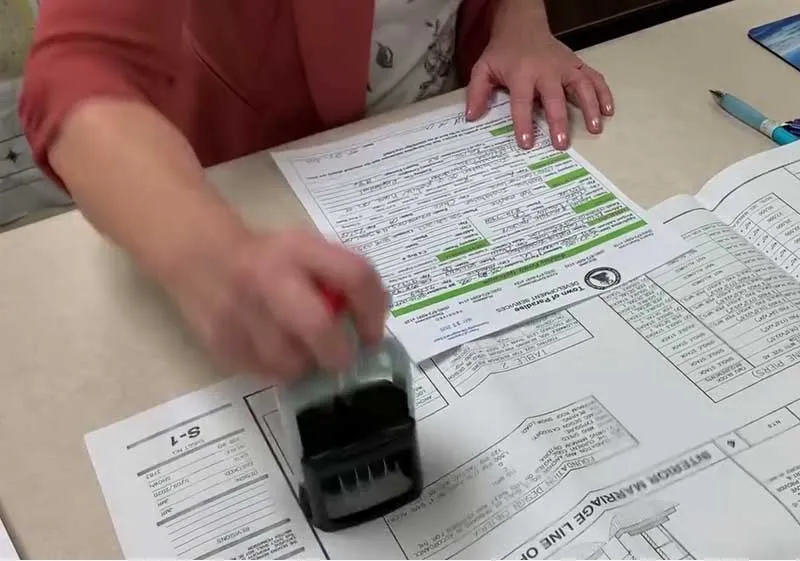
Shed permits are the law. I’ll never forget the look on my client’s face. We’d just finished a beautiful 12×16 cedar-clad studio, a real piece of art.
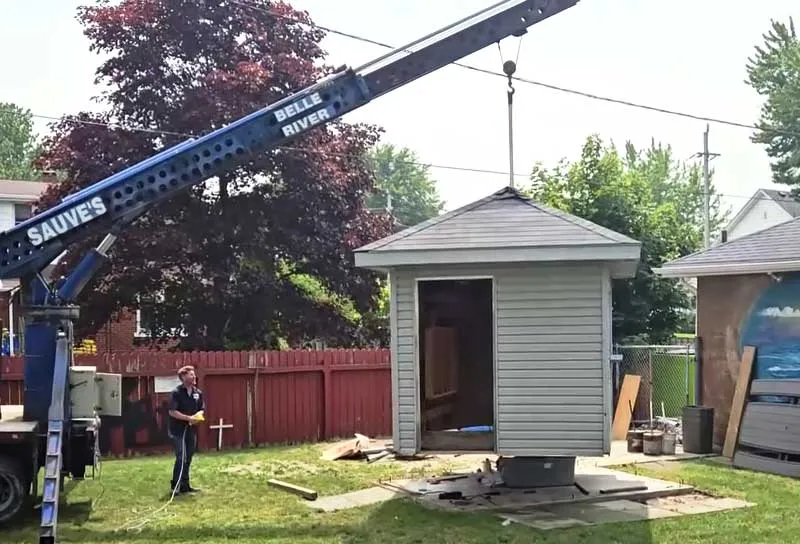
Three weeks later, a city inspector doing a drive-by for a neighbor’s pool noticed our roofline. Turns out, the unwritten rule in that specific township was a 10-foot setback from the rear property line, not the 5-foot standard we’d followed.
I had to watch a crane hoist $15,000 of my hard work over a house just to move it five feet to the left. It was a $4,000 mistake that nearly tanked my reputation.
Many DIYers think a shed is just a big box that sits on the grass. To the city, it’s an accessory structure that can affect drainage and even your neighbor’s property value. If you skip the permit process, you’re risking a stop-work order or, worse, a demolition order after you’ve already spent three weekends and three grand on lumber.
Permit Necessity: In many US jurisdictions, sheds under 120 square feet (10×12) often don’t require a building permit, but zoning rules (setbacks) still apply.
Height matters: Going over 10 or 12 feet in height usually triggers more stringent structural requirements.
Setbacks are King: You generally cannot build right against your fence. Expect to stay 3 to 10 feet back from property lines.
Foundations: Skids and gravel are often okay for small sheds, but once you hit a certain size or add power, the city might demand concrete piers or a slab.
HOAs are Not the City: Getting a city permit does not mean your HOA won’t make you tear it down if the shingles don’t match your house exactly.
Utilities change everything: As soon as you run a wire or a pipe to that shed, you’ve exited simple shed territory and entered habitable space or utility territory, which means multiple inspections.
What Happens When A Homeowner Ignores Shed Building Codes & Permits?
I watched a homeowner lose $14,000 because he thought a 12×16 garden shed didn’t need a piece of paper from the county. He built it right over a utility easement. Six months later, the gas company needed to service a line. They didn’t knock; they brought a backhoe and pushed his beautiful cedar-sided workshop into a splintered heap. Because he had no permit, he had zero legal recourse and was actually fined for obstructing the easement.
Building without a permit is a gamble with your home’s future value. When you go to sell that house, the buyer’s inspector is going to cross-reference your property’s footprint with the tax assessor’s records.
If that 200-square-foot structure doesn’t exist on their map, the bank won’t finance the loan until the structure is either permitted or demolished. I’ve seen after-the-fact permits cost triple the original price because the city demanded we rip off the siding just to prove the wall studs were spaced 16 inches on center.
Insurance companies are even more ruthless. Imagine a branch falls, or a heater sparks a fire in your unpermitted shed. If that structure wasn’t legal, your carrier can, and often will, deny the entire claim, including damage to your main house if the fire spreads. They view unpermitted work as an undisclosed risk. You’re essentially paying premiums for coverage that doesn’t exist for that building.
An Invisible Foundation
In my early days, I used to believe we didn’t need a permit for a portable shed on skids. I was wrong. The local code stated that any structure with a permanent electrical sub-panel required a full building permit, regardless of the foundation. We had already finished the interior drywall when the notice appeared on the door.
I had to pay out of pocket to rip out the insulation so the inspector could see the wiring rough-in. It was a $3,500 lesson in reading the fine print of intended use versus foundation type.
Deciphering Square Footage Thresholds And When a Permit Becomes Mandatory
The most common myth in the DIY world is the 120-square-foot rule. While many jurisdictions in the United States use 120 or 200 square feet as the cutoff for a structural permit, this is a dangerous oversimplification. I’ve worked in townships where even a 64-square-foot lean-to requires a zoning voucher. The threshold is more than just the footprint. It’s also about the height and the impact on the land.
You might find that a 10×12 shed is exempt from a building permit, but that doesn’t mean it’s exempt from zoning laws. Zoning handles where the building sits, while the building permit handles how it’s constructed. If you build an 8×10 tool shed but place it two feet from your neighbor’s fence in a zone that requires a five-foot setback, the city can still force you to move it, permit or no permit.
Overhangs Matter Too
Most homeowners measure their shed by the floor dimensions (e.g., 10×12). However, many building departments measure the structure by the drip line or the outermost edge of the roof eaves. If you have 12-inch overhangs on all sides, your 10×12 shed is actually 12×14 in the eyes of the law. That extra 48 square feet can easily push you into the permit-required category without you realizing it until the inspector shows up with a tape measure.
Building Permit vs. Zoning Permit: Understanding the Crucial Difference
Think of a zoning permit as your permission to exist and a building permit as your permission to build safely. I’ve seen countless DIYers get one and assume they have the other. A zoning permit is usually the first hurdle. The planning department looks at your site map to ensure you aren’t crowding the neighbors or blocking a sightline for traffic. They don’t care if you use 2x4s or toothpicks; they just care where the box sits on the dirt.
The building permit is a different beast entirely. This is where the International Residential Code (IRC) or your local equivalent comes into play. This permit ensures the shed won’t blow over in a 90-mph wind or collapse under a snow load. It requires detailed drawings showing your rafter spans and foundation depth.
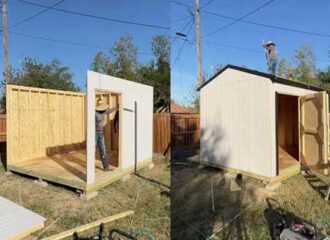
Temporary Structures Don’t Always Pass
People often think putting a shed on skids (pressure-treated 4x4s) makes it a temporary structure like a tent, exempting it from permits. Most modern codes define a permanent structure as anything that stays in place for more than 180 days. Don’t rely on the “It’s on runners” excuse to bypass the law; if it has a roof and stays in the yard, the city considers it a building.
If you’re building a simple pre-fab shed from a big-box store, you might only need a zoning permit. But the moment you add a porch or a second story, you’ve crossed the threshold into building permit territory. Zoning is about the where, and building is about the how.
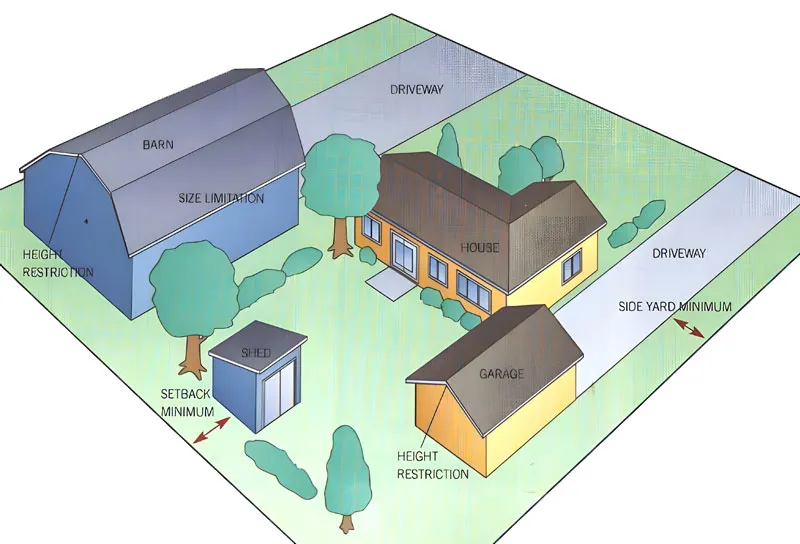
Setback Requirements Create Invisible Lines That Shouldn’t Be Crossed
Setbacks are the no-man’s land of your property. They exist mainly for privacy and safety. In most residential areas, you’ll encounter a rear setback and a side setback. For example, your shed might need to be 5 feet from the side property line and 10 feet from the rear line. If you have a corner lot, things get even weirder because you technically have two front yards, which usually have much deeper setback requirements (often 20-25 feet).
Legal Fire Separation Distance
The reason setbacks exist isn’t just to keep you from annoying your neighbor. If your shed catches fire and it’s only 2 feet from a wooden fence or your neighbor’s garage, the heat alone will ignite the adjacent structure before the fire department even arrives. Setbacks provide a buffer zone that can save an entire block from a single lawnmower fire.
Many fire codes require a shed to be at least 10 feet away from the main house. If you tuck it closer to save space, you might be required to install 5/8-inch Type X fire-rated drywall on the interior of the shed walls to prevent a flame spread event from jumping to your home.
Utility easements are the most dangerous setbacks. Your property deed might show a 10-foot wide strip at the back of your lot reserved for Public Utilities. Even if there are no visible wires or pipes, the city or power company has the legal right to clear that space at any time. Building a shed there is essentially gifting the city a demolition project.
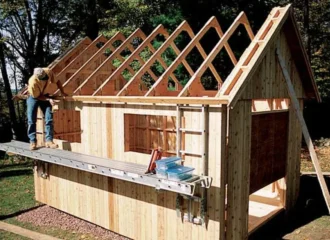
Maximum Peak Height May Make A Lofted Shed Illegal in R-1 Zones
Most DIYers focus on the footprint, but the mean height or peak height is what triggers neighbor complaints. In many R-1 districts, the maximum height for an accessory structure is capped at 12 or 15 feet. This is measured from the highest point of the roof down to the average grade of the ground.
If you’re dreaming of a gambrel or barn-style roof with a loft for storage, you’ll hit that 12-foot limit faster than you think. A standard 8-foot wall plus a high-pitched roof will easily put you at 13 or 14 feet. I once had to bury a shed foundation four inches deeper into the ground just to pass a height inspection because the homeowner wanted a specific roof pitch that put us two inches over the limit.
There’s also the height-to-setback ratio. Some advanced codes state that for every foot of height over 10 feet, you have to move the shed an additional foot away from the property line. This prevents looming structures that block sunlight for the person living next door.
Measuring Grade
The standard says you measure from the ground. The reality is that your yard isn’t flat. If you build on a slope, the inspector will measure from the highest grade or the average grade. I’ve seen sheds pass on the uphill side but fail because they looked too tall from the downhill side. Always calculate your peak height from the lowest point of the slope to be safe.
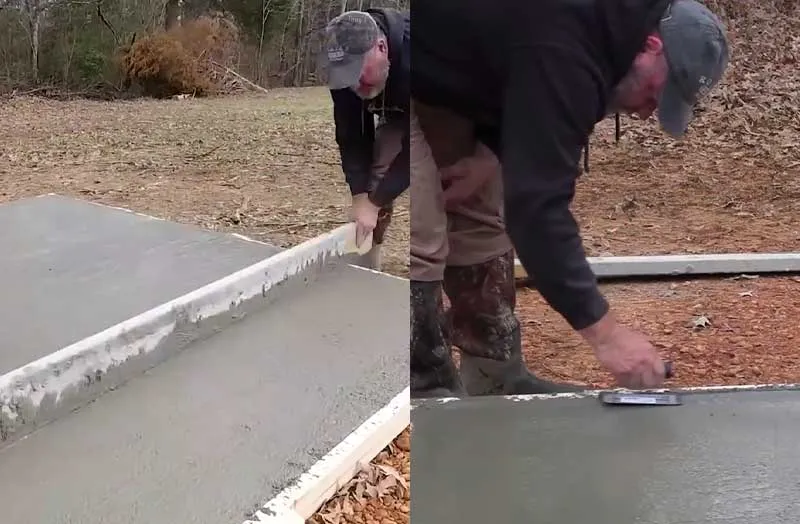
Foundation Engineering: Skids and Concrete Slab Mandates
If you’re pouring a monolithic slab (a single pour of concrete that acts as both the floor and the footing), the city will almost certainly want to inspect the rebar and the sub-base before you pour. Once that concrete is hard, they can’t see what’s inside, and if you didn’t get a pre-pour inspection, they can make you jackhammer the whole thing up.
Frost-protected foundations are another hurdle in northern climates. If your shed is over a certain size (usually 400 to 600 square feet), you may be required to dig piers down below the frost line, sometimes 36 to 48 inches deep. This prevents heaving, where freezing groundwater pushes your shed out of level and cracks the frame.
For smaller sheds, you might get away with a gravel pad or skids on crushed stone. However, if you live in a high-wind zone (like Florida or the coast), the code might require hurricane anchors or auger anchors that tie the shed frame deep into the earth, even if it’s sitting on skids.
I’ve seen a 10×12 shed flipped like a pancake in a thunderstorm because the owner thought gravity was enough of a foundation.
HOAs Care More About Shingle Color Than Structural Integrity
You can have a permit from the city and the okay from the building inspector, but if your Homeowners Association (HOA) says no, your shed project is dead in the water. HOAs operate under civil law, which means they can be even more restrictive than the city. I’ve seen HOAs that require shed shingles to perfectly match the house’s dye lot or mandate that the shed siding must be the exact same manufacturer as the main residence.
Neighbor's Signature
Many HOAs require you to get signed letters of non-objection from your immediate neighbors. Even if it’s not a formal rule, I always recommend taking a box of donuts to the neighbors and showing them your plans. A happy neighbor won’t call the code enforcement hotline the moment they hear a circular saw.
The biggest gotcha in HOA land is the Architectural Review Committee (ARC). You usually have to submit a formal Application for Modification before you even buy lumber. This includes a site plan, photos of your house, and sometimes even samples of the paint you plan to use. If you build first and ask later, they can fine you daily until the structure is removed.
We once did a project where the city allowed a 10×20 shed, but the HOA limited outbuildings to 8×10. The homeowner ignored the HOA, citing the city permit. The HOA sued and won a permanent injunction. The homeowner had to pay a crew to chainsaw the shed in half to meet the 80-square-foot limit. It was a $9,000 disaster.
A Two-Shed Limit: Why Aggregate Square Footage & Impermeable Surface Ratio Matters
One of the most frustrating phone calls I get starts with: But I only added a tiny 8×10 lean-to! The homeowner usually already has a 12×20 workshop and a detached garage. In the eyes of the zoning department, it’s not about the individual shed; it’s about the aggregate accessory square footage.
Most residential lots have a cap on the total number of outbuildings allowed, often limited to two, or a total square footage maximum based on your acreage. If you hit that limit, the city won’t even look at your permit application until you tear something else down.
Unified Site Plan
If you are planning a shed, a deck, and a patio over the next three years, apply for the permits all at once on a single master site plan. Most building departments charge a base filing fee per application. By grouping your backyard projects, you save on the administrative gatekeeper fees and ensure your total Impervious Surface Ratio is calculated once, rather than getting rejected three years later when you try to add the final piece of the puzzle.
The Impervious Surface Ratio (ISR) is the ultimate hidden boss of backyard construction. An impervious surface is anything that doesn’t let rainwater soak into the ground, such as your house roof, driveway, patio, and yes, your new shed.
Most modern suburban codes limit your ISR to 30% or 40% of your total lot. If you’ve already got a massive pool deck and a wide driveway, that new she-shed might push your lot over the limit. This triggers stormwater runoff issues, and in some high-density areas like Seattle or Charlotte, it can actually lead to a monthly impervious surface fee on your utility bill because your shed is contributing to local flooding.
I once worked on a property where we had to use permeable pavers for the shed foundation, basically specialized stones that let water through, just to bypass the ISR limits. It added $2,000 to the budget, but it was the only way to get the permit approved. The city doesn’t care about your storage needs; they care about where the rain goes when it hits your roof.
Checking Local Shed Regulations And Avoiding The Red-Tape
Don’t just Google shed permits near me. You’ll get generic blog fluff. You need to go straight to the MuniCode or Zoning Map for your specific city or county. Most jurisdictions have an online GIS (Geographic Information System) map. You type in your address, and it will tell you if you are in an R-1 (Single Family), R-2 (Multi-Family), or Agricultural zone. The rules for an R-1 lot are usually ten times stricter than an Agricultural lot.
Once you know your zone, look for the Table of Allowed Uses and Accessory Structure Standards. This is where the real shop talk happens. You’re looking for terms like Rear Yard Setback and Separation from Primary Structure. If you can’t find it online, call the Duty Planner. Don’t call the building inspector yet, as they handle the how. Call the planner; they handle the where and if.
Call up your local building council and ask. What is the maximum height allowed for a detached accessory building in my zone? Do I need a separate zoning voucher if the building is under 200 square feet? Be prepared for them to ask about fire separation. If your shed is within 5 to 10 feet of a property line, you enter a restricted fire zone where your siding materials might be limited to non-combustible options like HardiePlank or brick.
How to Get a Shed Permit Without Going Crazy
First, you need a site plan (sometimes called a plot plan). This does not need to be an architectural masterpiece, but it must be to scale. Take a copy of your property survey (the one you got when you bought the house) and draw a box where the shed is going. Label the distances from the shed to the house and all property lines. If those numbers do not match the setback rules we talked about earlier, the clerk will hand it back to you immediately.
Second, you need construction drawings. If you are buying a kit, the manufacturer usually provides these. If you are building from scratch, you need a floor plan, a cross-section showing the foundation, wall studs, and roof rafters, and an elevation showing what it looks like from the outside. The showing of your fastening schedule, exactly what size nails or screws you are using to tie the rafters to the top plate, is highly recommended here.
Third, submit the permit application and pay the fee. This can range from $50 to $500 depending on your zip code. Then, you wait. This review period can take three days or three weeks. Once the permit is issued, you will get a placard to tape to your front window. Do not start digging until that paper is in your hand. I have seen inspectors drive by, see a hole in the ground without a placard, and issue a stop-work order on the spot.
Incomplete Submittal
If your permit gets rejected, do not panic. Usually, it is because you forgot to specify the lumber species (e.g., Pressure Treated Southern Yellow Pine) or the wind load rating. Look for the red ink on your plans. If it says “Need truss calc”, and you are building your own trusses, you might need to get a stamped engineer’s letter or switch to rafters. Most DIYers fail here because they treat the plan like a suggestion rather than a legal contract.
Pro Tips From A Building Inspector: Get Approvals on the First Try
Building inspectors are not looking for perfection. They are looking for compliance and effort. An inspector who sees a clean job site and a copy of the approved plans sitting on a table is going to be way more lenient than one who has to trip over trash to find your footings.

Inspectors hate hidden work. If the permit requires a footing inspection, do not put a single drop of concrete in that hole until they see the bottom of the trench. If they require a framing inspection, do not put up the siding or the interior insulation. They need to see the studs. If you cover the studs, they will make you uncover them. It is that simple.
No Point In Arguing
Never argue with an inspector on-site. If they tell you your header is undersized, just say, “Understood, what size would you like to see there?” Even if you think they are wrong, they have the final authority on-site. If you make it a battle of egos, they will find ten more things wrong. If you make it a learning experience, they will often give you a conditional pass where you can fix the issue and just send them a photo instead of scheduling a second $75 visit.
Use approved materials. If you use reclaimed wood from an old barn, the inspector might ask for a stress grade stamp. Since old wood does not have stamps, they can technically reject the whole structure. Stick to new, stamped lumber for the structural parts (studs, plates, rafters) and save the character wood for the trim and siding.
No-Nonsense Checklist For Bulletproof Compliance
Go through this checklist before you spend a dime at the lumber yard.
- Do you have your Plat of Survey (map of your lot)?
- Are you R-1, R-2, or AR? (Check your tax bill or GIS map).
- Subtract your setbacks (e.g., 5ft side, 10ft rear) from your total lot. Is the shed inside the remaining box?
- Will this shed plus your house and driveway exceed 30-40% of your lot?
- Is the peak of your roof less than 12 feet from the average grade?
- Are there any drainage paths on your deed?
- Have you called 811 to mark underground lines?
- Does your local code require concrete footings for structures over a certain size (e.g., 200 sq ft)?
- Have you talked to your immediate neighbors?
- Do you have a Letter of Approval from your ARC or HOA board?
If you cannot answer Yes to all the questions, you are not ready to build yet.
Accessory Dwelling Unit (ADU) Bait-and-Switch: A Guest Shed Can Be a Legal Landmine
With the rise of the Tiny Home movement, many DIYers want to turn a shed into a guest house or a man-cave with a bed. This is where things get legally hairy. The moment you put a bed or a kitchenette in a shed, it is no longer a shed. It is now an Accessory Dwelling Unit (ADU).
The permit requirements for an ADU are 500% more complex than a shed. You will need a full change of use permit. This requires R-Value insulation mandates, egress windows (windows big enough for a firefighter with a tank to crawl through), and often a separate sewer hookup.
If you build a shed but the inspector sees a shower and a stove, they will flag the building and potentially cut off your main house’s power until the illegal dwelling is decommissioned.
If someone is living in your backyard shed, and a neighbor complains about the extra car or the smell of a wood stove, the city will come down on you like a ton of bricks. You cannot legally live in a structure that was permitted as S-1 Storage.
Navigating the High Voltage Hurdles of Lighting Up A Backyard Studio
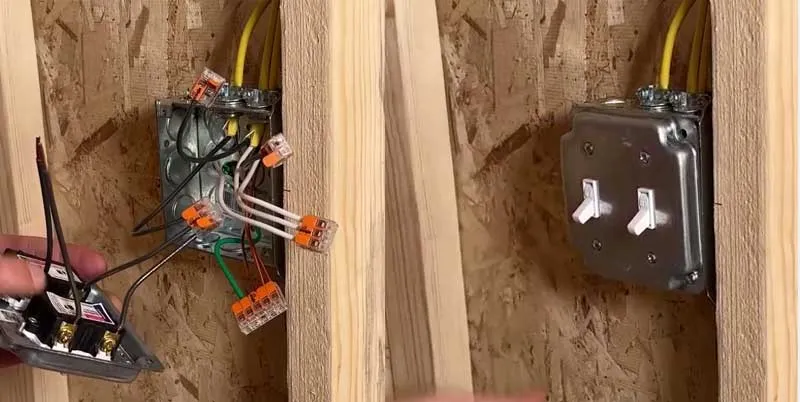
Running a drop cord from your house to your shed is not electrical work; it is a fire hazard. If you want lights or a laptop charger in your she-shed, you need an electrical permit. This is usually separate from the building permit. You will need to bury UF-rated cable or THWN wire in conduit at least 18 inches deep (or 24 inches for non-conduit).
If you just want one light and one outlet, you can often run a single 20-amp GFCI-protected circuit from your house. But if you want a space heater and a treadmill, you will trip the breaker constantly. You will need a sub-panel in the shed, which requires a four-wire system (two hots, one neutral, and a dedicated ground) and a grounding rod driven 8 feet into the earth at the shed site.
Most DIYers fail the rough-in inspection because they do not use staples to secure the wire every 12 inches inside the walls, or they forget to use nail plates where the wire passes through the studs. If a screw hits that wire later when you are hanging shelves, it can energize the entire metal siding of the shed.
Historic District Red Tape, Wetlands and Resource Protection
If you live in a house built before 1950, or your backyard borders a creek, you are not just dealing with a building inspector, you are dealing with Conservation Commissions and Historic Review Boards. These entities have the power to override your standard zoning rights.
I once had a project in a designated Historic Overlay where the city permit was approved, but the Historic Board blocked us because the shed’s roof pitch was 8/12 and the original 1920s house was 10/12. They literally made us redraw the rafters to match the architectural language of the neighborhood.
Wetlands are even more restrictive. In many states, you cannot build any structure, not even a shed on blocks, within a 50-foot or 100-foot buffer zone of a protected wetland or vernal pool. These areas are not always swampy; sometimes it is just a low spot in your yard that stays wet for three weeks in the spring. If you build there without a Notice of Intent and a formal Order of Conditions, the Department of Environmental Protection can hit you with fines that dwarf the cost of the shed itself.
I have seen a homeowner forced to hire an environmental scientist to prove that their shed’s drip line would not cause erosion into a nearby stream. It turned a $5,000 shed into a $12,000 bureaucratic nightmare. Always look for the blue lines on your town’s topographical map before you buy a single pressure-treated 4×4.


Read Next
 Shed Rafters vs. Trusses Comparison: Pro-Tested DIY Guide
 Cost To Build a Shed: 2026 Price Guide & DIY Budget Checklist
 37 Pro-Tested Tools For Building DIY Sheds That Last
 Shed Roof Guide: How To Frame & Sheathe For Weatherproofing
 Shed Foundation Guide: 11 Durable Builds And Traps To Avoid
 Shed Roof Slope: Guide To Find the Right Weather-Proof Pitch
Framing-to-Finish Roadmap: DIY Guides For Every Step of The Build


