Shed Siding Options: Field-Tested DIY Weatherproofing
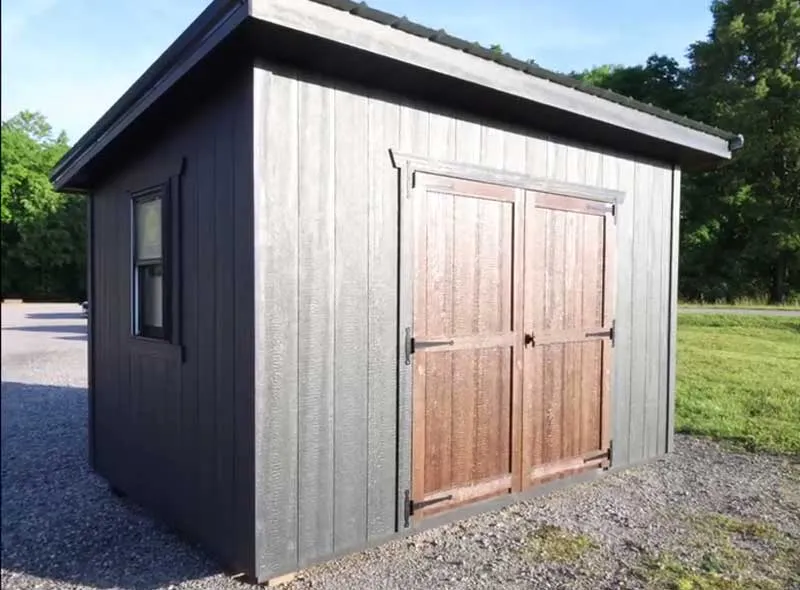
Back in my early contracting days, I made a devastating ten-thousand-dollar mistake on a custom 12×16 workshop project.
I chose a cheap interior-grade plywood core siding with a thin cedar veneer, skipping the water-resistive barrier behind it because the client wanted to keep costs rock-bottom.
Three wet winters later, the lower twelve inches had turned into a sponge of soft rot and black mold, ruining the lower wall framing.
Siding is your shed’s primary rainscreen and structural shield and not just cosmetic skin.
Key Takeaways
- Selecting the right siding material determines ninety percent of your backyard shed’s exterior lifespan and maintenance profile.
- LP SmartSide Panel Siding delivers the highest strength-to-cost ratio for DIYers, featuring zinc borate treatment that resists fungal decay and wood-boring insects.
- Vinyl siding requires structural substrate sheathing like OSB beneath it, meaning it cannot be nailed directly to studs without losing structural integrity.
- Fiber cement offers superior fire resistance and zero rot, but demands specialized diamond blades, respirators, and a heavy-duty wall frame.
- Maintain 6 inches of clearance between the bottom edge of any wood-based siding and the soil to prevent capillary wicking and rapid decay.
- Always install Z-flashing over horizontal joints and window headers to direct water away from interior wall cavities.
Comparison Of Top Siding Panel Specifications
|
Siding Material
|
Average Cost / Sq. Ft.
|
Expected Lifespan
|
Primary Strength
|
Maintenance Level
|
DIY Difficulty
|
|---|---|---|---|---|---|
|
LP SmartSide
|
$3.50 - $6.50
|
30-50 Years
|
Superior dimensional stability & factory priming
|
Low
|
Moderate
|
|
T1-11 Plywood
|
$2.50 - $4.50
|
10-15 Years
|
Low initial material outlay & fast panel coverage
|
High
|
Easy
|
|
Vinyl Siding
|
$2.00 - $5.00
|
25-40 Years
|
Complete rot immunity & zero repainting needs
|
Very Low
|
Easy-Moderate
|
|
Fiber Cement
|
$4.50 - $9.00
|
50+ Years
|
Class A fire rating & total insect resistance
|
Low
|
High
|
|
Corrugated Metal
|
$2.00 - $6.00
|
30-50+ Years
|
Rapid installation & extreme wind endurance
|
Very Low
|
Moderate
|
|
Natural Cedar
|
$6.00 - $12.00
|
20-30 Years
|
Authentic architectural beauty & natural aroma
|
High
|
Moderate-High
|
Critical Factors For Evaluating Shed Siding Materials Before Construction
Moisture penetration is the single greatest enemy of backyard structures. Wood fibers expand when wet and shrink when dry, creating stress fractures in low-grade paint films.
If you ignore thermal movement, extreme temperature swings will buckle cheap plastics and twist thin metal sheets before your first year is up. Experienced builders always evaluate local humidity levels and seasonal temperature swings before ordering materials.
Skip this step, and your shed will rot out regardless of how tight your stud spacing is or how expensive your screws were. Wood framing breathes continuously. Your cladding has to block liquid rainwater while letting internal vapor escape.
Local Climate And Weather Resistance Mechanics
Freezing temperatures force trapped moisture inside porous wood fibers to expand by nearly nine percent, splitting grain structures and blowing apart untreated panel edges.
High humidity is just as bad, bringing fungal spores that turn damp wood into mush behind trim boards or dense bushes.
Building near the ocean? Salt spray will eat standard steel fasteners alive in a few months, leaving long, rust streaks down your siding. You have to match your material to your climate if you want your build to last past the decade mark.
Skipping house wrap under horizontal lap cladding creates an air pocket that traps condensation against your wall studs. Always install a quality woven water-resistive barrier before mounting any lap siding profile.
Upfront Material Cost Versus Lifetime Maintenance Costs
Factor future labor and material inflation into your initial budget. Spending one extra dollar per square foot today almost always saves you hundreds down the road.
Cheap exterior panels are a trap. They trap you in an endless loop of scraping, caulking, and repainting every three to five years. Premium composites cost more up front, but their factory-applied resins and engineered decay resistance mean you build it once and forget it.
Always factor in the hidden costs: scaffolding rentals, specialty saw blades, high-end sealants, and the value of your own weekends.
HOA Guidelines and Architectural Matching
Municipal inspectors enforce strict height restrictions and material combustibility ratings, especially for structures located within close proximity to property lines. Beyond code, matching your home’s architectural profile protects your property value and keeps the neighborhood board off your back.
HOA committees frequently reject raw industrial metal siding or unfinished plywood panels, demanding matching color palettes and professional trim detailing before granting building approval.
Properties situated within designated historic preservation districts require custom-milled wood siding profiles and period-accurate fastener selections to pass strict municipal board reviews.
Field Tested Comparison Of Every Major Shed Siding Material Class
Engineered wood composites and fiber cement boards have left traditional lumber in the dust. Every material has its own quirks, and knowing them beforehand saves you massive headaches on job day. Here is my honest take on how these materials actually perform when you put tools to board.
LP SmartSide Engineered Wood Is The Modern Backyard Standard
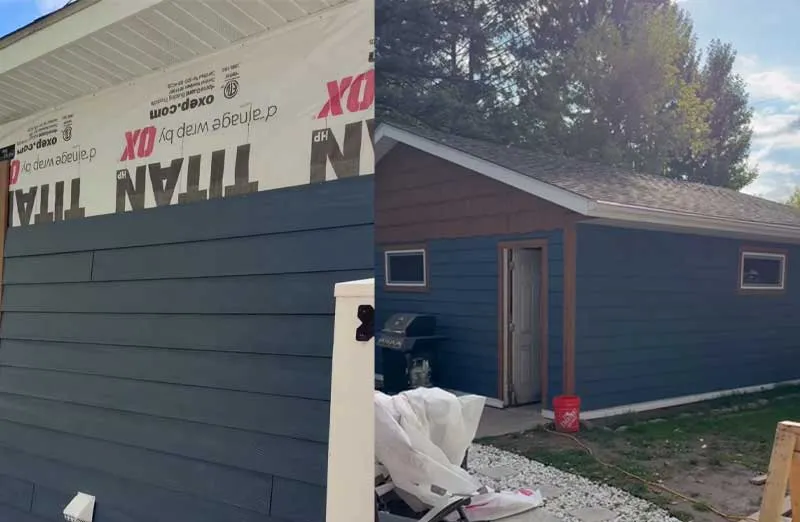
To make these panels, manufacturers blast wood strands with intense heat, pressure, zinc borate resins, and exterior binders. This process strips out natural knots and prevents warping. LP SmartSide panels stay flat through radical weather shifts, and if you treat them right, they will easily cross the thirty-year mark.
Zinc borate integration also protects organic wood fiber elements from termite infestation and fungal decay. It also resists high heat and extreme humidity far better than older exterior-grade plywoods.
LP SmartSide panels can take a beating. Lawn mower rocks and stray baseballs that shatter vinyl or dent metal barely leave a mark on SmartSide. Plus, the factory primer grips high-grade acrylic latex paint like glue.
You can rip LP SmartSide panel siding down horizontally to create custom wainscoting details, blending vertical panels on top with horizontal lap siding below for a high-end architectural finish without buying two distinct product lines.
Here is the ultimate rule with engineered wood: seal every single cut edge. Many DIY builders nail engineered wood lap siding directly to studs without leaving the mandatory six-inch ground clearance, allowing turf moisture and splashback to wick directly into the bottom edge of the panels.
Ignoring this crucial rule traps swelling moisture inside the substrate, leading to premature edge flare and paint peeling.
Traditional T1-11 Plywood Siding For Classic Rustic Aesthetics
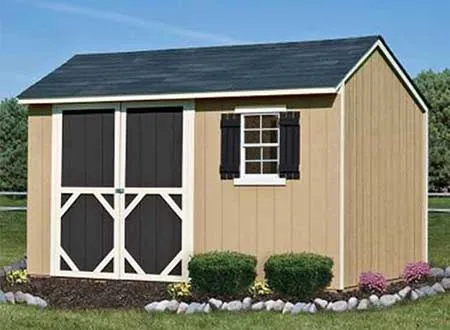
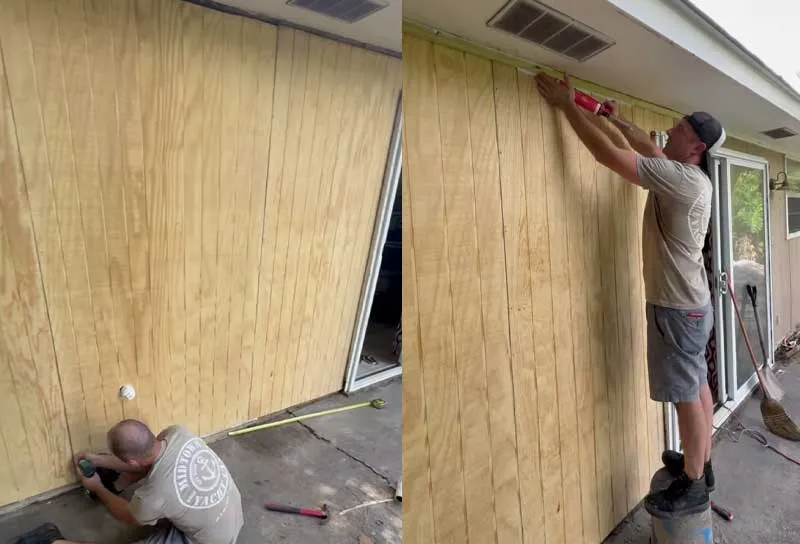
Milled from softwood veneers like Southern Yellow Pine or Douglas Fir, T1-11 gives you that classic look with vertical grooves every four or eight inches. Because it acts as structural sheathing, you can nail it right to the studs and bypass OSB entirely to speed up your frame build.
Slap a temporary 2×4 ledger board across the bottom plate of your wall framing before lifting heavy T1-11 panels into place. It acts as an extra set of hands to rest the heavy sheets on while plumb-checking and driving your first corner nails.
Inspect your sheets before buying. If you see core voids along the factory edges, pick another sheet. Water will get inside those hollow pockets, freeze, and split the sheet from the inside out.
Vertical shiplap joints are another weak spot. Unsealed bottom cuts suck up ground moisture, swelling the plies until the panel delaminates into layers.
T1-11 keeps upfront costs low for basic tool sheds, and you only need standard framing tools to hang it. Just remember that four-by-eight sheets are heavy and awkward, so bring a buddy to help line them up.
Regular maintenance cycles require applying high-build acrylic primer and heavy-duty exterior latex house paint every three to five years. Expect a fifteen to twenty-five year service life when kept well-painted and elevated above damp ground surfaces.
Standard exterior paint alone will not seal raw plywood end-grain on T1-11 panels long-term; dipping panel bottom edges into a shallow trough of liquid wood sealer before hanging ensures decades of moisture protection.
Low-Maintenance Exterior Protection With Vinyl Shed Siding
Modern vinyl uses titanium dioxide to fight off UV rays, color fading, and chalking. The panels feature top locks, hemmed nail strips, and bottom channels that snap together into a tight wall system.
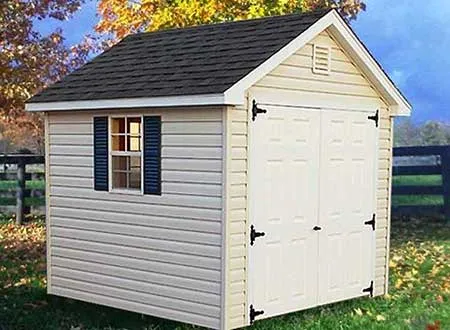
Whether you pick uninsulated profiles or foam-backed panels, you get the look of Dutch lap or board-and-batten without ever picking up a paintbrush.
Vinyl siding systems remain completely immune to rot and insect damage under all climates. They also eliminate future painting and scraping chores entirely, requiring only occasional soap and water washdowns to maintain appearance.
Done right, a well-installed vinyl cladding lasts twenty to thirty years with occasional pressure washing to clear airborne dirt and mildew.
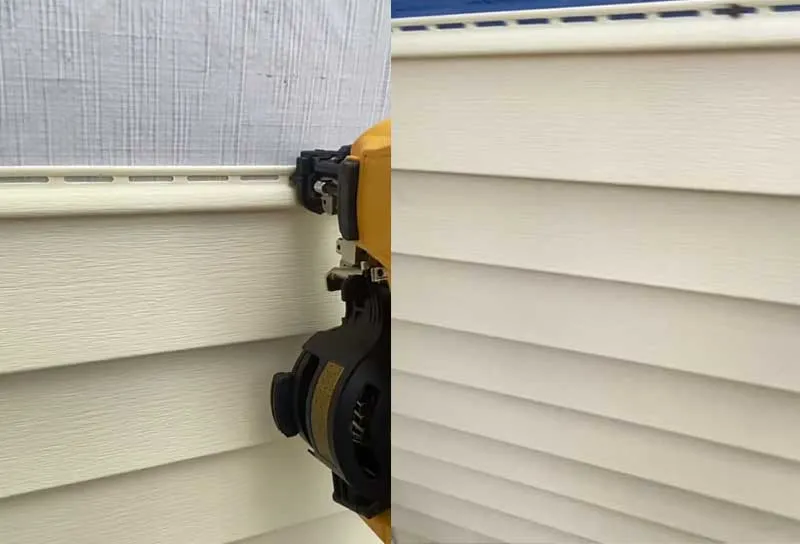
But do not skimp on structural backing! A homeowner I know in Ohio built an un-sheathed utility shed with direct-hung vinyl siding on sixteen-inch stud centers; strong autumnal crosswinds warped the framing and buckled the vinyl panels, forcing a complete teardown to add proper OSB wall sheathing underneath.
Vinyl has zero structural shear strength. You must install solid OSB or plywood sheathing wrapped in house wrap first, which bumps up your total material bill.
Cold weather is vinyl’s biggest vulnerability. Stray rocks thrown by lawnmowers during early spring cleanups easily shatter cold, brittle PVC panels, leaving unsightly holes that allow water intrusion.
High-Durability Fiber Cement Siding For Workshop Builds
Made from a dense composite mixture of Portland cement, silica sand, and cellulose fibers, these thick planks easily resist moisture degradation and mold growth.
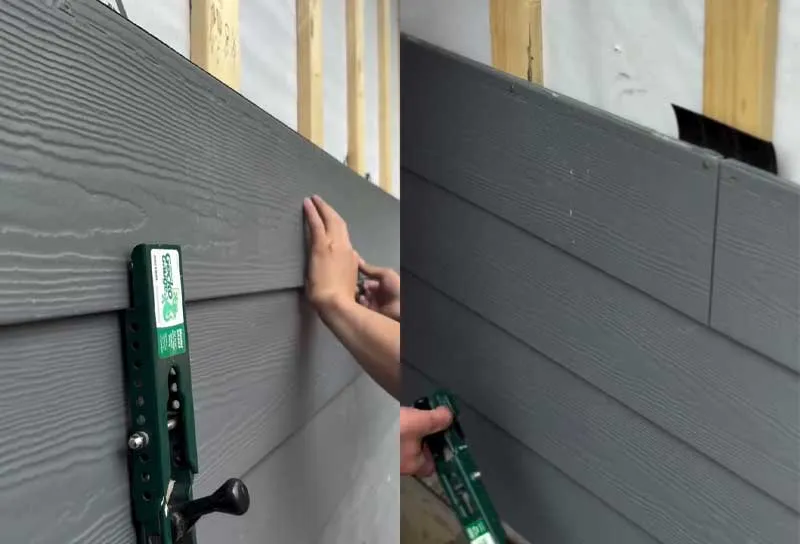
Handling fiber cement planks requires specialized gear and proper technique. Fiber cement is exceptionally heavy and brittle to handle alone; if you drop a six-foot section onto a concrete slab during installation, it will shatter into unusable pieces instantly. Heavy twelve-foot planks break easily if lifted horizontally by a single worker without adequate midpoint support.
Cutting fiber cement releases fine crystalline silica dust, requiring specialized shears or dust-collecting carbide saw blades paired with NIOSH-approved respirators.
Invest in a dedicated set of fiber cement siding gauges like Gecko Gauge tools to lock each lap plank into place automatically, allowing a single builder to hang heavy horizontal planks accurately.
Use a pneumatic coil siding nailer with a flush-mount adapter so you don’t overdrive nails through the brittle faces. Installed properly, fiber cement will easily cross the 50-year mark.
Many suburban fire zones mandate non-combustible exterior wall cladding on accessory structures built within five feet of property lines. Class A fire-rated fiber cement is hands-down your best choice here, and the factory paint finish won’t need touch-ups for fifteen to twenty years.
Metal Siding For Agricultural & Custom Shed Profiles
Available in corrugated sheets, standing seam panels, and ribbed utility profiles, metal cladding utilizes high-tensile steel or aluminum alloys coated with protective zinc-aluminum layers. Top-tier paint systems like Kynar 500 hold their color against punishing sun exposure for decades.
Properly anchored to wall studs, steel siding handles 140 mph winds without blinking. Aluminum is lighter and completely rust-proof, making it the undisputed king for salty coastal air and humid marine areas.
Installing a metal siding without an underlayment felt layer creates more interior moisture issues inside an unheated shed than using traditional wood siding. This is due to dramatic daily temperature swings that create rapid indoor condensation.
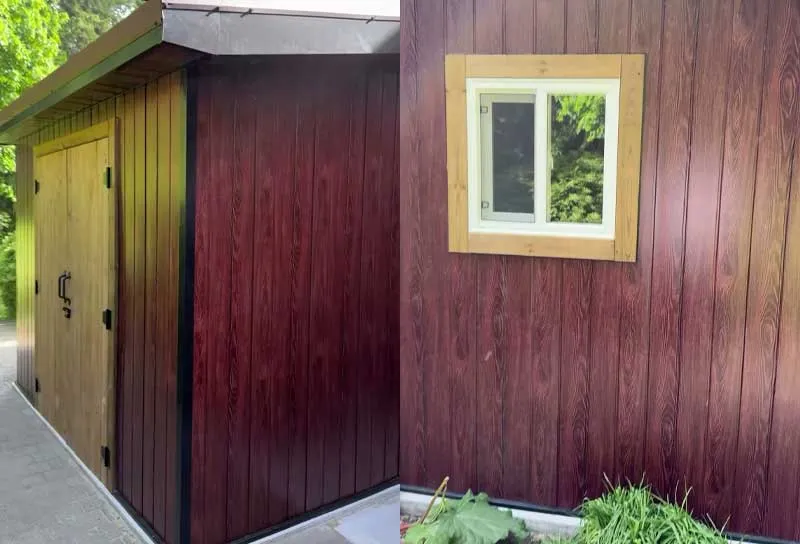
For quick builds, run wide ribbed panels over horizontal 2×4 wall girts using color-matched hex screws with EPDM rubber washers. Self-drilling screws save massive time and seal water out reliably.
Fastening corrugated metal panels through the high rib versus the low valley drastically impacts water shedding performance. Valley fastening offers maximum holding strength against wind uplift, while high-rib fastening minimizes direct water pressure exposure around screw washer seals.
Rain noise remains a major consideration for backyard structures clad in metal siding.
Uninsulated metal walls turn heavy storms into a deafening drum session. If you plan to use the shed as a home office, put up sound-dampening insulation. Expect galvanized metal to last forty-plus years without paint.
Never use standard high-speed abrasive metal cutoff wheels to trim painted steel siding panels. The shower of white-hot metal filings will melt into the paint face, rusting into tiny orange freckles after the first rain storm.
Natural Wood Cladding For Traditional Handcrafted Appeal
Popular species used for cladding include naturally rot-resistant Western Red Cedar, Redwood, Cypress, and pressure-treated Southern Yellow Pine. Common profiles range from horizontal bevel lap and tongue-and-groove boards to rustic vertical board-and-batten assemblies built from rough-sawn lumber.
Natural wood siding provides unmatched organic character and classic architectural charm for custom garden sheds and artisan workshops.
Single-nailing board and batten siding allows individual wood planks to shrink and expand across moisture cycles without binding against adjacent fasteners, eliminating middle-board splitting.
Vertical board and batten clear-grade Western Red Cedar installed over a fully rainscreened wall framing system represents the absolute peak of architectural beauty and wood siding craftsmanship.
Installation requires stainless steel or hot-dipped galvanized fasteners and careful end-grain sealing at all butt joints. Standard steel nails react with natural wood tannins, leaving ugly black bleeding streaks down the face of cedar or redwood boards within weeks.
Maintaining natural wood requires consistent work. You need to re-apply penetrating oil or stain every three to five years to stop UV damage and surface checking. Keep it elevated off damp soil, and cedar will reward you with forty-plus years of service.
Real-World Field Testing & Long Term Weathering Insights
Dirt splashback, falling leaves, shade-induced algae growth, and erratic lawn sprinklers punish lower siding panels continuously. Observing how siding performs across multi-year cycles reveals structural flaws and clear design vulnerabilities.
Pros evaluate field installations by analyzing edge swelling, paint adhesion decay, fastener corrosion, and panel stability along bottom framing plates.
Learning these field lessons help DIY builders avoid high-maintenance mistakes and pick materials that withstand real-world weather exposure.
Five Year Weathering Analysis: Fiber Cement Vs LP SmartSide Performance
Installed in high-humidity environments with heavy seasonal snowfall, both materials hold protective paint films far better than traditional T1-11 plywood.
Fiber cement shows zero structural expansion or edge swelling near ground contact zones, maintaining tight paint adhesion right down to the drip edge.
LP SmartSide exhibits slight micro-swelling along unsealed lower cut edges exposed to continuous soil moisture or standing snowdrifts. Factory-sealed horizontal edges hold paint exceptionally well, showing no sign of chipping, or peeling.
Fiber cement stays completely dimensionally stable, while engineered wood shows tiny amounts of movement around tight corner trim.
What Majority Of DIY Builders Get Wrong
Improper installation techniques destroy premium siding materials far faster than natural weathering processes.
Failing to install a continuous weather-resistive barrier behind wood or vinyl cladding allows wind-driven rain to seep through seams and create hidden structural rot pockets.
Over-driving nails with a high-pressure nail gun is another classic rookie mistake. Nail heads driven deep beneath panel surfaces break protective exterior paint seals, creating exposed circular craters that collect rainwater and accelerate moisture penetration into panel cores.
Using incorrect non-corrosive fasteners leads to premature rusting, unsightly wall staining, and compromised fastener holding power under strong wind loads.
Clearance Requirements And Critical Z-Flashing Detail Mistakes
Keep your siding at least six inches off bare dirt to stop splashback erosion and capillary water wicking. If you are building over a sloped concrete slab or driveway, you can drop that clearance to two inches.
Horizontal panel seams demand corrosion-resistant metal Z-flashing to shed water safely over lower panel edges. Omitting Z-flashing at horizontal joints traps rainwater inside raw panel seams and destroys structural integrity within three seasons.
Do not caulk that Z-flashing gap shut. Caulking blocks the drainage path, forcing trapped water straight back into your framing wall cavities.
Extreme Climate Weather Testing: Thermal Shifts And Freezing Cycle Resistance
Water trapped inside porous material gaps expands by nine percent upon freezing, creating internal micro-cracks that enlarge during subsequent freeze cycles.
Dark paint absorbs heat, causing huge expansion on sunny winter days followed by rapid cooling at night.
Vinyl siding exhibits the highest thermal movement rates, expanding and contracting up to one-half inch across twelve-foot panel runs between summer heat and winter freezes.
Metal pops and creaks loudly during temperature spikes, needing slotted screw holes to handle movement without buckling. Fiber cement and engineered wood barely move at all, giving you the best stability in harsh climates.
How To Select The Ideal Siding Material
A basic lawnmower shed only needs simple, low-cost panels. A backyard home office or studio deserves fire-resistant fiber cement or cedar lap siding. Match your material to your actual needs and tool set so you don’t blow your budget or get stuck halfway through.
Practical Options For DIY Builders: Vinyl And LP SmartSide Panels
First-time DIY builders benefit greatly from selecting forgiving siding systems that install quickly with standard carpentry hand tools. LP SmartSide four-by-eight panels cover thirty-two square feet of wall area per sheet, squaring up wall framing quickly while reducing overall seam alignment steps.
Vinyl siding offers simple snap-together horizontal interlocks and pre-punched nail slots, eliminating difficult edge-sealing steps and post-installation painting tasks. Lightweight vinyl panels are easily lifted and positioned by a single builder working alone on weekends.
If your building budget is under $1,500 total, use LP SmartSide panels; if your budget exceeds $4,500 for a home office, upgrade to fiber cement planks over a full rainscreen assembly.
Fiber Cement And Aluminum Are Top Choices For High Humidity Areas
High-humidity regions and coastal environments with severe salt spray require corrosion-proof, rot-immune cladding materials. Aluminum siding and fiber cement boards resist saltwater exposure without rusting or degrading under high UV radiation exposure.
Natural wood rots quickly in constant damp shade unless you stain it constantly. Consult the USDA Wood Handbook for regional decay hazard maps to determine exact moisture protection requirements for your region.
Metal utility panels featuring high-performance Galvalume zinc-aluminum coatings provide excellent moisture protection when fastened with 304 stainless steel hardware. Avoid positioning exposed cut steel edges along bottom drip lines. Rust will creep up from the bottom and degrade the sheet over time.
Spending 20% more up front for stainless steel siding screws on a coastal build saves you 100% of the cost of tearing off rusted steel panels ten years down the road.
T1-11 Plywood And Corrugated Steel Offer Low-Cost Utility Options
T1-11 provides integrated structural racking shear resistance, eliminating separate OSB sheathing layers and reducing total wall material purchases. Stick to exterior-grade SYP T1-11 to get dependable performance at minimal upfront cost.
Corrugated steel installs fast right over 2×4 horizontal wall girts, letting you skip wall sheathing entirely. Thin gauge metal panels lower total structural dead weight while providing fire-resistant, zero-maintenance exterior protection for basic utility storage needs.
Never install untreated low-grade interior particleboard or non-exterior MDF panels on an outdoor structure, even if you plan to cover it with heavy paint; high humidity will dissolve the internal glue bonds within two seasons.
Every single saw cut made on a piece of plywood siding must be thoroughly saturated with end-grain sealer or primer prior to nailing.
Siding Selection and Project Planning Tool
Use this simple scoring guide to determine the ideal siding material for your build based on climate, budget, maintenance needs, and technical skill level.
1 – Climate and Exposure Scoring
Score your job site based on local weather conditions:
High annual rainfall or persistent humidity: Add 3 points to Fiber Cement, Vinyl, and Metal.
High fire risk zone or forested region: Add 5 points to Fiber Cement and Metal; Subtract 5 from Wood.
High coastal winds or severe storm exposure: Add 3 points to LP SmartSide and Metal.
Moderate climate with direct sun exposure: Add 3 points to Cedar and Fiber Cement.
2 – Skill and Tool Readiness Assessment
Match your available skill level and tool collection to the material requirements:
Beginner Skill Level (Basic hand tools, circular saw, drill): Best suited for Vinyl Siding or LP SmartSide Panels.
Intermediate Skill Level (Miter saw, pneumatic nailers, level guides): Best suited for Cedar Board-and-Batten or Corrugated Metal.
Advanced Skill Level (Diamond shears, track saws, multi-person crew): Required for Fiber Cement Systems.
3 – Final Selection Checklist
Before ordering materials, complete this final readiness checklist:
Confirm wall framing studs are spaced accurately at sixteen inches on-center.
Verify house wrap is installed and properly integrated with sill flashing.
Measure total wall square footage and add a ten percent waste factor for cutting errors.
Purchase corrosion-resistant fasteners matching the exact specification of your selected material.
Ensure six inches of clearance exists between the bottom siding edge and soil grade.

Read Next
 Shed Roof Guide: How To Frame & Sheathe For Weatherproofing
 37 Pro-Tested Tools For Building DIY Sheds That Last
 Shed Rafters vs. Trusses Comparison: Pro-Tested DIY Guide
 Top 3 Wooden Shed Wall Siding Materials & Installation Steps
 Shed Foundation Guide: 11 Durable Builds And Traps To Avoid
 Shed Ventilation Guide: DIY Ideas for Dry, Mold-Free Builds
Framing-to-Finish Roadmap: DIY Guides For Every Step of The Build