
Cost To Build A Shed: 2026 Price Guide & DIY Budget Checklist
I once watched a homeowner sink $4,500 into a budget 10×12 DIY build, only to see the entire structure rack and lean like the Tower of Pisa because he tried to save eighty bucks by skipping a proper gravel pad. He ended up paying me double to tear it down and start over. That’s the cheap way of doing things.
Whether you are looking for a simple lawnmower lean-to or a high-end shoffice (shed-office), the difference between your initial estimate and the final invoice is usually paved with forgotten permit fees and the specialized hardware that big-box stores never include in their kits.
The true cost of building a shed must include site prep and long-term maintenance. In today’s market, you’re looking at anywhere from $15 to $150 per square foot. If that range sounds wide enough to drive a tractor through, it’s because the how matters more than the what. In this guide, we are going to strip away the marketing fluff of pre-fab kits and look at the raw, unvarnished numbers of custom construction.
- DIY Basic (Skids/Plywood): $1,500 – $4,000. Best for basic storage.
- Mid-Range Custom (Stick-built/Siding): $5,000 – $12,000. The sweet spot for longevity.
- High-End/Studio (Insulated/Electric): $15,000 – $35,000+. Professional workspace grade.
- Hidden Killer: Site preparation and leveling can add 20% to your budget instantly.
- Permit Threshold: In most US jurisdictions, anything over 120 sq. ft. triggers a building permit and potential property tax reassessment.
Why The Sticker Price On That Big-Box Kit Is A Total Bold-Faced Lie
Walk into any home improvement warehouse and you’ll see a shiny 8×10 shed for $999. It looks like a steal until you realize it’s basically a glorified cardboard box held together by staples and prayers. Those kits rarely include the floor system or the roofing shingles. By the time you actually make it weather-tight and sturdy enough to hold a riding mower without the floor joists snapping, you’ve spent $2,500.
I’ve spent years fixing kit regrets. The primary issue is the lumber grade. Kits often use finger-jointed studs or undersized 2×3 framing that warps the moment it sees a drop of humidity.
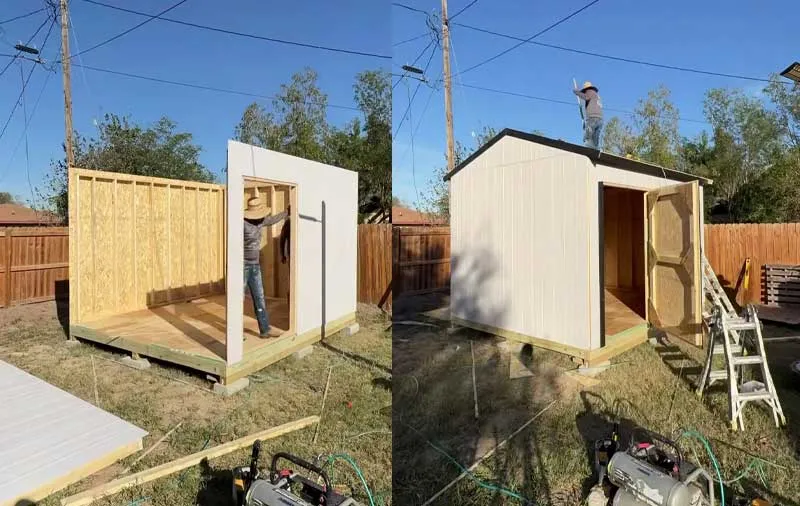
When we talk about the real cost to build, we’re talking about stick-building. This means buying raw 2x4s, 2x6s, and CDX plywood. While the upfront material cost is higher, the ROI is found in the fact that the shed won’t be a pile of rot in seven years. You have to account for the delivery fee too, as most people forget that hauling three tons of lumber to a backyard usually costs a few hundred dollars in flatbed fees or a dozen grueling trips in a borrowed pickup.
A Blunt Reality Check
You cannot build a high-quality, long-lasting 10×12 shed for under $2,000 anymore. If your budget is lower than that, you aren’t building a shed; you’re building a temporary shelter.
Between the cost of pressure-treated (PT) lumber for the mudsills and the price of decent architectural shingles, the floor for quality materials has risen significantly. If you try to undercut this, you’ll pay for it in settlement cracks and door bind within the first two seasons.
When estimating, I always tell clients to look at the hardware. A single box of high-quality structural screws (like GRKs) can run you $40. You’ll need five of them. Then there are the drip edges, the felt paper, and the galvanized nails for the siding.
These consumables often represent 10% of the total budget, yet they are the first thing DIYers leave off their spreadsheet. If you want a shed that doesn’t smell like a mushroom farm after three years, you have to pay for the details that the kits ignore.
Shed Reality Check Cost Calculator & Checklist
This tool will help you finalize your budget before you spend a dime. Work through these three sections to see where your True Cost lands.
The Material Tier Multiplier
Take your base square footage (e.g., 10×12 = 120 sq. ft.) and multiply it by the Intent Tier below:
- Tier 1 (The Mower Shed): $18 – $25/sq. ft. (Basic wood, T1-11, no windows).
- Tier 2 (The Workshop): $35 – $60/sq. ft. (Sturdy floor, workbench, electrical, windows).
- Tier 3 (The Office/Studio): $100 – $180/sq. ft. (Insulated, finished interior, HVAC, high-end siding).
Overlooked Expense Checklist
Add these flat costs to your square footage estimate:
- Permit & Zoning Fees: $150 (Avg.)
- Site Leveling/Gravel: $800 – $1,500
- Electrical Run (per 50ft): $1,000
- Tool Purchase/Rental: $500
- Painting/Finishing Materials: $400
- The Oops Fund (10% of total): $_______
Skill vs. Cost Quiz
Can you read a framing square and calculate rafter tails?
No: Add $3,000 for professional framing labor.
Do you own a truck capable of hauling 1,500 lbs of lumber?
No: Add $300 for delivery fees.
Are you comfortable wiring a GFCI circuit?
No: Add $800 for an electrician.
Managing Scope Creep: Why $5,000 Turns Into $15,000
I’ve sat at many kitchen tables watching homeowners’ eyes glaze over as I explain why their simple shed is now costing as much as a used Silverado. It’s called scope creep. It starts with let’s add a little porch, then maybe some windows for light, and ends with “Well, if we’re doing that, we might as well add a loft and a mini-fridge.”
Every upgrade has a compounding effect. A loft requires a steeper roof pitch, which requires longer rafters, which requires a more expensive ridge beam, which requires a beefier foundation to handle the weight. Before you know it, you’ve doubled your material list.
Decide on the primary mission of the shed before you buy a single board. If it’s for a lawnmower, build a lawnmower shed. Don’t try to build a multi-purpose space that is 50% storage and 50% office. You’ll end up with a cramped office that smells like gasoline and a storage area that’s too nice to put a muddy tiller in. Pick a lane and stick to it. It will save you thousands in middle-ground materials that don’t serve either purpose well.
Matching the Budget to the Build
The Bootstrap ($1,500 – $2,500): 8×10, on skids, T1-11 siding, basic shingles, DIY doors, no windows. Perfect for the suburban homeowner who just needs the mower out of the garage.
The Workhorse ($4,000 – $7,500): 10×12, gravel pad foundation, 16″ OC framing, LP SmartSide, architectural shingles, one window, sturdy workbench. This is the 30-year shed.
The Executive ($15,000 – $30,000): 12×16+, concrete slab, insulated, finished interior, electrical sub-panel, HVAC, high-end siding to match the house. This is a legitimate property value add.
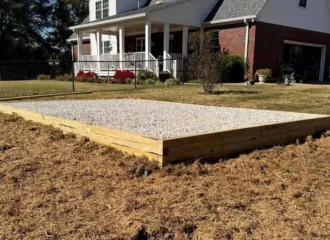
Foundation Mathematics: Why Your Dirt is More Expensive Than You Think
The biggest mistake I see, which is the one that keeps me in business doing repairs, is throwing it on the grass. You can’t just slap a shed on some cinder blocks and call it a day. The cost of a foundation is a massive variable. A simple Crushed Stone Pad (the gold standard for drainage) will cost you about $4 to $8 per square foot if you haul the stone yourself. If you hire a crew to excavate and rake out four inches of #57 clean stone, you’re looking at $1,200 to $2,500 before a single wall is raised.
Then there’s the Concrete Slab. If you’re building a heavy workshop or a garage-style shed, a 4-inch reinforced slab is non-negotiable. In the current market, ready-mix concrete is expensive, and many companies have short load fees that can double the price if you’re ordering less than 10 yards.
You’re looking at $10 to $15 per square foot for a professionally poured slab. If you try to DIY a slab without a power trowel, you’ll end up with a dusty, unlevel mess that makes it impossible to roll a toolbox across.
- Concrete Blocks/Deck Blocks: $150 – $400 (Only for small, non-permitted sheds).
- Gravel/Crushed Stone Pad: $800 – $2,000 (Best all-around value).
- Concrete Slab: $2,500 – $5,000 (The forever foundation).
- Helical Piles: $1,500 – $3,000 (For swampy or sloped land).
Where Beginners Fail
Beginners almost always underestimate the tonnage of stone needed. They buy twenty bags of leveling sand from the store, which does absolutely nothing for drainage. You need clean stone that allows water to pass through, not crusher run which packs down like concrete and traps moisture against your floor joists.
If your shed floor is 10×12, your gravel pad should be 12×14. That extra foot of perimeter prevents splash back rot on your siding. Skipping that extra foot of stone is a $50 save that costs $2,000 in siding repairs a decade later.
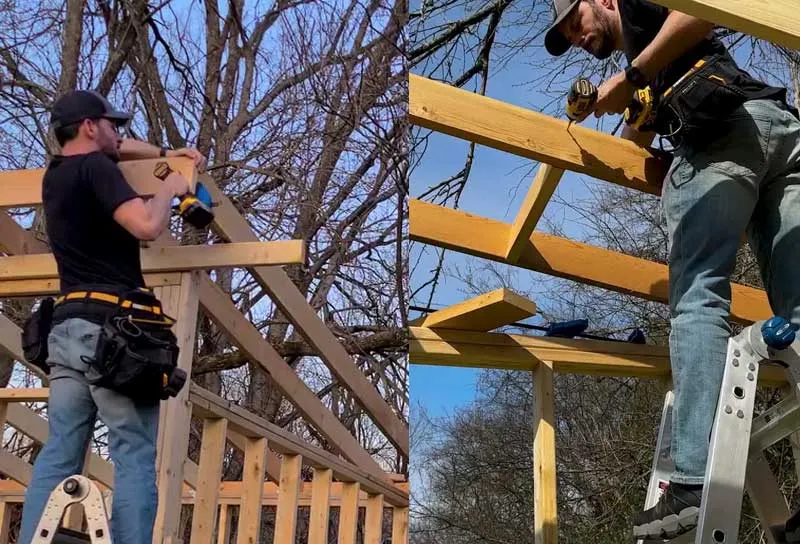
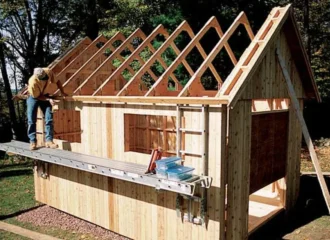
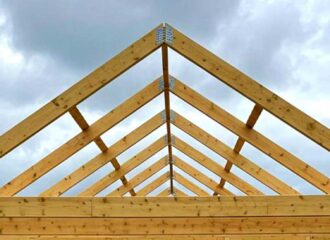
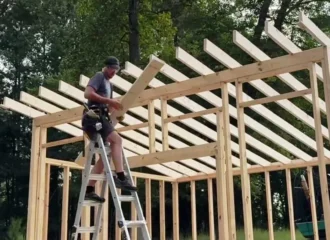
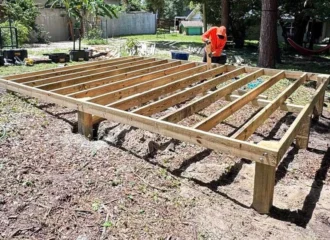
Framing the Skeleton: Lumber Grades, Spacing, and the "Hidden" Hardware
Once you’re out of the dirt, you’re into the bones. This is where the price fluctuates based on your OC (On Center) spacing. Standard code for a house is 16 inches OC. Many cheap sheds use 24-inch spacing. Does it save money? Sure, about $150 in studs. But it makes the walls feel like paper, and your siding will eventually wave like a flag. I refuse to build anything wider than 16 inches OC.
Materials for a standard 10×12 frame (floor, walls, and rafters) will typically run between $1,800 and $2,800. This depends heavily on whether you’re using Standard & Better or Premium studs. Personally, I pay the extra 50 cents per board for Premium. Why? Because I don’t want to spend three hours crowning boards (finding the curve) or returning 20% of the pile because the studs look like boomerangs.

Building A Rock-Solid Structure
When calculating your floor frame, don’t use standard 2x4s. Even if the manual says it’s fine, it isn’t. Use 2×6 pressure-treated joists at 12-inch centers if you plan on storing anything heavier than a bicycle. The cost difference is negligible, maybe $100 total, but the deflection (the bounce in the floor) disappears.
A stiff floor makes the whole building feel like a vault. Also, always use triple-zinc or hot-dipped galvanized hangers for your joists; standard silver zinc hangers will corrode in contact with the chemicals in pressure-treated wood.
Then there is the sheathing. This is the skin that gives the frame its shear strength. I’ve seen people use OSB (Oriented Strand Board) because it’s cheaper than CDX plywood. In a climate-controlled house, OSB is fine. In a backyard shed where humidity swings are wild, OSB acts like a sponge. If it gets wet once, the edges swell and stay swollen.
Spend the extra $10 per sheet for CDX or a specialized product like LP SmartSide panels. It’s the difference between a shed that lasts 15 years and one that lasts 40.
Roofing and Siding: The Face of the Shed and Where Budgets Explode
This is where the aesthetic costs kick in. You can go functional or architectural. A basic 3-tab shingle roof is the cheapest option, but it looks cheap and has a lower wind rating. I prefer Architectural Laminate Shingles. They cost about 15% more but offer a 30-year life and significantly better curb appeal if you’re worried about property value.
When Cheap Gets Expensive
Years ago, I tried to save a client money by using off-brand cedar shakes for a gabled shed. I thought I was being a hero. Three months in, the shakes started cupping (curling up) because the moisture content was too high when they were packed.
I spent four days of un-billable labor ripping them off and replacing them with high-grade Western Red Cedar. The lesson? Cheap wood is the most expensive thing you can buy. Now, if a client wants a high-end look but doesn’t have the budget for Grade A materials, I tell them to wait or go with a high-quality synthetic. Never compromise on the envelope of the building.
Siding is the biggest cost-driver. You have three main tiers:
- T1-11 Plywood/LP SmartSide: $40 – $60 per panel. Fast to install, needs paint.
- Vinyl Siding: $150 – $250 per square (100 sq ft). Low maintenance, but requires an OSB/Plywood substrate first.
- Fiber Cement (HardiePlank): $2.00 – $5.00 per square foot. Fire-resistant, looks amazing, but it’s heavy and requires specialized saws and masks to cut.
For a 10×12 shed, siding materials alone can range from $600 to $2,500. If you want that Modern Farmhouse look with board and batten, you’re paying for the trim twice, once for the gaps and once for the boards.
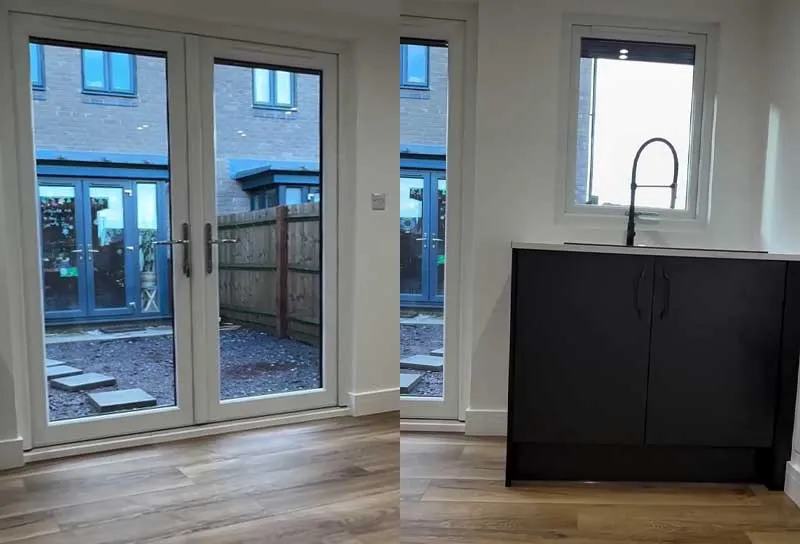
Windows & Doors Come With An Access Tax
You wouldn’t believe how many people plan a whole shed and forget that they need to actually get inside it. A pre-hung exterior door from a big-box store is about $300. But those are designed for houses. For a shed, you often want double doors to get a mower or a workbench inside. Custom-built barn doors are cheap in materials (maybe $150 in wood and hardware), but they are notoriously difficult to seal against mice and driving rain.
If you go for professional-grade shed doors with locking T-handles and heavy-duty strap hinges, expect to pay $500 to $800 for a pair. Windows are another hidden cost. A simple 2×3 single-pane shed window is $80. A double-pane, energy-efficient window (if you’re making an office) is $250. If you want three windows and a door, you’ve just added $1,500 to your simple project.
Standard Steel Entry Door: $300 – $500.
Custom Wood Double Doors: $150 (DIY) – $600 (Pro).
Roll-up Garage Door (6ft): $800 – $1,200 (Requires 12 inches of headroom above the door).
A Forgotten Drip
The drip cap is the most underrated piece of hardware in shed building. It’s a $5 piece of bent aluminum that goes over the top of your doors and windows. Most DIY builds skip it. Without it, water runs down the siding, hits the top of the door trim, and seeps into the header. In five years, your door won’t close because the wood is rotten and swollen. If you see a builder skipping drip caps, fire them on the spot. It’s the ultimate tell for a hack.
The Soft Costs: Permits, Taxes, and the Hidden Paperwork Trail
Here is the ugly truth of backyard construction: The city wants their cut. In many parts of the US, a zoning permit is required just to place a structure, and a building permit is required if it’s over a certain size (usually 10×12 or 12×12). Permit fees usually range from $50 to $300, but that’s not the real cost.
The real cost is the setback requirement. Most towns won’t let you build right on the property line. You might have to stay 5, 10, or even 15 feet back. If you have a small yard, this might force you to build in a spot that requires massive amounts of fill dirt or retaining walls to make it level. I once had a project where the $2,000 permit process forced us to spend $4,000 on a retaining wall just to meet the legal placement.
Zoning/Building Permits: $100 – $500.
HOA Approvals: $0 – $200 (plus the mental tax of dealing with them).
Property Tax Increase: In some counties, a permanent structure on a slab increases your assessed value. This could cost you $50–$100 a year, forever.
Shed vs. Studio
When you’re calling the permit office, don’t use the word shed if you’re building a studio. In their eyes, a shed is for lawnmowers. A studio or ADU (Accessory Dwelling Unit) triggers a completely different set of fire codes and electrical inspections. If you’re just storing tools, keep it simple. If you’re planning to live in it, prepare for a bureaucratic marathon that can add $5,000 to the soft costs of your project before you even buy a nail.
Powering the Beast: The Real-World Costs of Shed Electrification
I’ve seen more DIY disasters in shed wiring than in any other category. Most folks think they can just run a heavy-duty orange extension cord from the back porch and call it a day. That is a one-way ticket to a structure fire or, at the very least, a tripped breaker every time your air compressor kicks on. To do it right, meaning to code, you’re looking at a dedicated sub-panel.
The cost to get power to the shed is largely determined by the distance from your main house panel. If you’re 50 feet away, you’re looking at $800 to $1,500 in materials and labor. If you’re 200 feet away at the back of a sprawling lot, the cost of THHN wire (the stuff that goes in the conduit) and the trenching itself can easily hit $3,000.
You have to bury that conduit at least 18 inches deep, or 24 inches in some jurisdictions. Renting a trencher is about $250 a day, and it is the most back-breaking, miserable saved money you’ll ever earn.
How to do it 2x faster
If you are trenching, don’t just pull one electrical line. Pull a second, smaller conduit for Ethernet or fiber optic cable at the same time. It costs an extra $60 in materials now, but it saves you from having to dig that trench again in two years when you realize your Wi-Fi won’t penetrate the shed’s metal roofing or foil-faced insulation. A connected shed is worth 15% more in resale value than one that’s a dead zone.
Sub-panel (60-amp): $150 – $300.
Trenching (per foot): $5 – $12 (Pro) / $2 (DIY rental).
Interior Outlets/Lights: $300 – $600 (Rough-in materials).
Licensed Electrician Hookup: $500 – $1,200 (The Safety/Compliance Note).
Risk management
Never, ever skip the AFCI/GFCI (Arc-Fault/Ground-Fault) protection. Sheds are inherently damp environments compared to a house. A standard breaker won’t trip fast enough if a mouse chews through a wire or if your miter saw gets a splash of rain. It costs $60 for a dual-function breaker versus $10 for a standard one. Pay the safety tax. It’s cheaper than an insurance claim that gets denied because your shed wasn’t built to National Electrical Code (NEC) standards.
Insulation and Climate Control In Moving from Storage to Studio
If you want to spend more than twenty minutes in your shed during a July heatwave or a January freeze, you need to think about the thermal envelope. Most people slap some fiberglass batts between the studs and call it good. That is a mistake. In a small, unvented structure, fiberglass acts like a wet blanket that traps condensation against your wooden studs, leading to invisible rot.
For a professional-grade finish, I recommend closed-cell spray foam or mineral wool (Rockwool). Spray foam is the gold standard because it acts as both insulation and a vapor barrier, while also adding structural rigidity to the walls. However, it is expensive, and you should expect to pay $3.00 to $5.00 per square foot of wall space. For a 10×12 shed with 8-foot walls, that’s roughly $1,500 to $2,000 just for the foam.
Fiberglass Batts: $400 – $700 (Cheapest, but prone to sagging/pests).
Rockwool (Mineral Wood): $800 – $1,200 (Fire resistant, doesn’t rot, great soundproofing).
Mini-Split HVAC System: $1,200 – $2,500 (The ultimate luxury for a backyard office).
What Perfection Looks Like
Perfection in a shed-office is a vented rainscreen assembly. This involves an air gap between your siding and your house wrap (like Tyvek). It allows the building to breathe so that moisture doesn’t get trapped. Combine this with Rockwool insulation and a mini-split heat pump.
You’ll have a workspace that is quieter and more energy-efficient than your actual house. I’ve built units like this where you could run a table saw inside and the neighbors wouldn’t even hear a hum.
The Non-Obvious Tool Arsenal You Actually Need
You can’t build a quality shed with a hammer and a handsaw unless you have six months of free time. But you also don’t need a $50,000 workshop. Everyone knows they need a miter saw, but nobody tells you about the siding coil nailer. Using a standard framing nailer on siding is a recipe for blow-throughs where the nail disappears into the wood, leaving a hole for water.
Tools of the Trade
Laser Level (360-degree): Don’t rely on a 4-foot bubble level to set your foundation. A $150 green-beam laser level will ensure your skids are perfectly level across the entire span. If you’re off by even 1/2 inch at the base, your roof rafters won’t line up at the top.
Palm Nailer: This is a $50 godsend for tight corners where you can’t swing a hammer to drive a joist hanger nail.
Speed Square (The big 12-inch version): Most people have the 7-inch one. The 12-inch version allows you to mark 2×10 joists and 2×6 rafters in one pass. It’s a massive time-saver.
Structural Screw Driver (Impact Driver): Don’t use a standard drill for 3-inch screws. You’ll burn the motor out. Get a high-torque 18V impact driver.
The mental overhead of tools is real. If you don’t own these, you’re looking at an additional $1,000 to $2,000 in equipment costs. Many DIYers forget to factor this into their cost-to-build spreadsheet. Sure, you can rent them, but the stress of a ticking rental clock usually leads to rushed work and mistakes.
Interior Finishing From Raw Studs to Lifestyle Space
The difference between a lawnmower shed and a shoffice is mostly in the interior cladding. Raw OSB or plywood is the cheapest way to skin the inside, costing about $500 for a 10×12. It’s durable and you can screw tool racks anywhere. But it looks like, well, a shed.
If you want it to feel like a room, you’re looking at drywall or pine tongue-and-groove (T&G). Drywall is a nightmare in a shed. Sheds move, they settle, and they breathe. Drywall is brittle. Within two years, you’ll have cracks in every corner unless you’ve over-engineered your foundation. I always advocate for pine T&G or beadboard. It’s more expensive, about $1,500 to $2,500 for a 10×12, but it handles the natural movement of a wooden structure perfectly. Plus, it smells incredible.
Flooring (Luxury Vinyl Plank/LVP): $300 – $600. It’s waterproof and indestructible.
Cabinetry/Workbenches: $200 (DIY 2x4s) – $1,500 (Pre-fab kitchen cabs).
Lighting (LED Shop Lights): $150 – $300.
The Over-Engineering Fallacy
Most people think that to make a shed better, they need to use thicker wood. They’ll use 2x10s for rafters on an 8-foot span. That’s actually counter-productive. It adds unnecessary weight to the foundation and makes the roof harder to frame.
The secret isn’t thicker wood; it’s better fasteners and blocking. Adding fire blocking (horizontal 2x4s between studs) and hurricane ties (metal clips connecting rafters to walls) does more for structural integrity than using oversized lumber ever will. It’s about the connections, not the bulk.
Custom vs. Pre-Fab: The Time-is-Money Calculation
The most common question I get is: should I just buy the one from the lot down the street? These are the pre-built sheds delivered on a mule (a specialized motorized dolly).
The pros of pre-fab: it’s done in an hour. You pay one price, and they drop it. For a basic 10×12, you’ll pay $4,000 to $6,000. The cons of pre-fab: you’re paying a 30% markup on labor and delivery. You also have no idea what’s behind the siding. Many lot sheds use staples instead of nails and the cheapest possible shingles.
If you have the skills and the time (roughly 40 to 60 man-hours for a 10×12), you can build a custom shed for the same price as a pre-fab, but with twice the material quality. If you hire a guy like me to custom build it on-site, you’re paying for the gold standard of craftsmanship, but expect the price to be $8,000 to $12,000. You aren’t paying for the wood; you’re paying for the years of knowledge I bring to the table so your doors don’t sag in 10 years.
Ghost Expenses Of Maintenance and Mental Overhead
Everyone calculates the cost to build a shed, but almost no one calculates the cost to keep it. A wood-framed structure sitting in a backyard is essentially a buffet for nature. If you aren’t factoring in the lifecycle cost, you’re lying to your bank account. In my experience, a shed requires a maintenance budget of approximately 1% to 2% of its total value annually.
For a $10,000 custom build, that’s $100–$200 a year. This covers the re-caulking of window trim and the inevitable replacement of a door handle or a latch. Then there’s the insurance factor. Most homeowners’ policies cover other structures at about 10% of the main dwelling’s coverage. But, and this is a big but, if you are using that shed for a home business (like a woodworking shop or an office), your standard policy might not cover your $5,000 laser cutter or your $3,000 server rack.
- Paint/Stain (Every 5–8 years): $300 – $600.
- Pest Control (Termite/Ant treatment): $150/year.
- Insurance Rider: $20 – $50/year (for high-value contents).
- Caulking/Weatherstripping: $50 (every 3 years).
No Deck Stains
Do not use deck stain on your shed siding. I’ve seen homeowners think they’re being clever by using leftover semi-transparent stain on T1-11 siding. Deck stain is designed for horizontal surfaces and frequent re-application. On vertical shed siding, it will fade unevenly and offer zero protection against UV-driven wood rot. Use a high-quality, 100% acrylic latex paint. It breathes and it shields the wood from the solar oven effect.
Regulatory Notes and the Vetting Process for Labor
If you aren’t swinging the hammer yourself, you are hiring a shed builder or a general carpenter. The vetting process is where most people lose their shirts. A handyman will charge you $30 to $50 per hour, while a master carpenter or specialized shed company will charge $75 to $125 per hour.
The red flag for me is always the quote. If a builder gives you a flat price on a napkin without a line-item breakdown of materials versus labor, they are either going to overcharge you or, worse, under-estimate and walk off the job when they realize they’re losing money. A professional quote for a cost to build should include the specific lumber grade and the wind rating of the structure.
The vetting question: ask them, how do you handle the transition between the mudsills and the foundation? If they don’t mention flashing or sill seal, they aren’t builders; they’re assemblers.
Ensure they have general liability insurance. If a worker falls off your shed roof and the builder isn’t insured, your homeowners’ insurance is on the hook. That $2,000 labor savings could cost you your house in a lawsuit.
Builder Meets Electrician
If you’re building a high-end studio, your builder needs to talk to your electrician before the walls are closed. I’ve seen beautiful interior tongue-and-groove work ripped out because the homeowner forgot to tell the electrician where the desk was going to be. This re-work is a silent killer of budgets, often adding $1,000 in change orders.


Read Next
 Shed Building Codes and Permit Guide For DIY Builders
 Shed Rafters vs. Trusses Comparison: Pro-Tested DIY Guide
 Shed Roof Guide: How To Frame & Sheathe For Weatherproofing
 Shed Foundation Guide: 11 Durable Builds And Traps To Avoid
 Shed Roof Slope: Guide To Find the Right Weather-Proof Pitch
 Shed Floor Framing: Step-By-Step Guide To A Sag-Proof Base
Framing-to-Finish Roadmap: DIY Guides For Every Step of The Build


