
21 Costly Shed Building Mistakes (& Pro Tips To Avoid Them)
I still remember a “leaning tower of cedar” one of my friends built back in the late 90s. He skipped the permit check and figured a level-ish patch of dirt was good enough for a 10×12 garden shed. Three years later, the floor felt like a trampoline, and a local code enforcement officer was standing in his driveway with a clipboard and a very expensive scowl. He had to tear the whole thing down. That $2,500 mistake taught him and me more about carpentry than any textbook ever could.
Costliest Screw-Ups
- The Foundation is Everything: If you miss the frost line or ignore soil drainage, your shed is on a timer. Use a gravel pad or concrete piers, never just dirt.
- Permits are Non-Negotiable: Zoning laws and setbacks are the difference between a permanent structure and a forced demolition.
- Moisture is the Enemy: Ventilation and drip edges aren’t “extras”; they are the lungs and skin of your building.
- Buy Once, Cry Once: Use hot-dipped galvanized fasteners and pressure-treated lumber for anything within 18 inches of the ground.
- Structural Integrity: Don’t skip Z bracing on doors or shear walls because wind and gravity never take a day off.
Building a shed seems like a weekend warrior’s rite of passage. But the gap between a box that holds rakes and a structural asset that adds $10k to your property value is massive.
Many people fail because they focus on the paint color before the soil density. Or the shingle brand before the roof pitch. In this guide, I’m gonna show you the bone-headed mistakes that ruin sheds and turn dreams of a backyard workshop into a soggy nightmare.
Skipping Permits and Zoning Laws Can Cause A Ghost Shed Disaster
Rework Danger Score: 10/10 (Total Demolition Risk)
Nothing kills the joy of a new build faster than a “Stop Work” order taped to your unfinished siding. I’ve seen homeowners lose $15,000 because they built a gorgeous shed three feet too close to a property line. Zoning laws aren’t just about safety. They’re also about setbacks and easements. In many jurisdictions, if your shed exceeds 120 square feet, you’re in permit territory. Even if it’s smaller, you might have height restrictions that prevent you from building that loft you wanted.
When you ignore the permit office, you’re gambling. If you ever try to sell your home, an unpermitted structure can stall the closing or force a “retroactive permit” fee that’s triple the original cost. Worse, if your shed is over a utility line (gas, water, or fiber-optic), the city has the legal right to bulldoze your work to get to their pipes. Always call 811 before you dig and visit the local building department with a rough sketch.
Accessory Structure Loophole
Many towns allow sheds under a certain square footage to bypass structural permits, but zoning permits (where it sits on the lot) are almost always required. Don’t confuse the two. Even a movable shed on skids usually has to respect a 5-to-10-foot setback from the neighbor’s fence. Check your local “Bulk Regulations” table; it’s the best standard for staying legal.
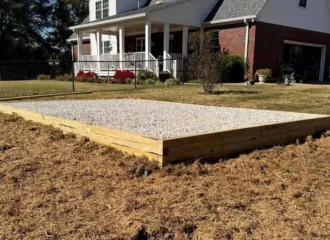
Ignoring Soil Composition and Site Selection Can Lead To A Sinkhole
Rework Danger Score: 9.5/10 (Foundation Collapse)
I’ve walked onto sites where the homeowner wanted to tuck a shed into a private corner that was actually the lowest point of the entire neighborhood. If you build in a depression, you’re essentially building a boat that doesn’t float. Soil composition is the silent killer. Expansive clay swells when wet and shrinks when dry, acting like a slow-motion jack under your floor joists. If you don’t account for this, your shed will “rack”, meaning it tilts until the frame is no longer square.
Site selection isn’t just about where the shed looks good. It’s about hydrology. You need to observe your yard during heavy rain or pour five gallons of water on your intended site. If water pools where you want the shed, you need to either build up the grade with compacted structural fill or choose a different spot.
Early in my career, I built a heavy tool shed on what looked like solid turf. Turns out, it was an old stump-dump. A place where the previous owner buried cleared trees. Two years later, as the wood underground rotted, the shed’s back left corner sank eight inches. We had to crane the whole shed out, dig out the rot, and pour deep concrete piers. It cost the client $2,000 to fix a “free” spot in the yard.
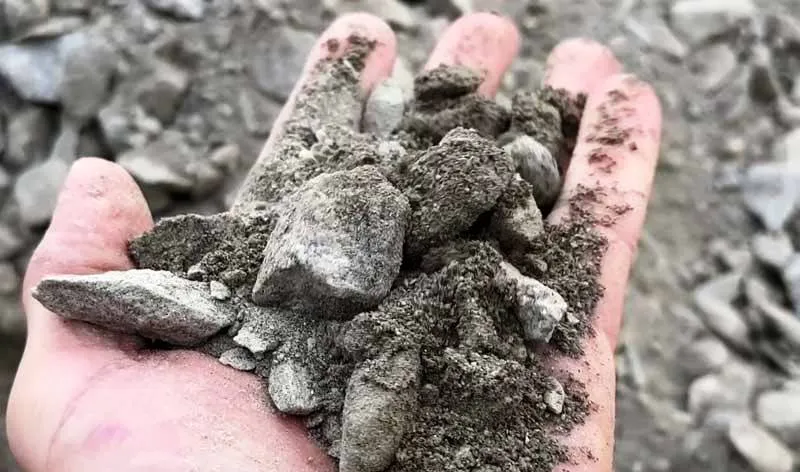
You must excavate the organic topsoil (the grass and black dirt) on your site until you hit the subsoil. Replace it with 4–6 inches of compacted ¾-inch crushed stone. This creates a “capillary break” that prevents moisture from wicking up into your floor system.
Mower Gap and Future-Proofing Regrets
Rework Danger Score: 9/10 (Utility Failure)
You build a 8×10 shed. It fits your current mower perfectly. Then, two years later, you upgrade to a zero-turn with a 54-inch deck. Suddenly, your “custom” shed is a useless box because the door is 48 inches wide. I call this the “Mower Gap” error. It’s the failure to account for human ergonomics and future equipment needs. It’s not just the door; it’s the internal turning radius.
When planning the layout, you need to account for “handlebar swing.” If you have to perform a 12-point turn just to get your snowblower out, you’ll end up leaving it outside, which defeats the purpose of the shed. I always recommend a minimum door width of 60 inches (double doors) for any utility shed.
String Mockup
Before you even buy lumber, go into your yard and stake out the shed’s footprint with string. Then, bring your actual mower and your workbench into that string-box. You’ll quickly realize that an 8×10 feels like a 4×6 once you add swing room for your arms and space to actually walk around the equipment.
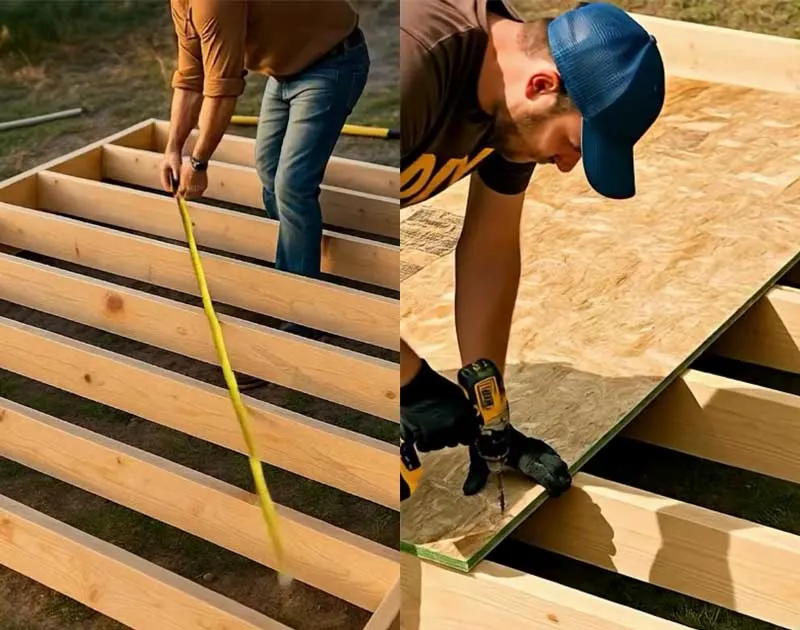
Skimping on Floor Joists Causes Bouncy Floor Syndrome
Rework Danger Score: 8.5/10 (Structural Gutting)
If you walk across your shed floor and the glass jars on your shelf rattle, you’ve failed the deflection test. Most DIY plans call for 2×4 joists 24 inches on center. That’s fine for a playhouse, but for a shed holding an ATV or a heavy cast-iron table saw, it’s a recipe for structural creep. Over time, those undersized joists will take a permanent “set” (a sag), and your floor will become a bowl.
A professional-grade shed floor is 2×6 pressure-treated joists spaced 12 inches on center. This isn’t just about strength; it’s about shear and vibration dampening. When you drop a heavy tool, a stiff floor absorbs the impact; a weak floor telegraphs it to the wall studs, which can eventually pop your siding nails.
Don’t just run joists from side to side. Install “mid-span blocking” (small pieces of joist material perpendicular between the main joists). This prevents the joists from “rolling” or twisting under load and significantly increases the floor’s rigidity without adding the cost of larger lumber.
Frost Heave Can Make Shallow Footings Dance In The Winter
Rework Danger Score: 9/10 (Major Leveling Issues)
In the Northern US, the ground breathes. It freezes, expands, and pushes upward with thousands of pounds of pressure. If your foundation footings aren’t below the “frost line” (which can be 36–48 inches deep in places like Minnesota or Maine), the earth will literally spit your shed out. You’ll wake up in March to find your shed is two inches higher on one side, and the roofline is buckled. This is why “deck blocks” sitting on top of the grass are a recipe for disaster for anything larger than a 4×4 trash can enclosure.
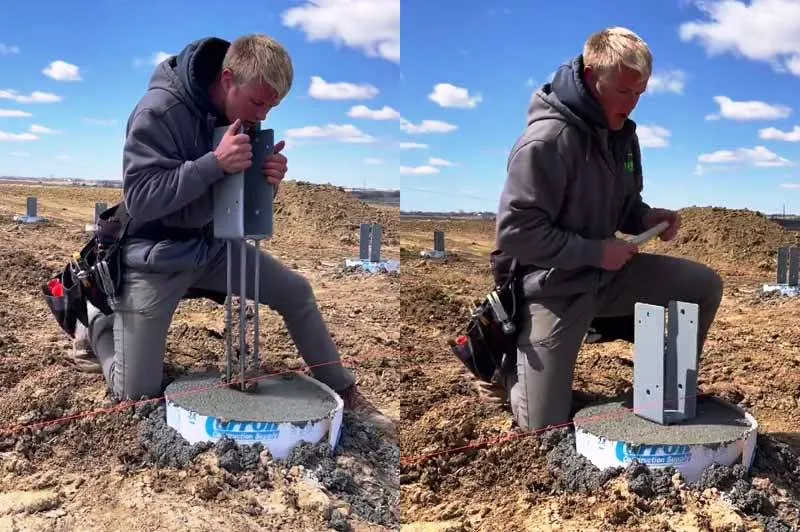
Use Bellied footings or Bigfoot forms. By widening the base of the concrete pier at the bottom (below the frost line), you create an anchor that the frozen soil cannot push up.
Digging 42-inch holes by hand sucks. It’s the part of the job everyone tries to skip. But a shed is only as permanent as its connection to the earth. If you’re too old or too tired to dig, rent a power auger or hire a pro-post company to spin in some helical piles.
Low-Grade Lumber Will End Up Costing A Lot
Rework Danger Score: 7.5/10 (Rot and Infestation)
I once saw a guy build a beautiful shed using whitewood (untreated spruce/pine/fir) for the bottom plates because it was $4 cheaper per board. Within two seasons, carpenter ants had turned those plates into sawdust because they were in direct contact with the concrete. Any wood within 6 inches of the ground or in contact with masonry MUST be pressure-treated.
Using interior-grade plywood (CDX) for exterior sheathing is another big mistake. People think, “I’m going to paint it, it’ll be fine.” It won’t be. Interior glue isn’t waterproof. Once humidity hits those panels, they will delaminate. The layers will peel apart like an old onion. You must use “Exterior” or “Exposure 1” rated panels like LP SmartSide or T1-11.
When you go to the lumber yard, look at the tags on the ends of the pressure-treated boards. UC3B is for “Above Ground” (deck railings). UC4A is for “Ground Contact” (shed skids and joists). If you use UC3B for your foundation, it will rot in half the time. Always check the chemical retention levels on the tag.
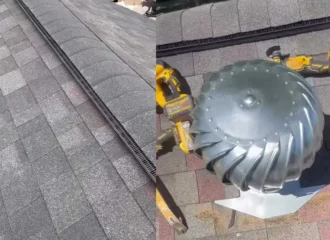
Drip Edge Oversight: How Water Destroys Fascia
Rework Danger Score: 7/10 (Roof/Siding Rot)
This is the most common mistake I see. A drip edge is a simple L-shaped piece of metal that goes under the shingles and over the fascia board. Without it, water doesn’t just fall off the roof; it uses surface tension to curl back under the shingles and run down your expensive wooden trim.
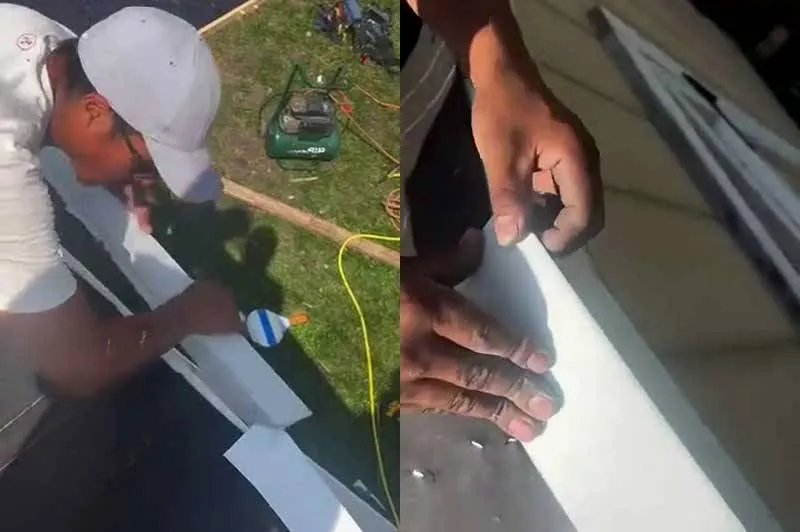
Within three years, your fascia boards will be soft and mushy. You’ll see black streaks of mold, and eventually, the water will find its way into the rafter tails. Fixing rotted rafter tails is a surgical carpentry nightmare that requires stripping the entire roof.
Beginners often cut their rafters flush with the walls to save money or simplify the build. This is a disaster. You need at least a 6-to-12-inch “eave” (overhang) to shed water away from the foundation. If water drips directly onto the base of your shed, it will splash back up onto the siding, causing splash-back rot.
Install your drip edge before your underlayment (felt paper) on the eaves, but after the underlayment on the gables (the rakes). This ensures that any water that gets under the shingles is always channeled “over” the next layer of protection. It’s a 10-minute job that adds 10 years to the shed’s life.
Neglecting Ventilation Will Turn A Shed Into A Hot Box
Rework Danger Score: 6.5/10 (Equipment Rust and Mold)
A shed without vents isn’t a storage unit but a solar kiln. In the summer, interior temperatures can hit 130°F. This heat destroys the seals on your power tools and bakes the life out of your lawnmower’s fuel lines. And it causes “oil bleed” in your lumber. In the winter, your breath and the dampness from a wet mower create condensation on the underside of the roof sheathing. That water drips down, creating a rainstorm inside your shed that leads to rusted tools and moldy walls.
If it smells like a wet basement when you open the door, your shed has zero airflow. Look at the handles of your screwdrivers. If they are pitting, the humidity is too high. In winter, if you see white frost on the tips of the nails poking through the roof, your shed is choking on its own moisture.
The 1/150 Rule
For every 150 square feet of floor space, you need 1 square foot of Net Free Venting Area. If you’re building a 10×10 shed, you need about 96 square inches of venting. Don’t just put one tiny 4-inch vent in the back; you need cross-ventilation to actually move the air.
You need a passive airflow system. A combination of soffit vents (where air comes in low) and ridge vents or gable vents (where hot air escapes high). This stack effect keeps the air moving and the humidity low.
Using OSB Without a Seal Can Mushroom The Edges
Rework Danger Score: 6/10 (Siding Replacement)
Oriented Strand Board (OSB) is a cost-effective material, but it has a fatal flaw: the edges. If the factory-sealed edge is cut and left unpainted, it will suck up water like a straw. The wood fibers will swell (mushroom), and the panel will lose its structural integrity.
I’ve seen budget sheds where the bottom 3 inches of the siding look like wet shredded wheat. This happens because the builder didn’t seal the “end-grain” of the panels after cutting them to size.
When you install siding, never let it touch the ground or the floor. Leave a 1-inch capillary gap between the bottom of the siding and the foundation. Then, take a paintbrush and “prime” the bottom edge of every single panel. This prevents water from wicking up into the wood.
Non-Galvanized Fasteners Eventually Bleed
Rework Danger Score: 7/10 (Structural Failure)
If you use standard “bright” nails or interior screws on the exterior of your shed, two things will happen. First, they will rust, leaving ugly “black streaks” or “bleeding” down your siding that no paint can cover. Second, if you’re using pressure-treated wood, the chemicals in the wood (usually copper-based) will literally eat the steel fasteners through a process called galvanic corrosion.
I’ve seen entire decks and shed floors collapse because the nails literally turned to dust inside the wood. You must use Hot-Dipped Galvanized (HDG) fasteners or Stainless Steel. Electro-galvanized nails (the shiny ones) have a coating that is too thin for the aggressive chemicals in modern PT lumber.
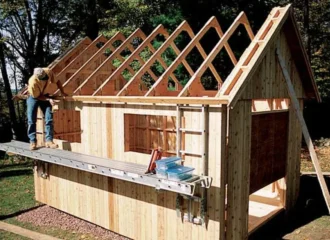
Underestimating Roof Pitch And Snow Load Turns Roofs Into Pizza Boxes
Rework Danger Score: 8.5/10 (Total Roof Collapse)
I once consulted on a modern lean-to shed where the owner wanted a nearly flat roof for that “minimalist” look. He lived in upstate New York. After a single 12-inch snowstorm, the center of his roof was sagging like a wet cardboard box. Most DIYers don’t understand that a roof isn’t just a lid; it’s a structural system designed to shed weight.
A low-pitch roof (anything below a 3:12 pitch) allows water to pool and snow to sit. Water is heavy, but ice is a killer. If your roof doesn’t shed water fast enough, it will find its way under the shingles.
Minimum Roof Pitch
You should never go below 4:12 if you’re using standard shingles. If you want a flatter look, you must switch to roll roofing or EPDM rubber. Using shingles on a flat shed is a mistake that leads to leaks within the first 18 months.
Improper Header Sizing Will Cause a Forever-Stuck Door
Rework Danger Score: 8/10 (Structural Rework)
When you cut a hole in a wall for a door or window, you are removing the studs that support the weight of the roof. That weight has to go somewhere. The header is a horizontal beam that redirects this weight to the side studs. I see many DIYers just nail a flat 2×4 across the top of a 6-foot double-door opening.
Within a year, that 2×4 will sag under the weight of the rafters. Suddenly, your shed doors, which used to have a perfect 1/4-inch gap, are rubbing at the top. A sagging header is almost impossible to fix without tearing off the siding and jacking up the roof.
For any opening over 3 feet, use a minimum of two 2x6s turned on edge, with a 1/2-inch piece of plywood sandwiched in between. This creates a “Flitch Plate” beam that is incredibly resistant to sagging. For a 6-foot garage-style door, I move up to double 2x8s.
The Penny Test: You should be able to slide a penny across the top of your door and window frames, even when there is 6 inches of snow on the roof.
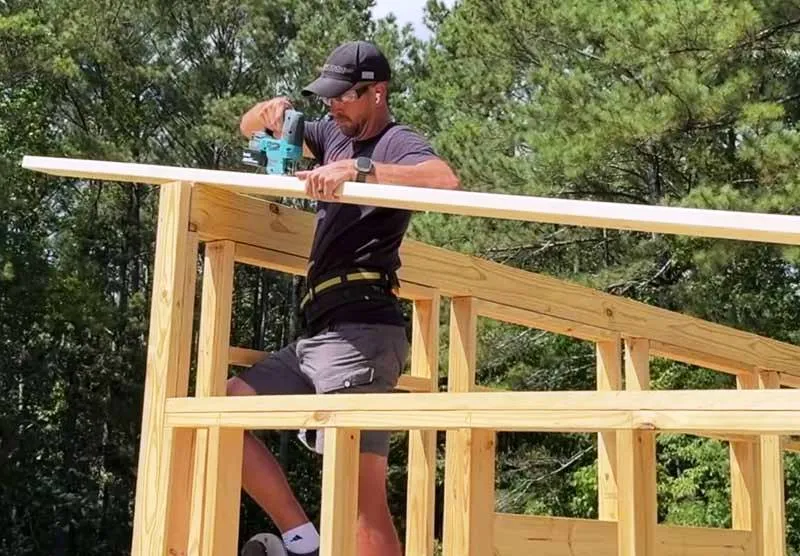
A Shed Without Shear Strength Turns Into A Leaning Tower
Rework Danger Score: 7.5/10 (Structural Instability)
Have you ever seen a shed that looks like it’s leaning to one side? That’s racking. It happens because the builder relied on the nails in the siding to provide all the lateral (side-to-side) strength. In a high wind or a heavy snow load, those nails shear or the wood “ovals” around the nail, and the whole building tilts.
You need Shear Walls. This is usually achieved by using 4×8 structural panels (like plywood or OSB) nailed every 6 inches along the edges. If you’re using horizontal lap siding, you must install “let-in bracing” (a diagonal 1×4 recessed into the studs) or use metal T-bracing.
Hurricane Ties
Rafters and trusses don’t just sit on the walls. They need to be tied down. Using Simpson Strong-Tie H2.5A clips (Hurricane ties) connects the rafter to the top plate of the wall. This prevents the roof from being lifted off by wind uplift. In many coastal states, this is a mandatory safety rule.
Every DIY Door Needs A Sag Savior
Rework Danger Score: 5.5/10
Shed doors are heavy. Gravity is constantly trying to pull the latch side of the door down toward the ground. If you just build a “picture frame” door, it will sag within six months.
You must use a Z-Brace. But here’s the trick most DIYers miss: The diagonal part of the Z must go from the bottom hinge to the top latch side. This puts the brace in compression. If you run it the other way, you’re putting the weight on the nails (tension), and it will eventually pull apart.
For extra-wide doors, use “Through-Bolts” for your hinges rather than just screws. A carriage bolt with a washer on the inside of the frame will never pull out, no matter how many times the wind catches the door and slams it open.
Misaligned Threshold Heights Create A Permanent Tripping Hazard
Rework Danger Score: 4/10 (Safety/Ergonomics)
You build your floor frame, you put down your 3/4″ decking, and then you build your door. Suddenly, you realize there’s a 4-inch “lip” between the ground and the shed floor.
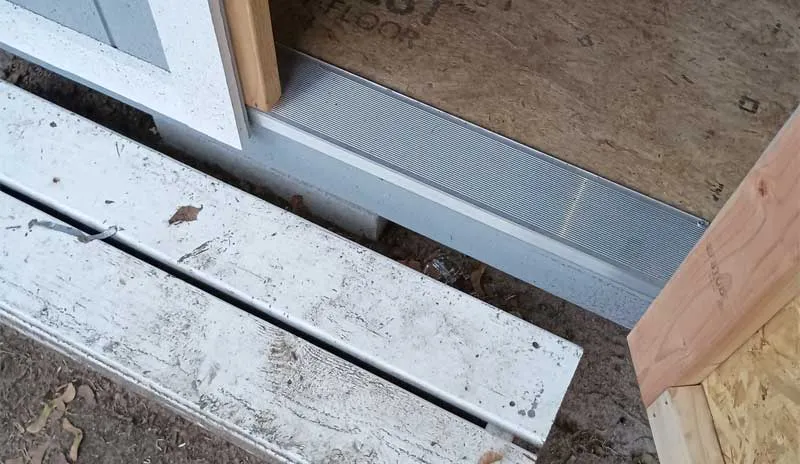
Try pushing a 500-lb lawn tractor or a heavy rolling toolbox over a 4-inch bump. It’s a recipe for a thrown-out back or a damaged machine. A high threshold is also a primary trip hazard. If you’re carrying a heavy piece of lumber or a power tool, catching your toe on a 4-inch ledge can result in a trip to the ER.
Always plan for a recessed threshold. I like to notch my floor joists at the door opening so the door sill sits lower than the rest of the floor. This allows you to build a ramp that meets the floor flush, or near-flush, preventing that annoying “thump-thump” every time you enter.
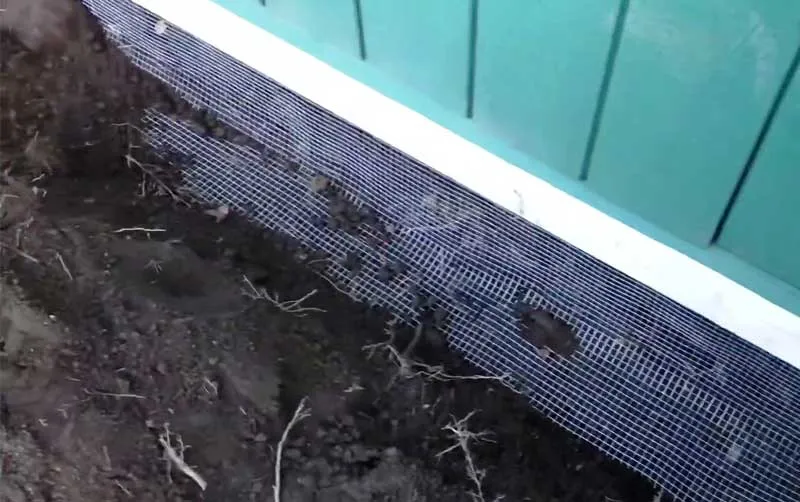
Missing Vapor Barrier Triggers A Silent Killer
Rework Danger Score: 7/10 (Internal Rot)
If you are building on a concrete slab, moisture from the earth will wick through the concrete (which is porous like a sponge) and rot your bottom plates and anything sitting on the floor.
Even on a wooden floor, moisture rising from the damp ground under the shed will condense on the underside of your plywood floor. This leads to delamination and that “musty shed” smell that ruins your holiday decorations and power tool cases.
Always lay a 6-mil poly vapor barrier over the ground before you build your floor frame, or under the gravel of your pad. If you’re building on a slab, use a Sill Sealer (a thin foam strip) between the concrete and your pressure-treated bottom plate. This breaks the capillary bridge and keeps the wood bone-dry.
Incorrect Shingle Offset Leads to Leaking Roofs
Rework Danger Score: 7/10
Roofing looks easy until you have a leak. The most common mistake I see is lining up the seams. If the vertical gap between two shingles on the first row is in the same spot as the gap on the second row, water will run straight through both layers and onto your wood deck.
You must “stagger” your shingles. For 3-tab shingles, this usually means cutting 6 inches off the start of every successive row (Row 1: Full shingle; Row 2: Cut 6 inches; Row 3: Cut 12 inches, etc.). This creates a stair-step pattern that ensures every vertical seam is covered by at least one solid layer of asphalt.
Staples are for amateurs. They blow through the shingle too easily. Use 1-1/4″ hot-dipped galvanized roofing nails and make sure the head is flush and not buried in the shingle.
Solar Burn Can Destroy Shingle Lifespan
Rework Danger Score: 4.5/10
Most DIYers worry about the rainy side, but the “sunny side” is where the most damage happens. In the Northern Hemisphere, the South-facing roof slope will reach temperatures 40% higher than the North-facing slope. This “thermal cycling” causes the asphalt in the shingles to become brittle, lose its granules, and crack.
If you have the choice, orient your shed so the largest roof plane faces North. If you must have a large South-facing roof, you must use a “High-Reflectance” shingle (Cool Roof rated) or a light-colored metal roof.
Dark Estate Gray or Black shingles on a South-facing roof in a yard with no shade will fail in 12 years, even if they have a 30-year warranty. The manufacturer will blame inadequate ventilation, and they’ll be right.
Tight Fit Disaster: Forgetting Expansion Gaps
Rework Danger Score: 5.5/10
Wood is a living material. It breathes. When the humidity hits 90% in July, a 4×8 sheet of plywood or OSB can grow by as much as 1/8 of an inch. If you butt your siding or roof sheathing panels tight against each other with zero gap, that wood has nowhere to go but out. This creates buckling or “pillowing” in the middle of your walls.
I’ve seen perfectionist DIYers spend hours making sure every joint is hair-tight, only to call me six months later because their shed looks like it’s warping. It’s not warping; it’s just crowded.
Use a 8d (8-penny) nail as a spacer. When you’re hanging siding or roof sheathing, stick a 8d nail between the panels before you drive your fasteners. This gives you an approximate 1/8-inch expansion gap.
You can also use H-Clips on the edges of the roof sheathing between rafters. They ensure a perfect expansion gap, and they provide structural support so the “weak” edge of one board doesn’t flex more than the board next to it.
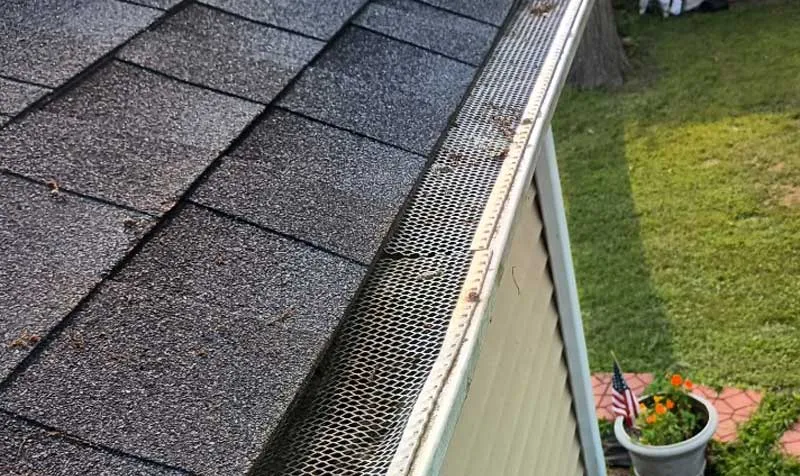
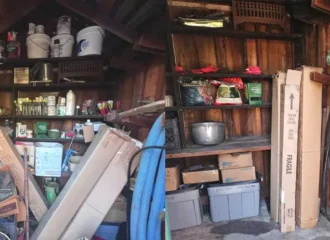
Neglecting Critter-Proofing Leads To A Rodent Hotel
Rework Danger Score: 5/10 (Sanitation and Damage)
If you build a shed on a wooden floor frame, you’ve just created a dry, predator-free “crawlspace” for skunks, raccoons, and rats. Most builders leave the area under the shed open. Within weeks, critters will begin nesting in your floor insulation or chewing on your stored fertilizer bags.
I’ve had to crawl under sheds to remove dead opossums, and trust me, it’s a smell that never leaves the wood. You need a physical barrier.
Beginners use chicken wire. Don’t. Raccoons can rip chicken wire like it’s tissue paper. You need 1/4-inch Hardware Cloth (a heavy-duty galvanized mesh). Bury the mesh 6 inches into the ground and attach it to the bottom rim joist of your shed. This L-shaped burial prevents animals from digging under.
The Maintenance Myth: Failing to Plan for Annual Structural Inspections
Rework Danger Score: 4/10 (Initial) / 9/10 (Cumulative)
The biggest lie in the backyard construction world is the phrase “maintenance-free.” I’ve seen $20,000 composite-sided luxury studios rot from the bottom up because the owner believed the marketing brochure. A shed is an island in a sea of moisture and pests. If you build it and forget it, you’re basically starting a countdown to its demolition.
Your Annual 5-Point Check
- Splash Zone: Look for back-splash dirt on the siding. If you see mud, your drainage is failing.
- Door Reveal: Check the gap at the top of the door. If it’s wider on one side, your foundation has shifted.
- Fastener Bleed: Look for streaks of rust. It means your galvanized nails are failing, and the structural integrity is dropping.
- Critter Scratch: Check the corners for chew marks. A small hole today is a raccoon nursery tomorrow.
- Shingle Curl: If the edges of your shingles are lifting, they’ve lost their seal and are vulnerable to the next wind storm.
Shed Health Checkup Quiz
Use this quiz to score your shed’s health. Rate your shed from 1 to 10 for each of the following questions.
- Is your foundation below the frost line or on a 6″ compacted gravel pad?
- Is all lumber within 6″ of the ground UC4A Pressure Treated?
- Is there a metal drip edge on all four sides of the roof?
- Are there at least 2 vents (High/Low) for cross-flow?
- Are all exterior nails/screws Hot-Dipped Galvanized?
- Does water flow away from the shed on all sides?
- Does the door have a diagonal Z-brace (Bottom hinge to Top latch)?
- Have you confirmed setbacks with the local zoning office?
- Are all OSB/Plywood edges primed and painted?
- Are there hurricane ties connecting rafters/trusses to walls?
Add up your scores for all questions to get a total out of 100.
What your score means:
- 90-100: Master Builder Status. Your shed will outlive your house.
- 70-89: Solid DIY. Expect some minor maintenance in 5 years.
- 50-69: At Risk. You likely have invisible rot starting in the foundation or roof.
- Below 50: “Rework Danger” Zone. Take corrective action before the next storm season.
The biggest mistake isn’t a crooked cut or a missed nail; it’s the Arrogance of the Amateur. Most people assume that because a shed is small, the laws of physics don’t apply. But gravity and moisture don’t care about the square footage of your building. They are relentless.
The most important parts of your shed are the ones you can’t see once it’s finished. The vapor barrier under the gravel or the hot-dipped coating on the nails. The Z-brace hidden behind the door trim, and the 42-inch deep concrete piers. If you “over-build” the skeleton, the skin is easy to maintain.
You’ve got the roadmap now. Your next step is to grab a clipboard, walk out to your backyard after the next heavy rain, and actually look at where the water goes. That one observation will save you more money than any coupon ever could. This is the first step to building a rock-solid foundation.


Read Next
 37 Pro-Tested Tools For Building DIY Sheds That Last
 Shed Foundation Guide: 11 Durable Builds And Traps To Avoid
 9 Pro-Tested Shed Ventilation Ideas For DIY Builds
 11 Pro Shed Organization Ideas To Maximize Storage Space
 Shed Rafters vs. Trusses Comparison: Pro-Tested DIY Guide
 How To Select The Best Building Site For A Shed
Framing-to-Finish Roadmap: DIY Guides For Every Step of The Build


