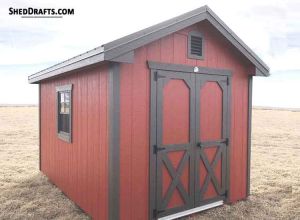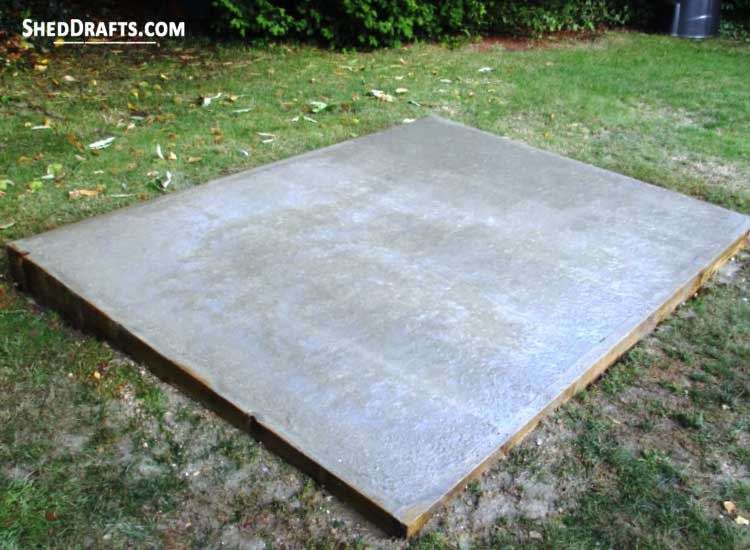
A poured-concrete slab foundation is the most stable and durable base you can design for your shed.
The slab is usually built about four to six inches in thickness. Still, local building regulations may require a different depth based on your building’s uses.
This type of foundation is also known as slab-on-grade, as the ground surface is called the grade.
Now let us look at the steps in building a DIY concrete slab foundation for your shed.
Step 1: Estimate The Concrete Mix Needed For Your Slab
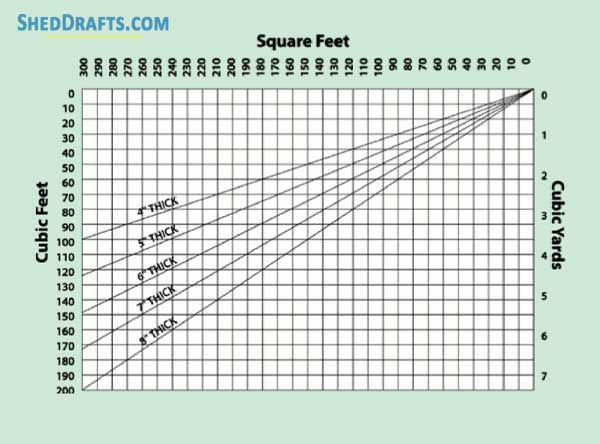
You can estimate how much concrete mix will be needed for constructing your slab by using the chart below. This will help you calculate the cost of building the concrete slab.
The top line in the graph represents the area covered by the shed in square feet. The left and right axes give you the approximate concrete mix required in cubic feet and cubic yards to create a slab of different thicknesses.
For e.g., in the chart, you can see that to build a 300 square-foot slab of 4-inch thickness will require about 100 cubic feet of concrete.
A concrete mix bag of 80 pounds can create about 2/3rd of a cubic foot. So you can order as many bags as will be needed in advance.
Also, add up the concrete that might be needed to build the forms by multiplying their dimensions (width x length x height).
It is always a good idea to order about 10 percent extra concrete than needed to prevent shortfalls during construction.
Step 2: Gather the Materials and Tools Needed
You will need these supplies and tools to build a concrete slab base.
- Form boards
- Measuring tape
- 2×4 or 1×4 stakes
- Line level
- Mason’s string
- Gravel
- Compactor
- Earth-moving tools
- Shovel
- Duplex nails
- Rebar
- Rebar chairs
- Wire chairs or Bricks
- Wire ties
- Wire mesh
- Wheelbarrow
- Sledgehammer
- Screed
- Concrete Finishing Broom
- Concrete Float
- Jointing trowel
- Edging trowel
- Concrete Mix
Step 3: Mark The Foundation And Prepare The Ground
- It is vital to prepare the soil and ensure proper drainage before you pour the slab.
- If you live in a cold region, then you must dig a ditch at least half as deep as the frost line. It is usually enough to dig a shallow six-inch deep ditch in warmer regions.
- Before you start digging, check that there aren’t any underground utility lines.
- Mark the boundaries of the foundation by driving stakes into the ground at the four corners and connecting them with strings.
- After you have excavated the ditch, compact the soil at the bottom and cover it with a 4-inch layer of gravel. Then compact the gravel.
- If your area receives a lot of rain, then place a vapor barrier before pouring the gravel.
- To design the footings along with the slab simultaneously, just dig deeper around the slab perimeter, so the concrete is thicker in this region. This will help support the building’s weight more effectively.
Step 4: Set Up Formwork For The Perimeter
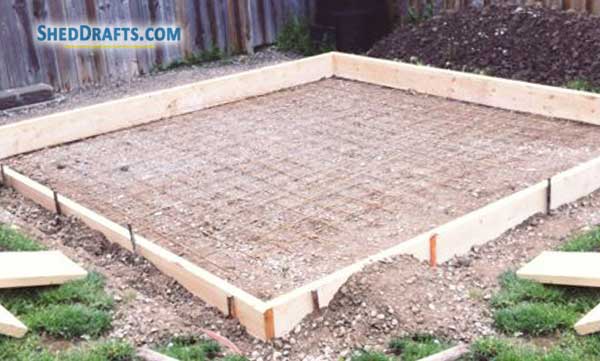
- Construct the perimeter for the slab using form boards that will hold the concrete as it dries.
- For concrete slabs up to 6 inches in thickness, 2×8 boards are enough. For thicker slabs that need more height above the grade, you can use 2x10s or 2x12s.
- Check that each form board is plumb and adjust their alignment with a spirit level and mason’s string after placing them on the gravel.
- Use scrap 2×4 boards to fasten the formwork into place.
- Once all form boards are in place, double-check each one once again to confirm that the tops of all boards are at the same level.
Step 5: Lay Down Reinforcement Metal Mesh
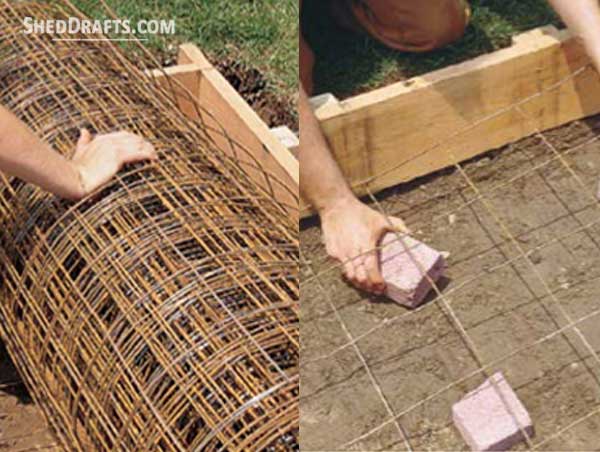
- Reinforce your concrete slab with rebar and steel welded wire mesh. This increases the durability of your shed’s base.
- You can purchase rolls of welded wire and lay them out on the gravel bed supported on short wire chairs. Bricks can also be used instead to hold the wire above the gravel or soil.
- Use wire ties to fasten multiple rolls together and cover larger areas.
- Integrate the footings into the slab directly by installing rebar inside the footings and attaching them to the wire mesh with wire ties.
- Fasten J-bolts at six-inch intervals inside the concrete footings.
- This can be used later to secure sill plates with each footing during shed construction.
Step 6: Pour The Concrete Slab And Footings
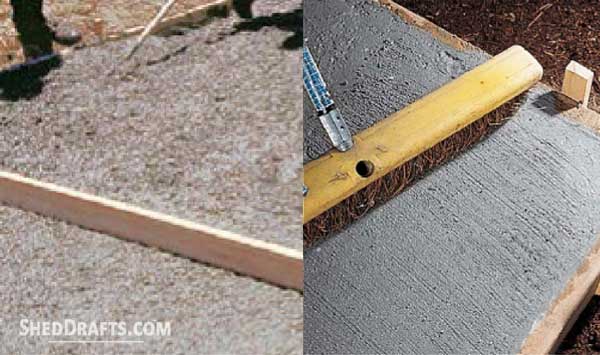
- Slabs with large surface areas should be crafted in sections divided by control joints.
- As the mix is being poured, use shovels and hoes to spread the concrete evenly.
- Use a 2×4 screed to remove any excess concrete and cover up hollow areas.
- The footings can be crafted along with the slab by pouring concrete deeper around the boundaries of the slab.
- Maintain the wetness of the concrete for a couple of days as it cures.
- Smoothen the slab surface with a broom to get a better anti-slip texture.
A concrete slab base is ideal for any kind of shed. Although it is a bit complex and expensive to build compared to other bases, it is the sturdiest foundation.
Once the base is built, you can move ahead to building the floor frame for your shed.