Once you have built a good foundation, the next important step in building a shed is to construct the floor.
The shed floor framing can be completed in a couple of days, and you can save money by gathering all required supplies and blueprints before you begin.
Step 1: Find Out Local Building Council’s Regulations On Floor Framing
Each town or county can have its own building regulations about the materials, measurements, and framing methods used for constructing floors. Some areas will require a permit if your shed’s floor area is larger than a particular limit.
You may need to tie down your floor frame by anchoring it to concrete posts in order to comply with local codes. Or you may have to use timber of a specific thickness for the framing members.
It is best to contact a local building inspector or visit your area’s planning website and learn about all applicable by-laws before you start work.
Step 2: Collect All Required Tools And Supplies
Here is the list of materials that would be needed for crafting the shed floor.
- Pressure-treated timber boards and plywood sheathing
- Galvanized screws and nails
- Wood screws
- Joist hangers
- Construction Adhesive
- Carpenter’s pencil
- Framing Hammer or Nail gun
- Framing Square
- Jigsaw
- Miter saw
- Circular Saw
- Measuring Tape
- Spirit Level
- Safety goggles
Step 4: Construct The Outer Floor Frame
The design of your shed’s floor frame will depend on what kind of foundation you have built and how high you want the floor to be.
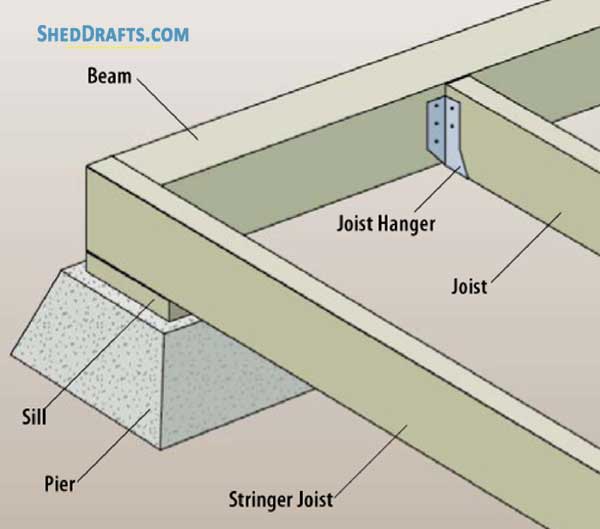
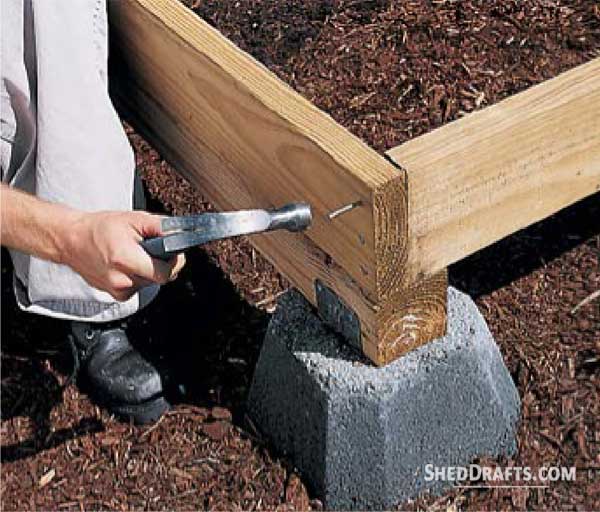
If your shed’s foundation consists of concrete piers or blocks, then you will have to fasten the floor members to the concrete sections with framing connectors.
This will keep the floor at the lowest height. If you wish to further elevate the floor, then posts made of 4×4 timber can be attached to the concrete with metal connectors. And then attach the joists to the posts.
If you are installing the floor frame on skids, then you don’t need a sill plate. But if you will be installing the frame on any concrete base, installing a sill plate first is recommended.
Concrete usually cures a little unevenly, and setting the joists directly on it can cause different parts of the floor to be of different heights.
Adding a sill allows you to remove any unevenness in the foundation and have a level base for your shed.
Installing A Sill On Concrete Piers
- Use pressure treated 2×6 timber board for crafting the sill.
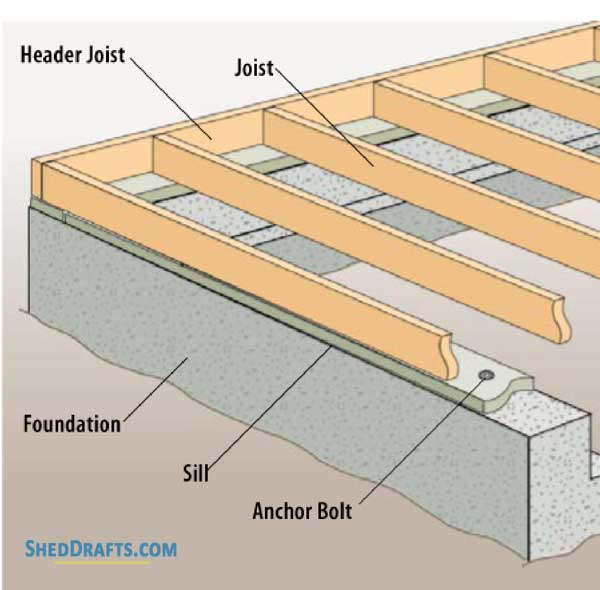
- First, clean the foundation of any dust or debris and install the sill over it.
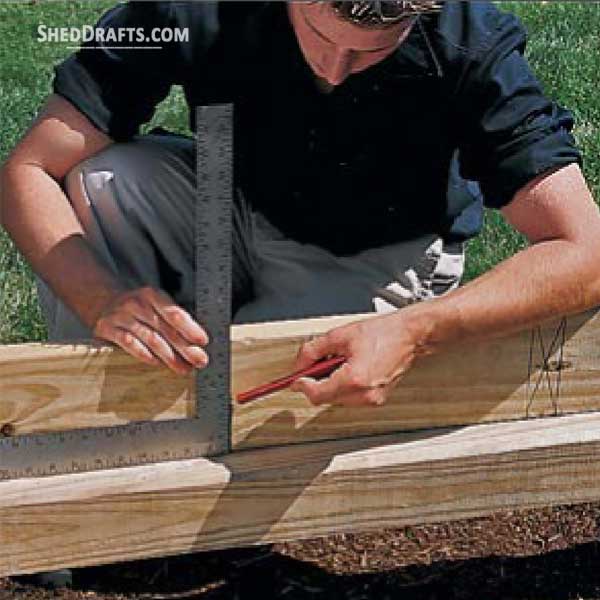
- Use a speed square to mark the points for installing anchor bolts.
- Measure and check that the mark for the bolt is evenly centered in the concrete and drill into the sill plate at that point using a 5/8 bit.
- You can install sill sealer between the foundation and sill to improve energy efficiency and fill irregularities.
- Clean the anchor bolts of any leftover concrete and install the sill.
- Attach a washer on each anchor bolt and check the sill is square.
- Then use a socket wrench to tighten the nuts on the anchor bolts.
Step 5: Build The Frame With Header, Rim And Floor Joists

- Determine the number of joists that will be needed for your shed’s floor layout.
- Usually, joists are spaced around sixteen inches apart.
- This allows the sheets of plywood to correctly align with the center of the joists.
- To determine the length of joists needed, subtract the thickness of the rim joists.
- Craft all the joists beforehand by cutting boards to proper measurements as per your shed’s dimensions.
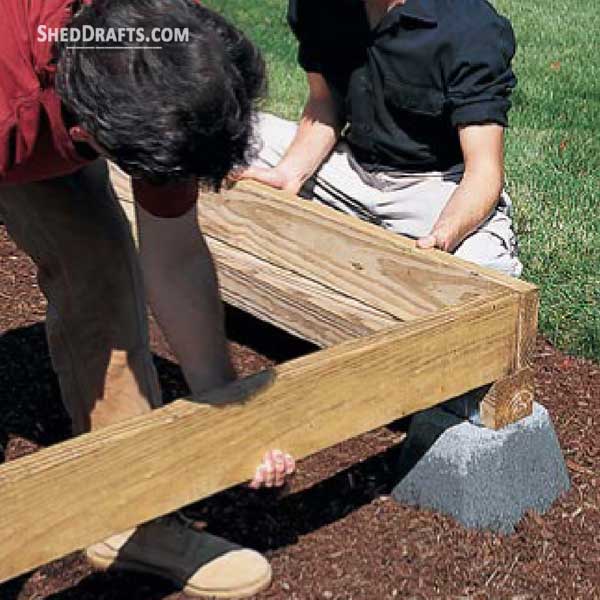
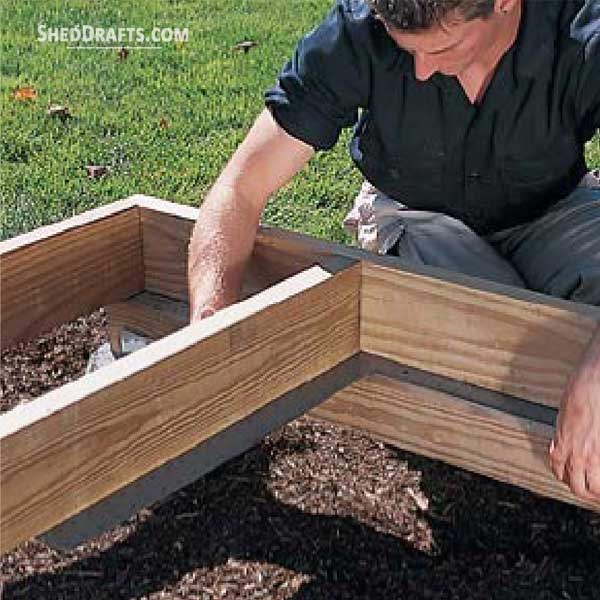
- Set the rim joists over the sill plate and square them.
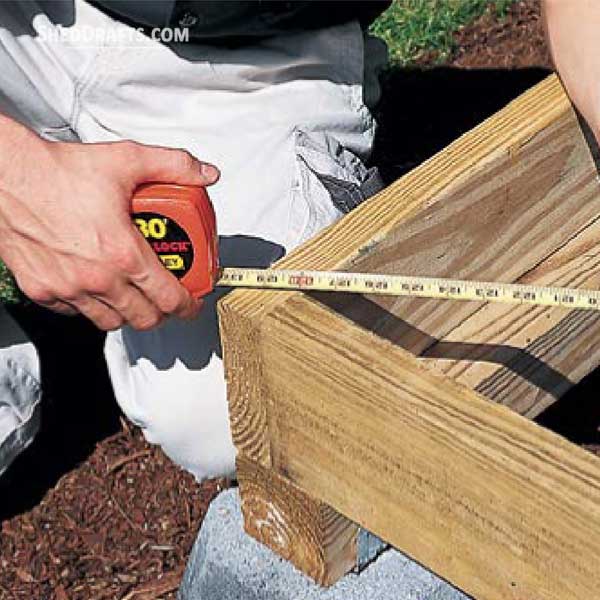
- Attach the perimeter joists in place and check the frame is still square by verifying diagonals are equal in length.
- Secure the end joists and rim joists with galvanized nails and check they align with the sill correctly.
- Mark the layout of the joists on the header boards.
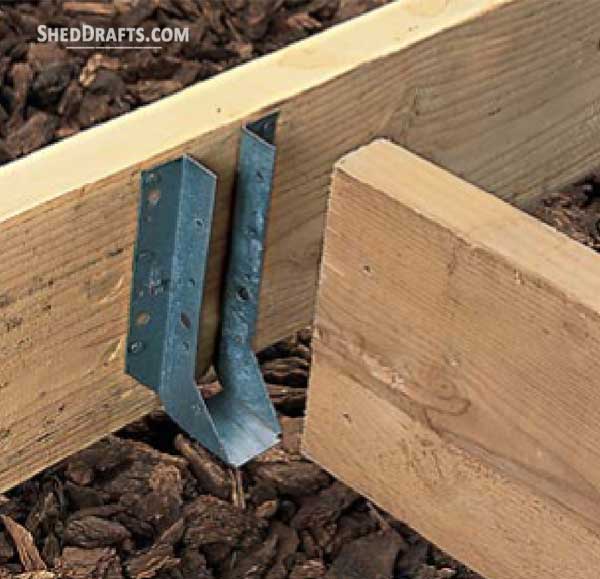
- Test fit the joists and check for squareness, then end-nail each joist to the header joists using metal joist hangers.
- Your final floor frame will consist of a perimeter of header joists that secure a set of floor joists spaced about 16 inches apart.
- If you have a shed that spans longer than 10 feet, it is better to install a girder at the middle of the frame to reinforce the floor.
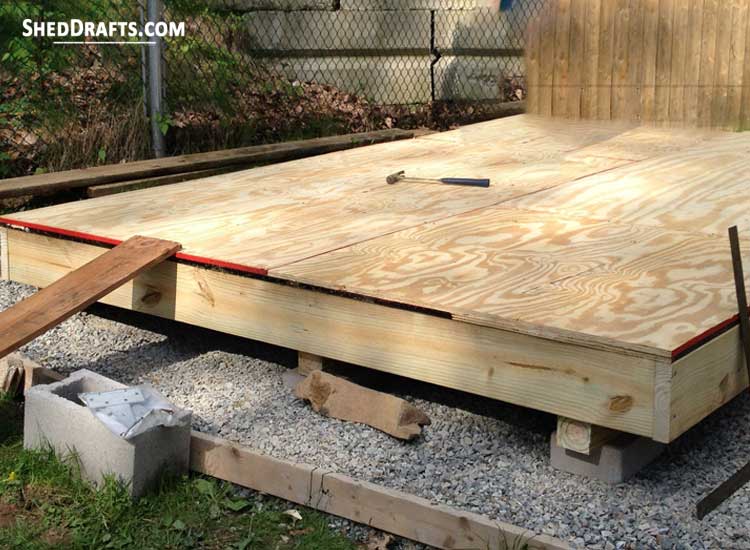
Step 6: Attach Plywood Sheeting To Floor Frame
- Use at least 3/4 inch thick CDX plywood for sheeting the floor joists.
- If you will be storing heavy equipment in your shed, then it is recommended to lay two layers of plywood.
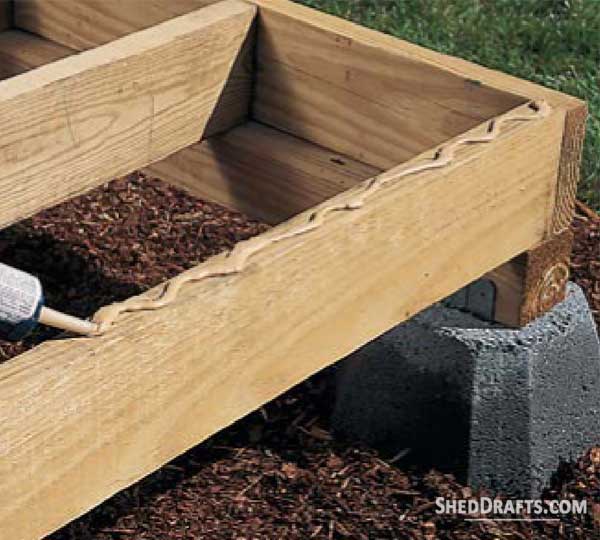
- Test fit and cut out all plywood sheets to the required measurements taking care that they fit the joists correctly and align on the center.
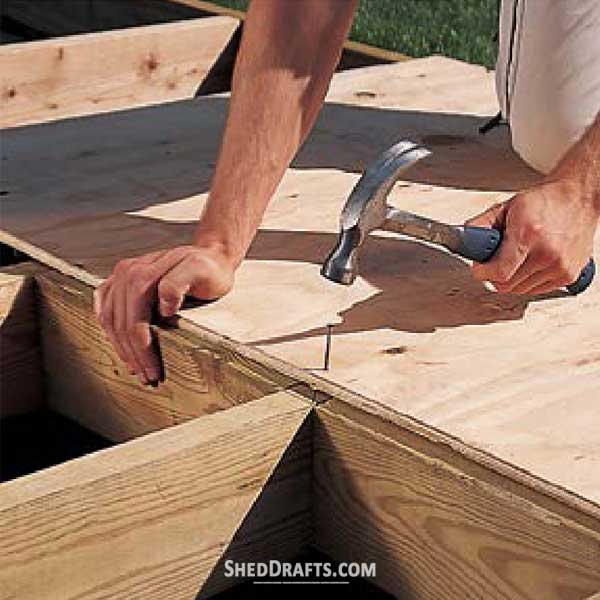
- You can nail the sheets to the joists using deck nails, but for additional durability, it is best to apply construction adhesive and use screws to secure them.
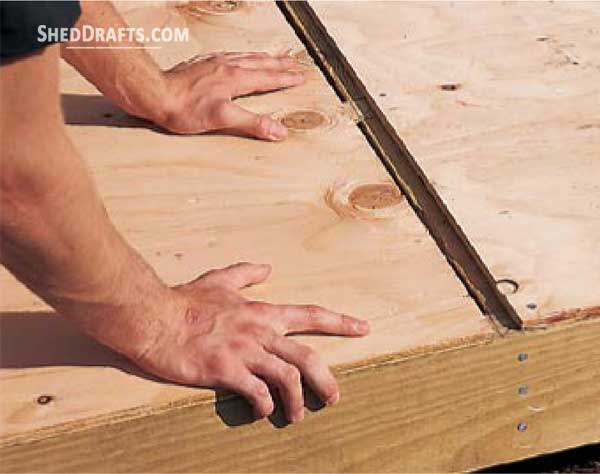
- If you use square edge panels, then keep an 1/8-inch gap between adjacent sheets to allow them to expand and avoid buckling as the seasons change.
- Secure the plywood panels such that the joists are perpendicular to the sheet’s face-grain.
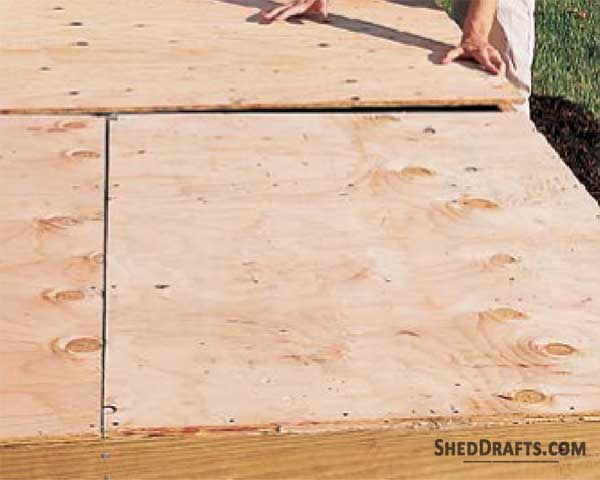
- Install screws every 12 inches of the plywood edges while staggering the joints.
- Start installing sheets from one end of the floor frame and complete one row of sheets.
- Then fasten the next line of sheets and so on.
- If you don’t use adhesive, then install screws or nails at intervals of 6 inches along the plywood sheets.
Creating a durable shed floor will ensure that your building requires minimum maintenance and will save you money in the long term. Now we can move on to read about wall framing and how to assemble a lovely shed.