Let us now look at the three most common techniques used to build shed walls. Namely, the stick method, timber framing or post-and-beam framing technique, and the pole method.
Commonly, sheds are crafted using the stick framing method as this is the quickest and simplest wall framing system.
However, sheds larger than 200 square feet will definitely benefit more from using the post or timber framing methods. These methods make larger sheds more durable and increase the life of your building.
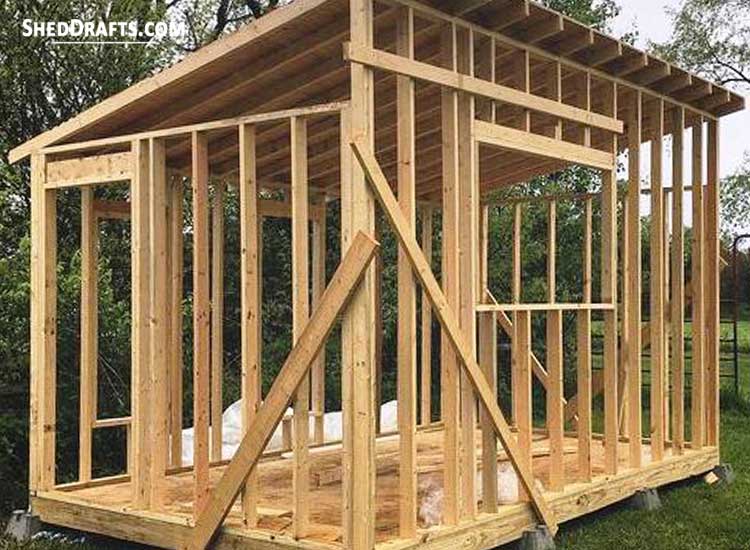
Stick Wall Framing Technique
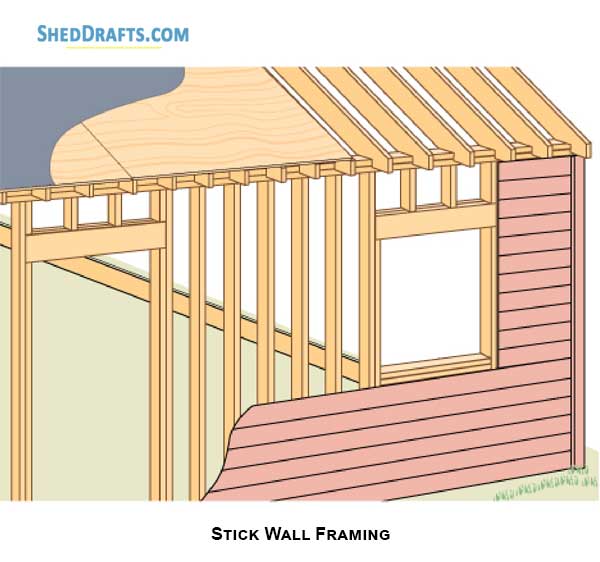
In this method, the walls are built using 2×6 or 2×4 lumber boards known as sticks, set about 16 inches apart. The frame consists of vertical studs, horizontal bottom and top plates, and rough openings for the windows and doors. Headers are installed above the window and door openings.
Standard pressure-treated lumber is usually used in the stick-framing method, but locally available timber like spruce, fir, redwood, or cedar can also be used based on your budget. The wall is usually framed on the deck floor and, later on, hoisted into place.
Timber Or Post-and-Beam Framing
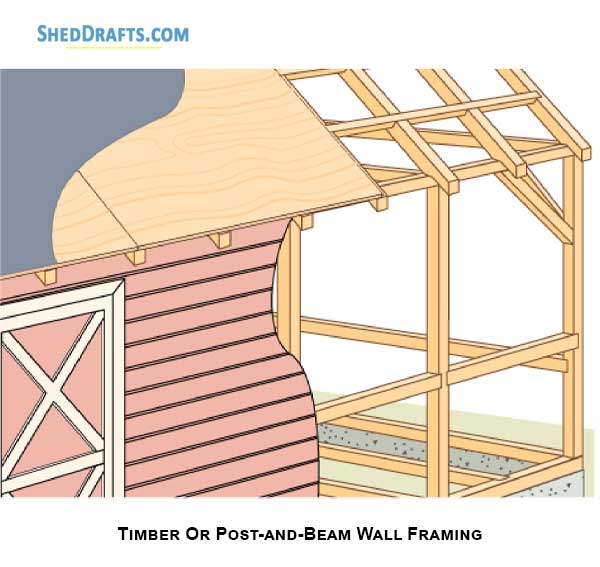
In timber framing, horizontal beams and vertical posts are secured together to create the wall frame. A post-and-beam wall frame usually has lesser framing members compared to a frame built using the stick method.
However, it uses bigger and heavier members that are more challenging to raise and align into position. In this technique, the framing members are crafted using 4×6 or thicker lumber boards.
The beams and posts are commonly connected using mortise and tenon joints. But as these joints can be tricky to construct, you can use metal fasteners like post caps and beam connectors instead.
While timber framing is much more complex and costlier compared to stick framing, it also results in a much sturdier building that will stand the test of time.
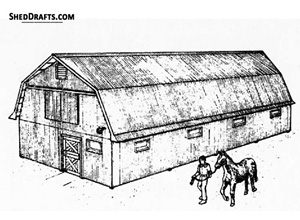
Pole Framing
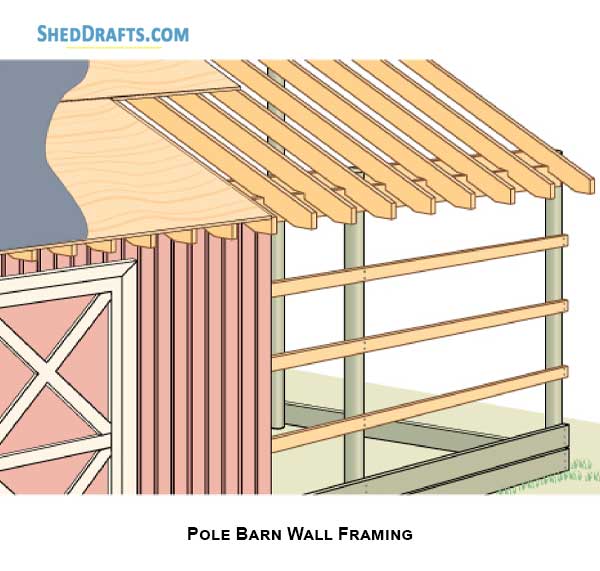
The pole framing method is commonly used for building very large structures like barns and livestock housing, which require a huge central open space.
Square posts or round poles that are driven vertically into the foundation are used as the primary framing members while crafting these walls. The first way is to install round poles and secure nailing boards at equal distances on these poles. Then attach siding to these nailers.
The second way is to install square posts and fasten pre-framed wall sections between these posts.
The poles are initially crafted to a length taller than the desired height. After the wall frame has been fully crafted then, the excess lumber is sawed off to make the top of each pole level with the wall.
Materials and Tools Needed
- Long spirit level
- Framing square
- Combination square
- Carpenter’s pencil
- Measuring tape
- Galvanized nails
- Circular saw
- Hammer
- Safety goggles and work gloves
- 2×4 or 2×6 lumber
Easy Stepwise Instructions For Stick-Built Wall Assembly, Positioning, And Attachment
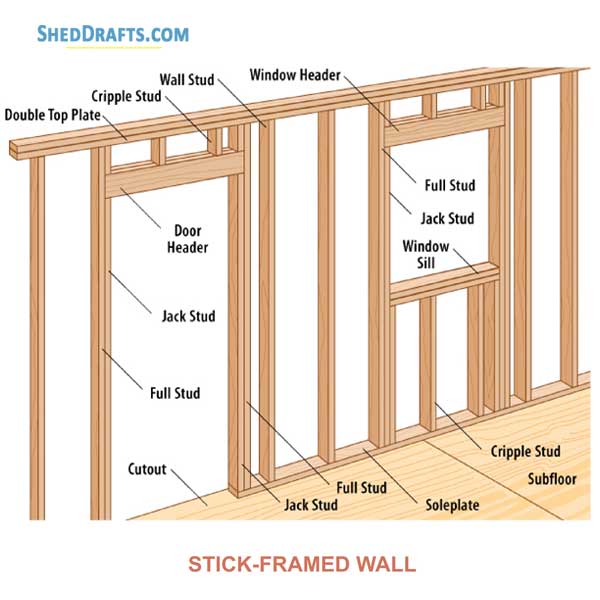
The base of the wall will be a horizontal lumber board (usually 2×4) called the shoe or soleplate.
Studs are fastened vertically onto the shoe at 16-inch intervals. Two more 2x4s cap the upper part of the wall, which is called the top plate.
The door and window frames have a header and are supported by smaller studs.
There are three types of studs.
- King studs run the full height of the wall from the top plate to the sole plate.
- Trimmer or jack studs run from the sole plate to the door or window header on either side of the rough opening.
- Cripple studs are short members used to fill the gaps above and below rough openings for windows.
Here are the steps to build a shed wall frame.
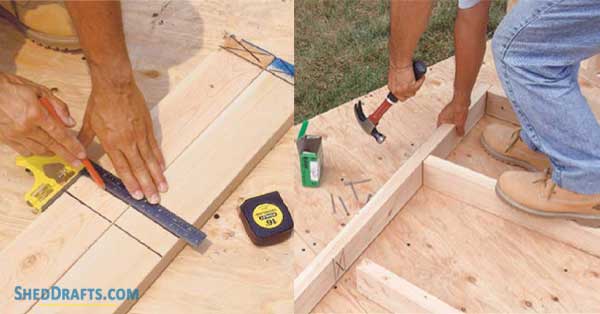
- First, create markings for the studs on the top plate and shoe plate, as shown in your plans.
- Lay out the framing members on the shed floor.
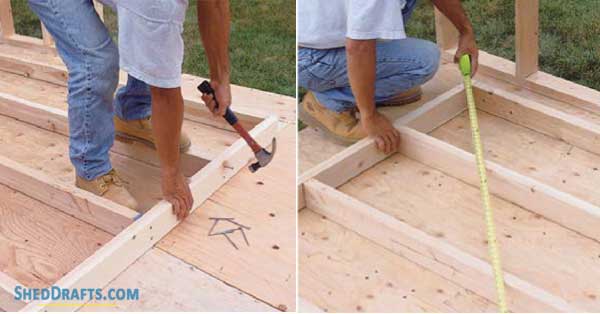
- Align each stud in place and fasten it to the soleplate using galvanized 16d nails.
- After all, studs are nailed to the soleplate, then nail them one by one to the top plate after checking each one is accurately square.
- Check that both the diagonal lengths of the wall frame are equal to verify it is correctly square.
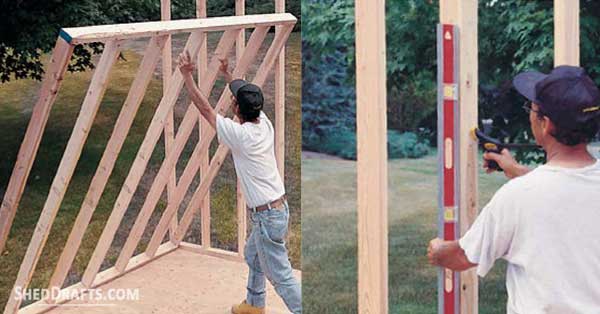
- Hoist each wall frame into place and nail their sole plate into the shed floor.
- Use a spirit level to check the studs are accurately plumb.
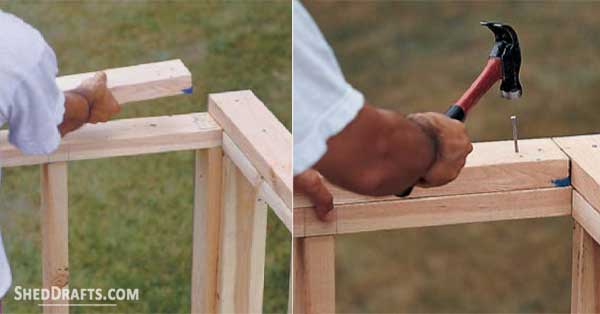
- Now fasten the second top plate (cap plate) by staggering the joints over the corners so the cap plate of one wall overlaps the adjacent wall.
- Secure the cap plates using 16d nails.
- Remove any temporary bracing and install sheathing on the wall frames.
Aligning And Reinforcing Studs At Corners
You can connect the studs at the wall corners in three different configurations.
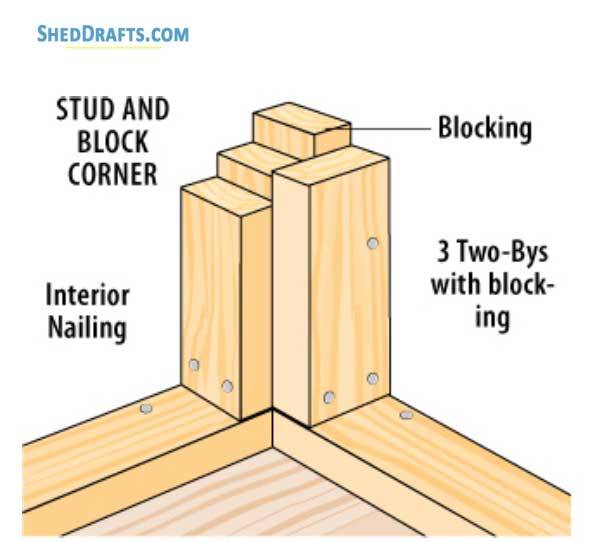
Stud and block corners are the sturdiest and use the most timber.
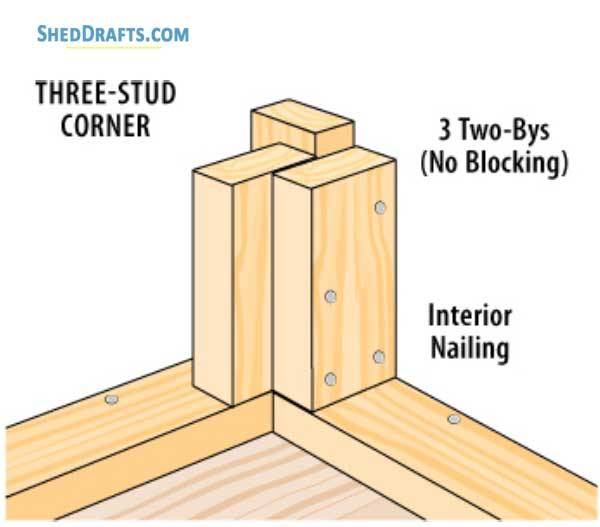
Three corner studs save materials and still provide inner and outer surfaces for nailing.
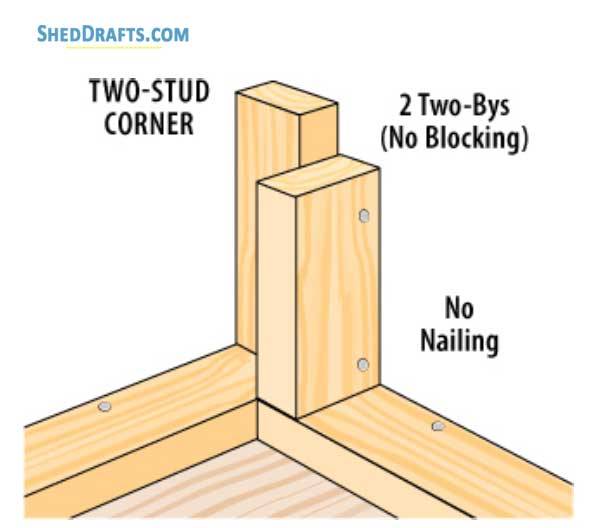
Two corner studs are fine for tiny sheds but are the least rigid and give the least nailing surface.
Window and Door Openings
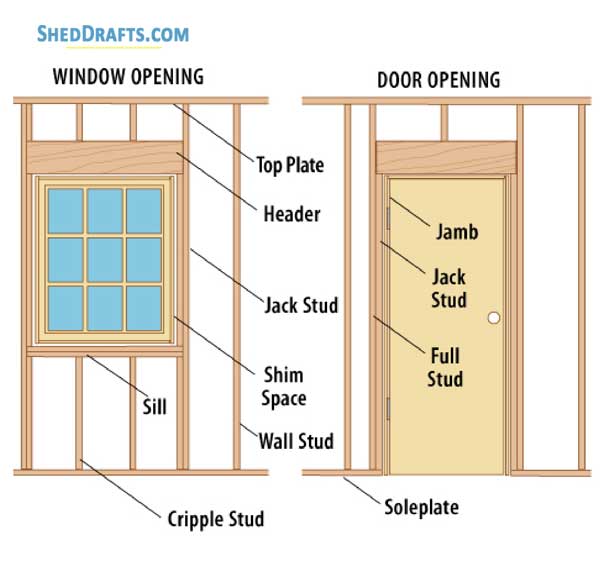
Stud positioning is very critical around the rough openings for doors and windows.
Usually, a shimming space of 1/2 to 3/4 inches is maintained around the window or door.
Each opening will be supported on both sides with king studs.
Contained between these full-length studs will be the door header or window sill that is braced by jack studs.
Cripple studs are fastened below the sill and above the header to reinforce the frame and provide a nailing surface.
Now we can move on to building the shed roof and look at the steps for completing your DIY construction.