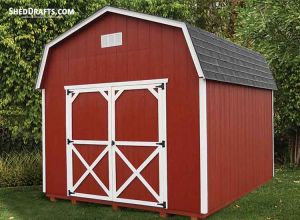
A concrete pier foundation gives your shed the advantages of a concrete foundation while keeping costs low.
It is easier to build compared to a concrete slab and has many of the same advantages as a permanent foundation.
In this process, form tubes are used as a mold. These tubes are buried into holes excavated into the ground and filled with concrete to create piers that extend beneath the frost line.
The piers are basically poured concrete cylinders that run to a depth deeper than the frost line to prevent them from experiencing frost heave during summer when the snow thaws.
The shed’s floor frame can be fastened to the piers using different methods like framing connectors, bolts, anchors, or other fasteners.
These are the main steps for crafting a shed base with concrete piers.
Step 1: Collect the supplies and tools
Here are the most important tools and materials needed to build a concrete pier foundation.
- 2×10 pressure-treated lumber
- Concrete mix
- Cardboard concrete forms
- Masking tape
- J-bolts
- Mason’s line
- Sledgehammer
- Line level
- Framing square
- Plumb bob
- Shovel
- Posthole digger
- Reciprocating saw
- Galvanized nuts and washers
- Ratchet wrench
- 2×4 lumber
- Stakes
- Nails
- Drill
- Circular saw
Step 2: Create the outline for your concrete pier shed foundation
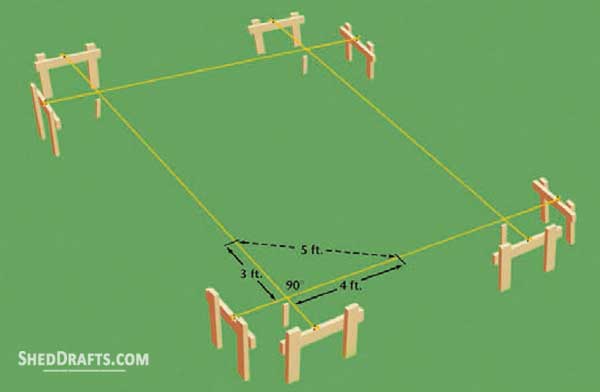
- Use 2×4 timber to construct eight batterboards and craft their legs to have pointed ends.
- Check that the legs of the batterboards are perfectly parallel and the brace is perpendicular to the legs.
- Fasten mason lines to the batterboards as shown in the diagram.
- Verify the lines are accurately square using a line level and tape.
- Find and mark the center of each pier using a plumb bob and drive a stake into it.
- After marking the centers, remove one end of the mason lines and stow them away.
Step 3: Excavate pier holes and set up form tubes
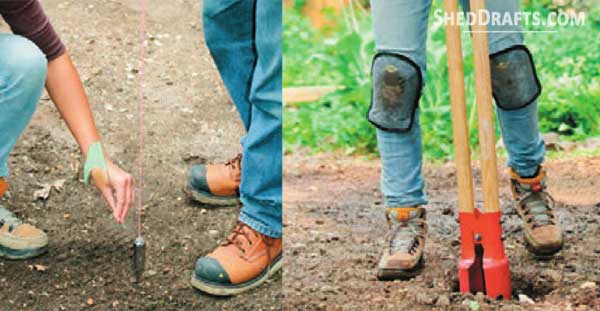
- Dig the soil around the stakes a few inches more than the size of the piers and deep enough to go below the frost line.
- Add a four-inch-thick gravel layer into the holes.
- Insert the cardboard or fiber gorms into the holes taking care that they extend three or more inches above the ground.
- Check that the tops of all forms are level using a spirit level, and then align all of them at the same height.
- Secure the forms into the ground by packing soil around them and recheck that the forms are still level and plumb.
- Reattach the mason lines and verify that the forms are in the correct positions.
Step 4: Pour concrete mix into form tubes and cure
- Prepare the concrete mix and pour it into the form tubes.
- Keep tamping the concrete with a stick as it is being poured to remove any pockets of air.
- Make the concrete at the top of each pier flat using a trowel or similar tool.
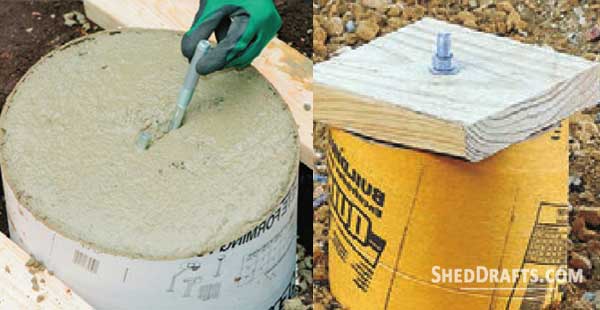
- Insert the fastener of your choice, like a J-bolt, inside the concrete before it dries
- Let the concrete dry, and then create mounting blocks from 2×10 pressure-treated timber.
- Drill and countersink a hole in the center of each block that is large enough for the fastener to pass through.
- Secure the blocks to the concrete piers using galvanized washers and nuts.
Once your pier foundation is complete, you can proceed to construct the shed’s floor frame.