
Shed Roof Guide: How To Frame & Sheathe For Weatherproofing
Framing a shed’s roof isn’t as complex as it might seem. Most DIY builders have a decent understanding of how to frame the floor, walls, and doors of their shed. It’s usually the roof that can seem like a challenge.
Whether you frame a 4×4 tool locker or an expansive 20×24 workshop, a poorly framed roof will eventually bow under snow or leak during spring thaws. A leaking ridge can rot out your floor joists in as little as three seasons.
Your roof’s success will depend on which design and what pitch/slope you select and how accurately you craft it. And lastly, on how well you fasten the rafters or trusses.
Trusses are now the go-to method used to craft most DIY sheds due to their superior strength-to-weight ratio and material efficiency. While rafter framing gives more attic storage space and design flexibility, trusses are easier for a solo builder to assemble on a jig and lift into place.
A gable design is simple to craft and also has excellent drainage. While the lean-to roof can be framed at the lowest cost. Before you begin, first always check local snow load requirements and only then select your lumber dimensions (typically 2×4 or 2×6). You must keep a minimum roof pitch of 3:12 and use hurricane ties for durability.
Framing A Roof With Trusses Or Rafters
When I first began building sheds, I almost treated the roof like a separate project. That was my first mistake. In reality, roof framing is just the final tie that fastens your walls into a sturdy box. Without it, your walls are just four independent planes.
Two Roles of a Properly Built Roof
The roof transfers the weight of materials (dead loads) and snow, as well as wind (live loads), down through the top plates of the wall to the foundation.
Think of your roof as a structural hat. It must be big enough to lead water away from the foundation (via overhangs) and integrated tightly enough to prevent the walls from spreading outward under weight.
Traditional Stick Framing: A Game Of Rafters
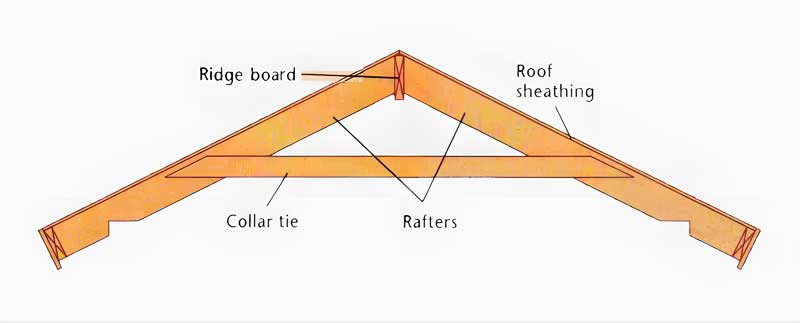
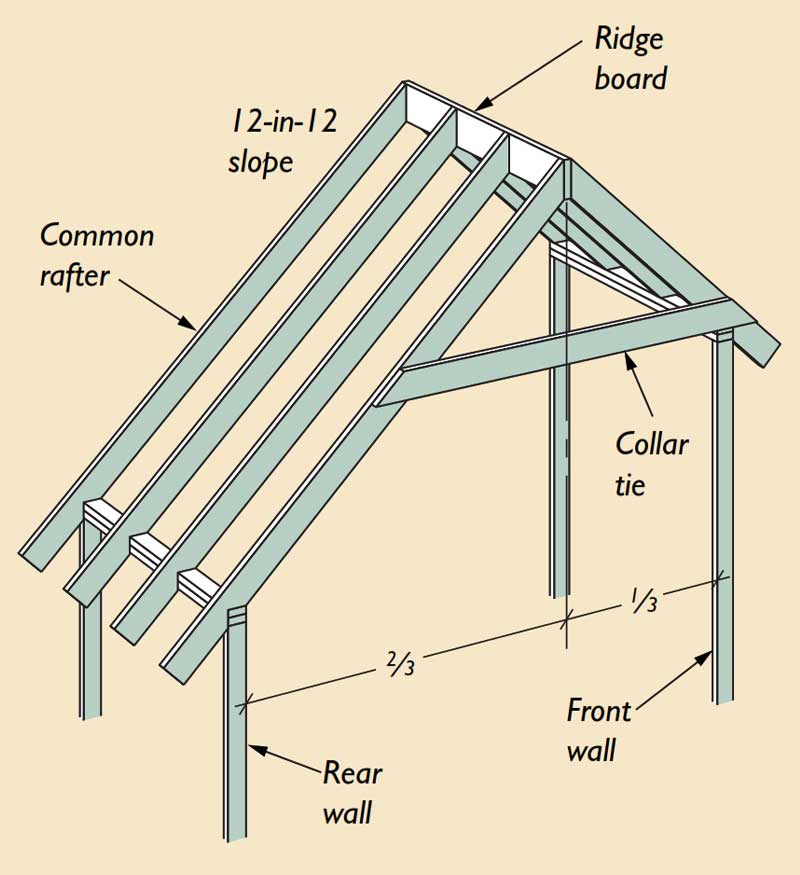
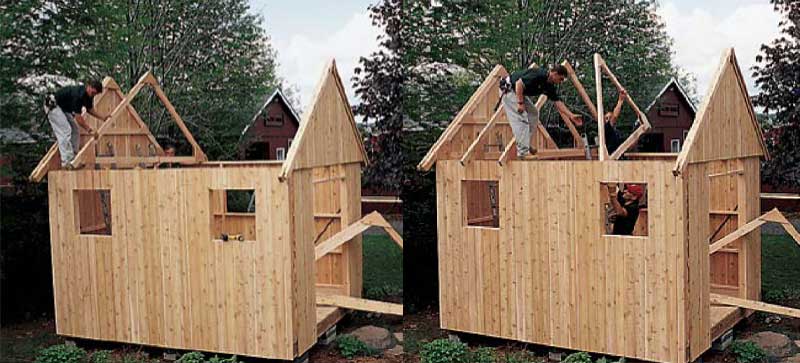
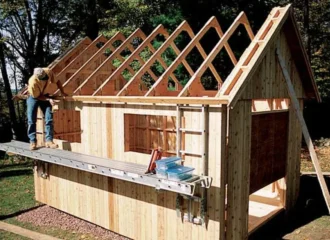
A common old-school method is stick framing, where you start by cutting individual rafters on-site. Then, a ridgeboard is aligned over the central peak of the shed walls, and you fasten one end of a group of rafters to either side of the ridgeboard. The other end of the rafters is secured to the top plates of the walls. Collar ties are used to fasten opposing rafters to each other and distribute the load evenly.
Pre-Assembled Truss Systems Allow Quick Crafting
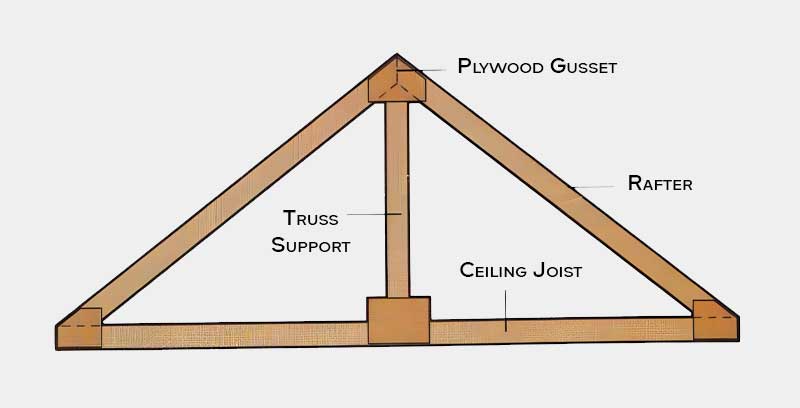
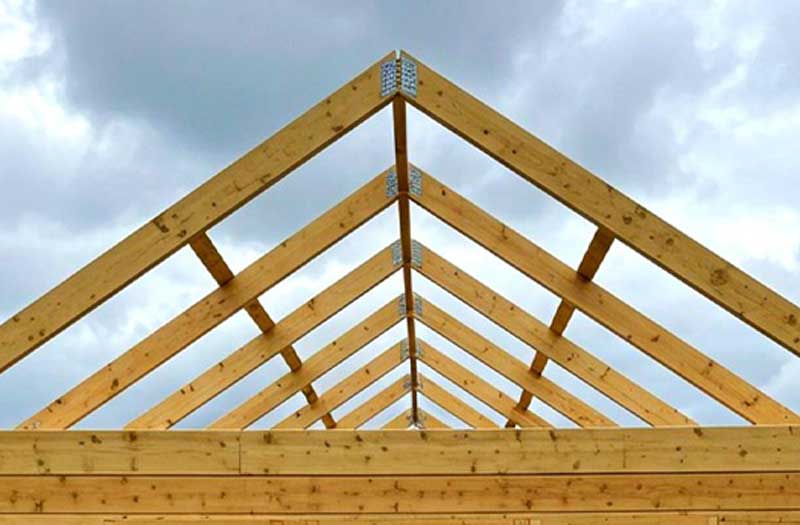
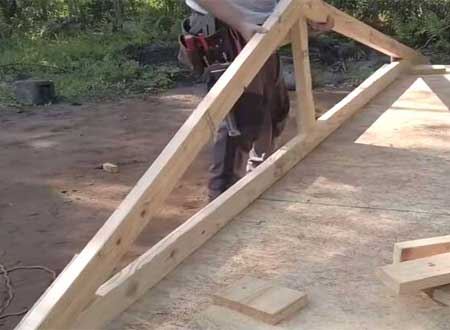
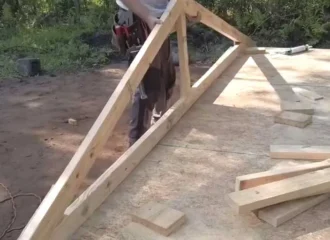
The second and faster method is using site-built trusses, which are pre-assembled triangles. A truss is built by fastening two or more rafters at an angle over a horizontal ceiling joist.
For sheds under 12 feet wide, stick framing allows for custom pitches and overhangs that you just can’t get with prefab trusses. For larger sheds, it’s almost always better to use trusses.
Choosing A Roof Style Wisely
Roof complexity varies from the straightforward layout of a single-slope lean-to all the way to the intricate compound miters required for multi-hip designs.
Minimal Budget Lean-To Is A Speedy Build
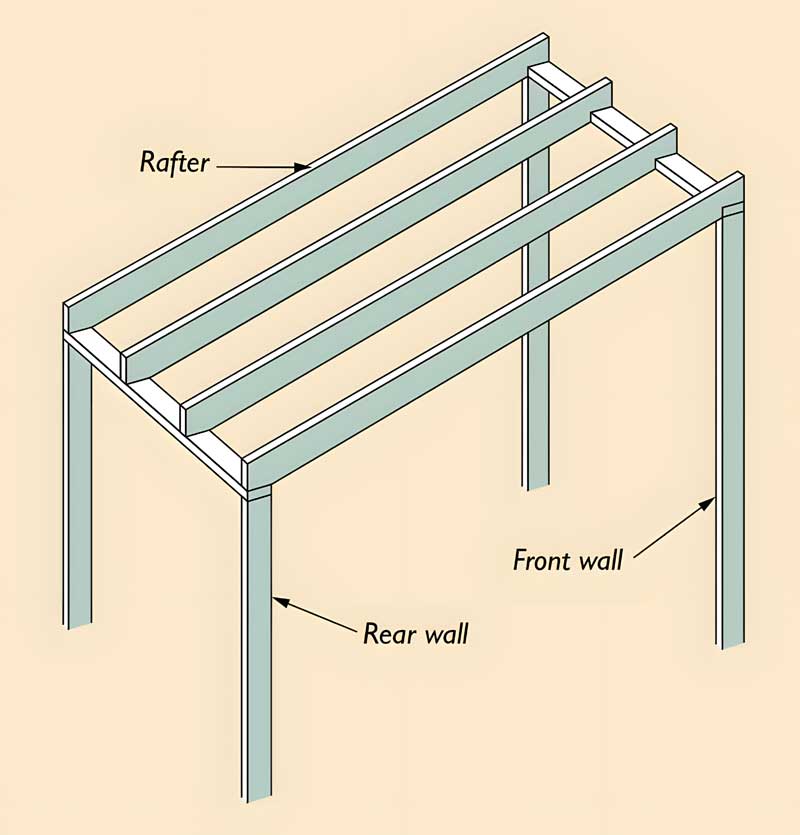
A lean-to, or shed-style roof, consists of a single sloping plane that effectively directs runoff in one direction. This design is also known as a slant roof. One shed wall is built taller than the other to allow the roof to slope. This is the simplest roof design you can build.
However, if you live in an area with heavy snow, as I did during my years in upstate New York, a lean-to can be risky if the pitch is too shallow. The snow just sits there, increasing the dead load exponentially. So, make sure to keep the pitch of lean-to roofs between 3/12 and 8/12.
It is the recommended style for beginners who are assembling their first shed. Because of its simple design, this roof can be built at a low cost in a short time. I once built a 10×12 garden shed with a 3/12 pitch lean-to in a single afternoon. It’s essentially a series of angled rafters resting on one high wall and one low wall.
Classic Gable: A Design That Never Gets Old

For most standard shed builds, the gable roof is the preferred choice. It has a double-pitched design that uses a central ridge board to distribute weight evenly across two opposing load-bearing walls. It can be constructed using individual trusses or rafters. A gable roof usually has a pitch of 4/12 and can go all the way up to 12/12.
Designs For Pros: Gambrel, Hip, Saltbox & Clearstory
If you’re looking for curb appeal or a dedicated workshop loft, you’ll need to graduate to these designs.
Maximizing Loft Space With Barn Style Gambrel

The gambrel roof is best for folks who need extra storage but don’t have too much yard space. This is a classic colonial design with a beautiful and complex double-pitched slope on either side. It is built by fastening two rafters of different pitches with a heavy-duty gusset. Here the upper rafter has a shallower pitch, while the lower one drops off steeply.
I really love this style because it creates a great deal of overhead room. If you want a loft for storage, this is your winner, but be prepared for a lot of miter saw adjustments.
Hip Style Is A Four-Sloped Juggernaut

The hip roof is easily the sturdiest design anyone can build. It features four equal sloping sections that meet at a center ridge. While it’s beautiful, it is also the most labor-intensive for a builder to frame.
Crafting a hip roof requires you to secure jack rafters to hip rafters and involves a series of complex compound cuts. As it requires a lot more lumber and building time than a standard gable, it can be quite a bit expensive. However, if you live in a high-wind area or deal with heavy snow loads, I would say this added cost is definitely worth the peace of mind.
High-Drainage Saltbox Style
A double-pitched roof that has one sloping section longer than the other is known as a saltbox roof. In this style, the peak of the roof is off-center and closer to one wall than the other. Basically, the saltbox is an asymmetric gable.
I’ve found that a 45-degree pitch works best for this style. It’s an excellent choice if you want to deflect wind from a specific direction or if you’re building against a fence and want the runoff to shed primarily toward the front of the structure.
Lightgiving Clerestory Design

When a client is planning to use their shed as a studio or workshop, the clerestory is my favorite design to suggest. This style features two roof sections separated by a vertical wall that we fill with a row of windows.
We can build these symmetrically or in an asymmetrical lean-to style. The main advantage is the incredible amount of natural light. It allows you to work at a bench all day without relying solely on artificial lighting, making the space feel much larger than it actually is.
Why A Lot Of DIY Sheds Now Only Use Trusses
Truss framing has surpassed traditional rafters in DIY builds because it uses 25-30% less lumber and, at the same time, provides very high structural integrity. As material costs are rising, the ability to build trusses from cheaper 2x4s rather than having to use premium 2×6 or 2×8 rafters is making trusses the more budget-friendly choice.
Trusses allow you to use short lengths of standard 2×4 lumber that won’t warp easily. Also, if you’ve ever tried to find a perfectly straight 16-foot 2×10 at a big-box store lately, you know it’s like hunting for a unicorn.
Trusses solve this by using smaller members connected by gussets. This creates a web that distributes the weight.
Don’t assume more wood equals more strength. A thick 2×10 rafter with a poorly cut bird’s mouth can actually be weaker than a well-engineered 2×4 truss with plywood gussets.
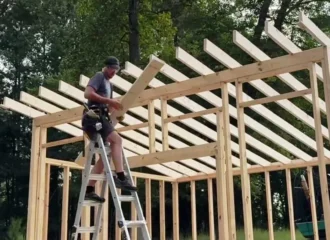
Trusses also allow you to build a Jig. I can then duplicate the jig and build all the remaining trusses similarly. I can spend a Saturday morning on a flat garage floor building ten identical trusses, then spend Sunday morning popping them into place. It’s safer and faster than air-nailing rafters while balancing on a ladder.

Old School Rafter Framing Is Still Alive
Rafter framing is still greatly used for projects that need attic storage space. Steep pitches or complex rooflines like hips and valleys also need rafters.
If you choose rafters for the extra space, use structural screws instead of nails to attach the rafters to the ridge board. The pull-out resistance is significantly higher, which is vital for open-ceiling designs.
There are still days when I put the truss jig away and pull out my framing square to cut rafters. If a homeowner tells me, “I want to store my winter tires and holiday decorations up in the rafters,” trusses are a bad choice. The internal webbing of a truss makes the attic space almost unusable.
Rafters provide unobstructed volume. A “She-Shed” or a backyard office that needs a beautiful, vaulted cathedral ceiling has to use rafters. They allow the interior to feel twice as large as it actually is. However, you must account for ceiling joists or collar ties to prevent the walls from bowing out under the weight of the roof.
Roof Pitch Calculator: A Build-Ready App
Before you pick up a saw, you need to master three numbers: Run, Rise, and Span. If any of these measurements are off, your roof will probably look like a topographical map of the Andes once the shingles go on.
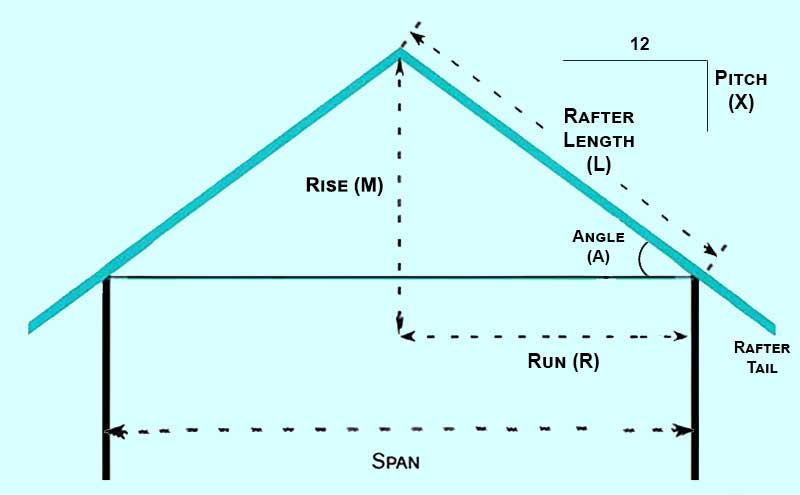
Span: The total outside-to-outside width of your shed walls.
Run: Exactly half of your span. If your shed is 10 feet wide, your run is 5 feet.
Rise: The vertical distance your roof climbs from the wall plate to the peak.
And we use these numbers to calculate the pitch.
Pitch is the angle at which a roof slopes. And it is most commonly shown as a ratio of Rise over Run. A 4/12 pitch indicates that the roof rises 4 inches vertically for every 12 inches of horizontal run. This ratio determines the angles for your plumb and seat cuts on the framing square.
The tool below calculates the roof pitch based on these typical framing scenarios:
- Pitch(X) – Based on Rise and Run
- Rise(M) – Based on Pitch and Run
- Run(R) – Based on Rise and Pitch
If this is your first build, stick to a 6/12 pitch gable. It’s steep enough to shed water and snow efficiently. But it is also shallow enough that you can still walk on it safely while sheathing without needing any special roof jacks.
Most builders I know just use a speed square or a framing calculator app these days. I use the “step-off” method with a framing square to mark rafters. This is a traditional but effective way to ensure accuracy without getting bogged down in decimals.
Field Guide For Common Slopes
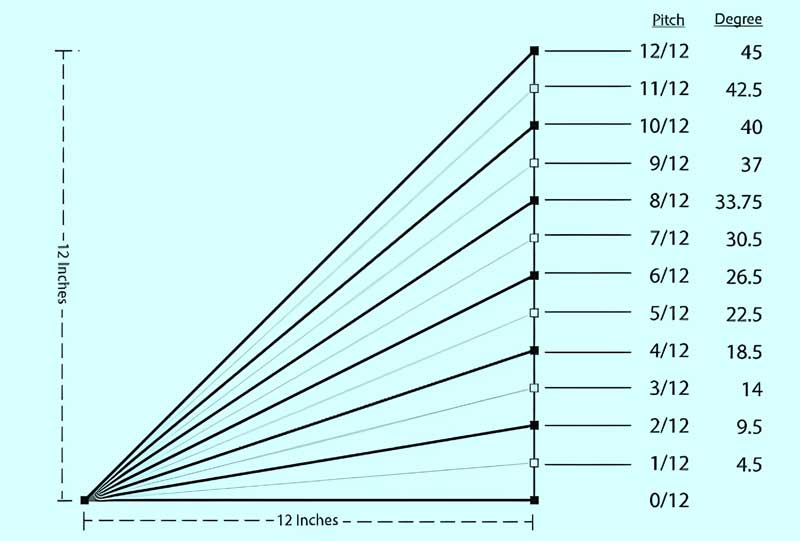
Minimum Pitch 3:12 (14.0 Degrees): I consider 3:12 the absolute minimum to prevent ice damming and capillary action. If my client’s design forces me to use a lower slope, we install EPDM rubber membrane on the roof to ensure a waterproof seal.
Standard Pitch 4:12 (18.5 Degrees): This pitch provides reliable drainage while also remaining shallow enough for me to walk safely during shingle installation without any roof jacks.
Snow-Load Pitch 6:12 (26.5 Degrees): In regions with heavy winters, I design with a 6:12 pitch. This slope is best for shedding heavy snow naturally. And it also creates enough headroom to install a functional loft or overhead storage rack.
Cottage Pitch 8:12 (33.7 Degrees): We use this to achieve a steep, high-end profile. While the curb appeal is unmatched, I always warn my client that this requires toe boards for maintenance, as it’s too steep for standard traction.
Crafting A Traditional Roof With Rafters
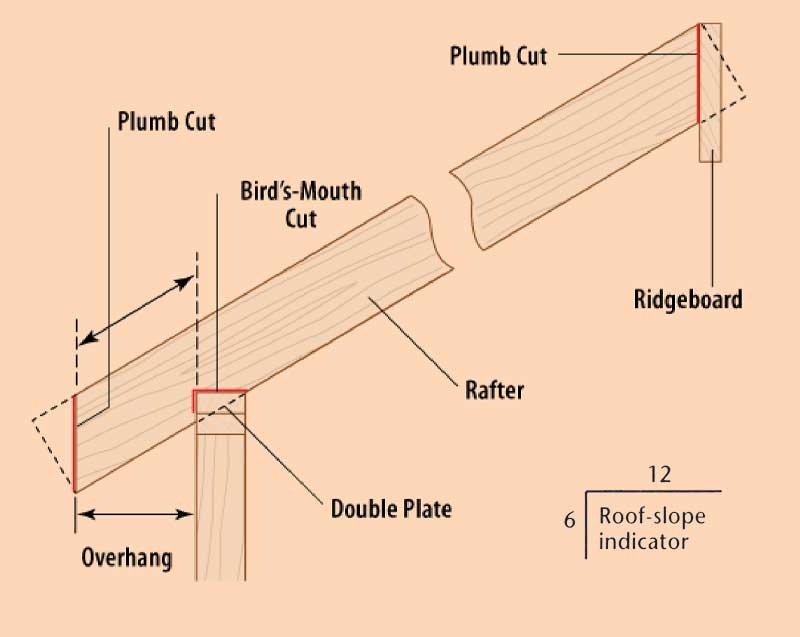
At the top, a rafter has the plumb cut, which connects to the ridge. At the bottom, it has a birdsmouth cut, which is basically a notch where it sits on the wall. And it has a Tail that creates the overhang. Each part must be calculated based on the roof’s pitch.
The birdsmouth cut is the triangular notch in a rafter that allows it to sit flat on the wall’s top plate. It consists of two cuts, a horizontal seat cut (which carries the weight) and a vertical heel cut (which braces against the wall). The tail of the rafter determines your eaves. I always recommend having at least a 12-inch overhang. This will keep water away from your siding and also prevent the cheap look of a boxy, store-bought shed.
Birdsmouth Cut: A Seat For Rafters
The birdsmouth is the most critical joint in your shed, and also usually where most DIYers make mistakes. In my early days, I once saw a shed roof pancake in Fort Wayne because the builder didn’t cut birdsmouths at all. He just toe-nailed the angled rafters directly to the plate. Without that flat seat, the only thing holding your roof up is the shear strength of a few nails.
When you’re marking this out, use your framing square. Let’s say you need a 6/12 pitch, then you’ll align the 6 on the tongue and the 12 on the blade with the edge of the board. The seat cut must be at least 1.5 inches wide to fully bear on the 2×4 top plate. And it should never exceed the width of the plate itself.
I’ve had many new woodworkers ask why we don’t just cut a deep notch to make it sturdier. That’s because a rafter is essentially a beam. The wood above the notch is what handles the compression and tension. If you cut more than one-third into the board, you’ve effectively turned your 2×6 rafters into 2x4s, and they will start to sag under the first heavy snowfall.
Simple Rafter Template
A master rafter is a perfectly cut rafter used as a template for all others. Using one pattern ensures uniformity across the entire roofline, preventing waves in the roof deck.
Once I’ve done the math and marked my first rafter, I cut it and do a best fit. I take a scrap piece of ridge board and a second rough rafter to see how they meet at the peak and how the birdsmouth sits on the wall. Only when I’m 100% happy do I label that first one MASTER in big red letters.
I never use a rafter that I just cut to mark the next one. Why? Because the thickness of your pencil line adds up. If you use rafter A to mark B, and B to mark C, by the time you get to rafter M, it’ll be an inch longer than rafter A. Always go back to the Master.
Double-check your HAP (Height Above Plate). This is the amount of wood left above the birdsmouth cut. All rafters must have the exact same HAP, or your roof sheathing will not lie flat, resulting in a bumpy roof that is a nightmare to shingle.
When cutting the birdsmouth, I use a circular saw for the main reach, but finish the corner with a hand saw or a jigsaw. If you over-cut with a circular saw (which is easy to do because of the round blade), you create a kerf that acts as a stress fracture point.
Setting the Ridge Board
The ridge board is the horizontal member at the peak of the roof. It should be one size larger than the rafters (e.g., use a 2×8 ridge for 2×6 rafters) to allow for full contact of the plumb cuts.
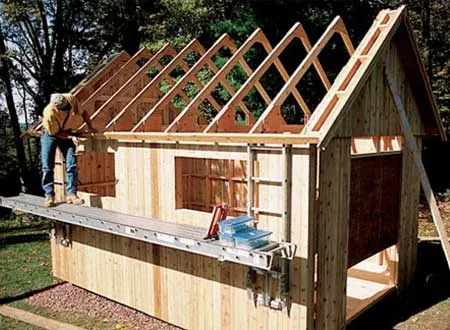
Installing a ridge board alone is like wrestling an octopus. When working solo, the trick is to nail a “third hand” or temporary 2×4 supports to the gable walls to cradle the ridge board at the correct height while you nail in your first pair of rafters.
The ridge board doesn’t have to be a single piece of wood if your shed is long. You can join two boards, but the joint must occur in the center of a rafter pair so they can sister the joint.
When you’re ready to nail the rafters to the ridge, nail the four corner rafters first. This pins the ridge in place and allows you to straighten it before filling in the middle rafters. Use 3-inch (10d or 12d) nails for a solid connection.
I’ve seen folks use a 2×4 for a ridge when they are using 2×4 rafters. The problem? Because the rafter meets the ridge at an angle, the plumb cut is actually longer than 3.5 inches. A 2×4 rafter ends up overhanging the bottom of a 2×4 ridge. Always upsize your ridge board to a 2×6 or 2×8 so the entire face of the rafter’s plumb cut is supported.
If you find that your birdsmouth cuts are slightly inconsistent (and they usually are), don’t shim them with cedar shakes; they’ll eventually compress or rot. Instead, use a power plane to slightly take down the high rafters until a string line pulled across the tops shows they are all perfectly in plane.
In windy areas, use hurricane ties (H2.5A clips) to secure rafters to the wall plate. I’ve seen one too many roofs lifted clean off by 70mph gusts because the builder skipped the metal clips and thought toe-nailing was good enough.
Assembling A Modern Roof Quickly With Trusses
A truss is made up of three types of members. Top chords create the sloped roofline. A ceiling joist forms the bottom chord. And reinforcement plates are installed at the joints called gussets. Together, they form a rigid triangle that transfers all roof weight vertically onto the load-bearing walls.
Never skip on construction adhesive when attaching your gussets. The screws hold the wood while the glue dries. But it is the glue that provides the long-term shear strength that prevents the truss from creaking or shifting over decades.
When you look at a truss, you’re looking at geometry in action. The top chords are in compression (being squeezed), while the bottom chord is in tension (being pulled apart). This is why you can’t just nail two boards together and call it a day.
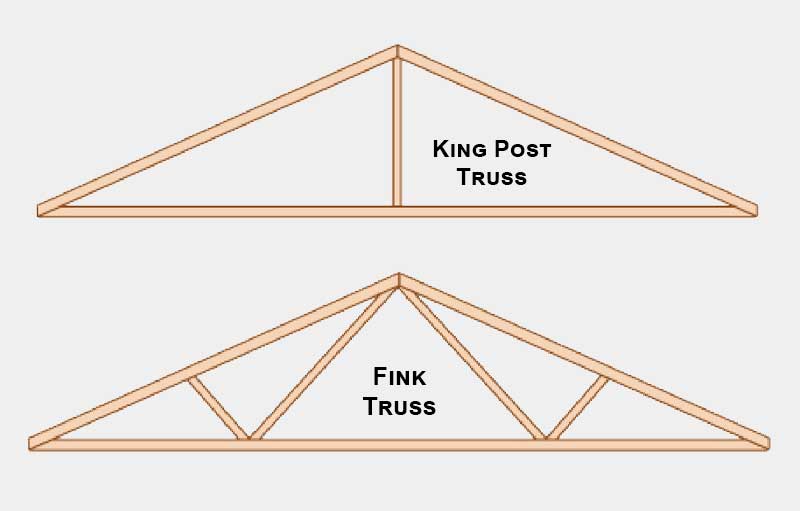
For most DIY sheds (up to 12 or 14 feet wide), the King Post Truss is my favorite choice. It’s the simplest design: one vertical post in the center that connects the peak to the bottom chord. For wider spans (16+ feet), you’ll move into Fink Trusses, which have a “W” shape of internal webbing.
In a factory, they use hydraulic presses to slam metal mending plates into the wood. In your backyard, you’ll use 1/2-inch CDX plywood gussets. I like to make mine 12 inches wide and glue-and-screw them to both sides of every joint. This creates a “sandwich” that is incredibly stiff.
Jig Building Your Own Trusses
You can quickly build DIY trusses by creating a jig that acts as a template. This jig is fastened to a flat surface like a garage or shed floor. By locking blocks into the desired dimensions, you can assemble identical trusses with consistent pitches. This will give you a perfectly straight roofline and make sheathing installation easier.
While I’m at a site, I always build trusses on the ground. First, you need to find your span (the width of the shed) and your pitch (the slope). Let’s say you’re building a 10-foot-wide shed with a 4:12 pitch.
First, I clear the shed floor. I lay out the two top chords and the bottom chord to form the outer triangle. Once the angles are perfect, I screw 2×4 cleats or blocks into the floor right up against the edges of the lumber. These blocks act as a permanent mold. Now, I can drop in pre-cut boards, glue them, nail on the gussets, flip the truss, and repeat. Every single truss will be identical to within a sixteenth of an inch.
Before you start your assembly line, build just one truss and test-fit it on your walls. There is nothing more soul-crushing than building 12 trusses only to realize your span was off by half an inch because you didn’t account for the siding thickness.
The Gusset Sandwich Technique
For gussets, I use 1/2-inch CDX plywood. I cut them into triangles and rectangles depending on the joint.
Run a bead of glue on the lumber. Place the plywood over the joint. I always stagger the nails. Don’t fasten nails in a straight line along the grain, or you’ll split the wood. Apply gussets to both sides of the truss to craft a truly sturdy design.
Installing Rat Runners For Lateral Stability
Bracing prevents rack or rollover, where trusses lean like a deck of cards. Permanent lateral bracing (2x4s nailed perpendicular to the trusses) and diagonal X bracing keep the roof assembly rigid during high winds and heavy snow.
I’ve seen a gust of wind knock down an entire day’s worth of framing because the builder didn’t brace the trusses. As soon as you stand your first truss up, it needs two legs (long 2x4s) nailed to the gable and braced down to the ground or the floor frame.
Many DIYers remove their temporary braces as soon as they start sheathing. Don’t do it. Keep the internal diagonal braces in place permanently. They weigh very little but provide critical shear resistance during storms.
Once all the trusses are up, you aren’t done. You need Lateral Bracing. These are long 2x4s that run the length of the shed, nailed to the underside of the top chords or across the webs. This ties all the individual triangles into one solid block. If one truss tries to lean, the other nine hold it up.
I always install a Rat Run, a continuous 2×4 nailed to the center of the bottom chords (the ceiling part). This keeps the spacing at exactly 24 inches on-center all the way across the shed, which makes hanging a ceiling much easier later.
Add Sheathing And Don't Skip The Vents Or Overhangs
Roof sheathing (usually 1/2″ or 5/8″ OSB or Plywood) provides the final structural deck for the roof. I prefer 5/8″ CDX Plywood over cheap OSB, especially for sheds in humid climates. Because OSB will mushroom and swell at the edges if it gets wet during the build, which creates visible ridges in your roofline.
H-Clips are a code requirement in many areas to support the edges of the sheathing between rafters, preventing sagging and telegraphing through the shingles. I once tried to skip the H-clips on a 12×16 shed in high humidity. By mid-August, the OSB edges had swollen so badly that the roof looked like a corrugated tin sheet. I had to rip the shingles off and start over. Save yourself the $400 and buy the clips.
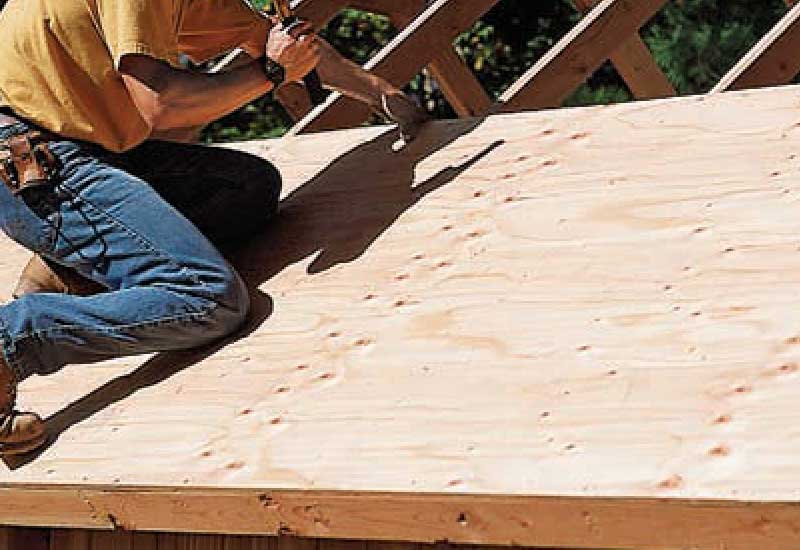
The sheathing is the skin that stops the roof from twisting. Always stagger plywood sheets when sheathing. Never have four corners of plywood meet at one single point. This’ll create a weak spot. Also, leave a 1/8-inch gap (about the width of a 10d nail) between the sheets. This’ll allow for natural expansion and contraction. If you butt them tight, the boards will buckle when the humidity hits 90%.
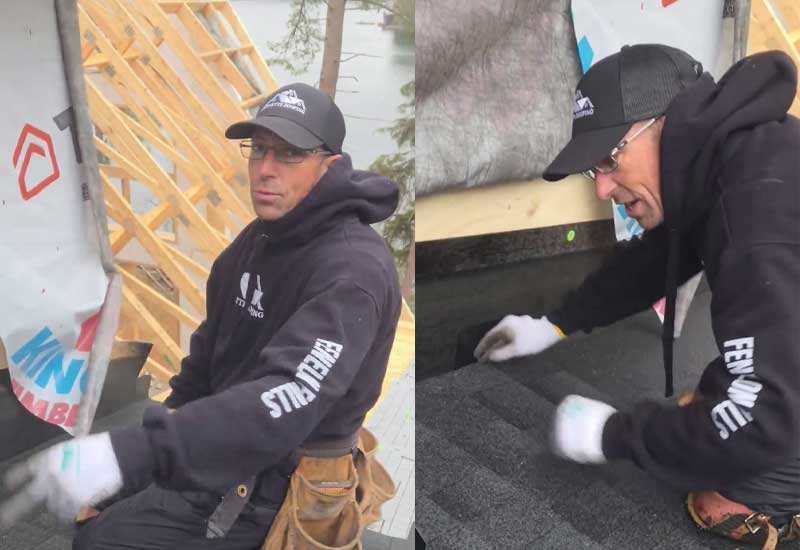
Stagger your nails. Think of it like a zipper. You’ll want to distribute the pressure, not create a perforated line that’s easy to break. Use 8d common nails or 2-3/8 inch ring-shank nails for sheathing. Space them 6 inches apart on the edges and 12 inches apart in the field.
Attaching Intake And Exhaust Ventilation
A sturdy roof always allows internal airflow. This includes Soffit Vents (intake) and a Ridge Vent (exhaust). Without ventilation, condensation will build up on the underside of the sheathing. And this causes mold and roof rot in the long run.
To frame for a ridge vent, you simply leave the sheathing back about 1 inch from the peak on both sides. This creates a 2-inch gap that the vent cover will eventually sit over. For the soffits, you can either drill holes in the blocking between rafters or leave a continuous gap that you cover with a screen.
People often think sheds don’t need vents because they aren’t living spaces. Wrong. In the summer, a shed roof can reach 150°F. That heat bakes the shingles from the inside out and creates a pressure cooker of humidity.
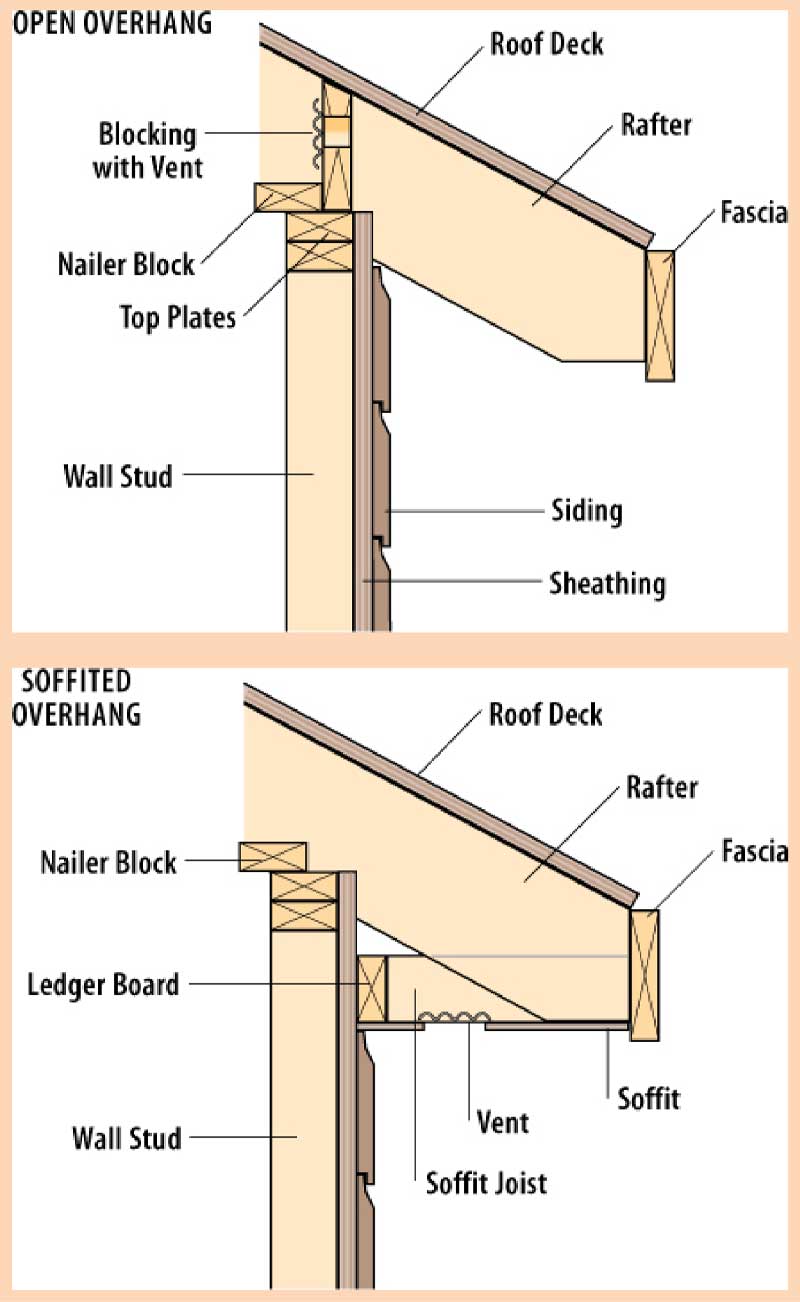
Soffits and Fascias
Overhangs will protect your walls from water damage. A ladder frame or fly rafter extension should be used on gable ends. Eave overhangs are created by extending the top chords of the trusses or the rafters beyond the wall plate.
I’ve learned that the quickest way to rot a shed is to build it with flush eaves. Without an overhang, rain runs directly down the siding, into the window trim, and eventually into the sill plates. I always recommend at least a 12-inch overhang on the eaves and a 6-to-8-inch overhang on the gable ends.
To create a rake or gable overhang, we use lookouts. These are short 2x4s oriented flat that look out from the last two trusses to support a fly rafter. This creates a professional, residential look. For the eaves, if you are building your own trusses, simply make the top chords longer than the bottom chords.
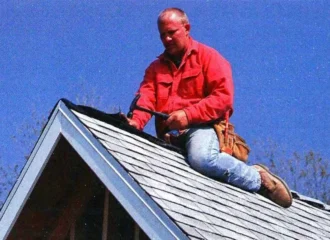
Fascia is the board that finishes the ends of the rafters. When installing your fascia, use a string line to ensure it is perfectly straight. Even if your rafters are slightly off, a straight fascia board will trick the eye into seeing a perfect roofline.
I now almost exclusively use PVC trim or Fiber Cement (Hardie) for fascias. Why? Because the fascia is the most exposed part of your roof framing. It takes the brunt of the sun and the rain. Using a rot-proof material here means you won’t be climbing a ladder to replace it in five years.
Economical And Waterproof Roofing Options
Maximizing a shed’s lifespan requires more than just structural framing. It needs the use of quality roofing materials and rigorous flashing details to maintain a climate-controlled, dry environment.
Here are three cost-effective materials we constantly use in the field:
Mineral Surface Roll Roofing (MSR) Is A Low-Slope Specialist
MSR is the best budget option for low-pitch sheds (anything below a 4:12 slope). It’s a rugged composite of rubberized asphalt reinforced with a fiberglass mat. Since it comes in 100-square-foot rolls, this greatly reduces the number of seams compared to shingles.
Architectural Asphalt Shingles Are A Lifetime Choice
If a client wants their shed to match their home’s aesthetic and last for decades, we just use classic architectural (laminated) shingles. Unlike flat shingles, these are composed of multiple layers of asphalt-impregnated fiberglass.
As they are multi-layered, they offer superior wind resistance. They are heavier, so ensure your rafter spacing is sufficient to handle the increased dead load.
Three-Tab Shingles Mix Economy And Ruggedness
When a project needs to stay strictly under budget, we go with three-tab shingles. They are a single-layer product, which makes them lighter and much easier to haul up a ladder if you’re working solo.
While they are the easiest for a DIYer to align, keep in mind they have a lower wind rating than architectural shingles. If your shed is in an open field, I’d suggest upgrading to a heavier shingle or using six-nail fastening instead of the standard four.
Lastly, install drip edges and gutters on your roof to allow water to be quickly channeled away from the fascia with minimum splashing.
I hope the first-hand insights we’ve shared here provide the technical confidence you need to get your trusses off the ground and under a dry, rock-solid roof.


Read Next
 Shed Roof Slope: Guide To Find the Right Weather-Proof Pitch
 How To Install Shingles On A Shed Roof: Step-By-Step Guide
 Shed Rafters vs. Trusses Comparison: Pro-Tested DIY Guide
 How To Build Shed Roof Trusses On A DIY Jig In One Weekend
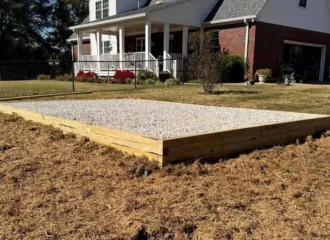 Shed Foundation Guide: 11 Durable Builds And Traps To Avoid
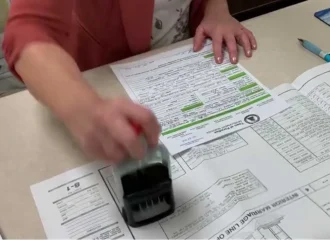 Shed Building Codes and Permit Guide For DIY Builders
Framing-to-Finish Roadmap: DIY Guides For Every Step of The Build


