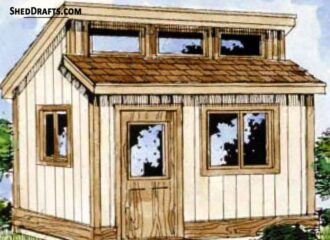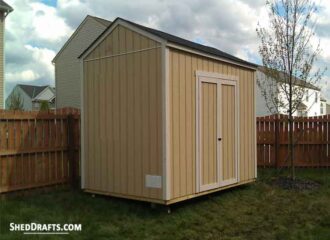
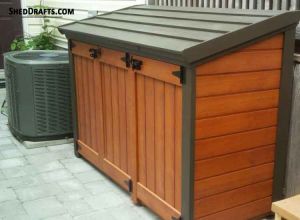
Presented here are some 8×12 lean to shed building diagrams that show how to craft your very own spacious storage shed.
It will provide a secure storage area for preserving your yard tools and gardening equipment.
You can then empty out many items from your garage and create more space within your house.
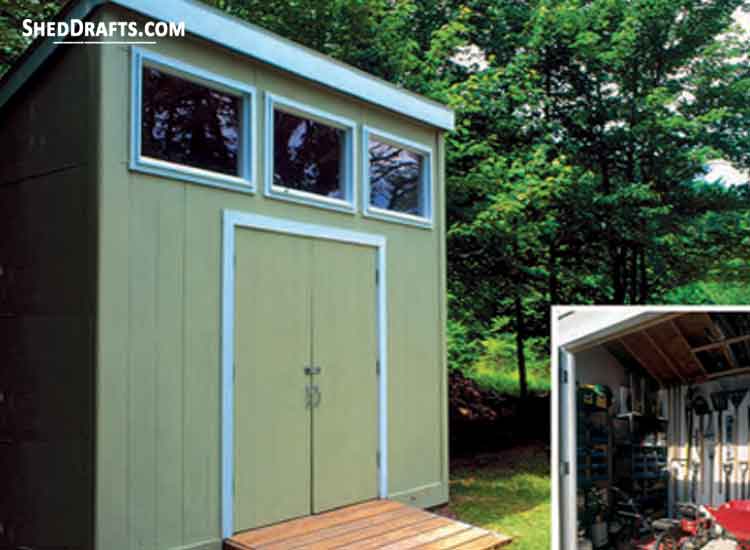
Its rustic design and wide windows give a beautiful look to this shed and makes it a glorious addition to your property.
There is enough room within the shed to store items on shelves and also to suspend tools on the walls.
Here are the essential steps involved in making this shed.
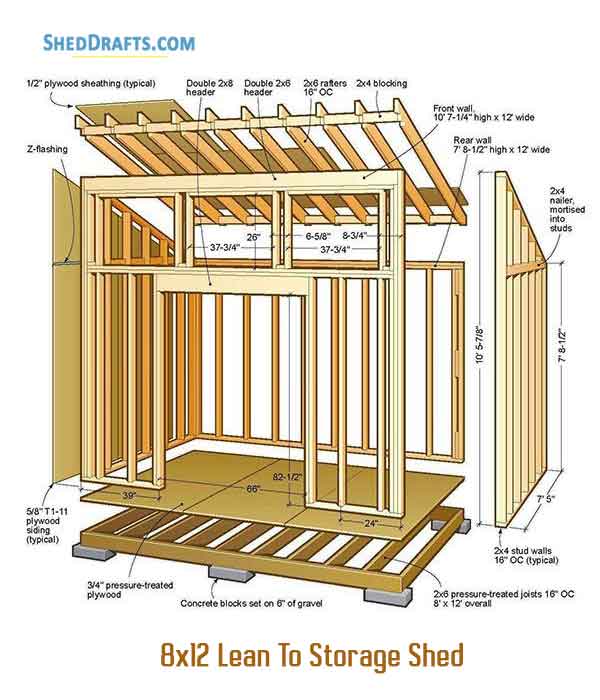
DIY Floor & Wall Frame Blueprints
Clear any leaves or rocks from the area where you will be building the shed and drive 2×4 stakes into the ground at the four foundation corners.
Verify that the diagonal lengths are equal so that the floor is perfectly square.
Dig 6 inch deep ditches into the ground and fill it with gravel for holding the foundation blocks.
Compact the gravel and place 8×12 concrete footing blocks into the ditches.
Using a spirit level to check that each block is correctly level.
Use 2×6 pressure treated timber to craft the header joists.
Inner joists will be 3 inch shorter than outer ones.
Make a 1.5 inch notch on each header joist at both ends.
Assemble the floor joists with a separation of 16 inches between each other and then secure them with hangers.
Place the floor frame over the foundation blocks and check they are level and square.
Use galvanized nails to fasten the joist hangers.
Nail 3/4 inch thick plywood siding to the floor frame to finish building the shed floor.
Wall Framing
Craft the front walls of the shed by assembling 2×4 studs at a distance of 16 inches from each other.
Use two layers of 2×6 boards for crafting window header and 2×8 boards to craft the door header.
Construct the top wall plates, studs for doors and windows.
Nail the corner trimmers with corner studs for crafting the front wall.
Mark the location for attaching studs on the sole plate and first top plate.
Nail the next top plate over the first and secure the window cripple studs.
Fasten the top block with the short blocks.
Top plate and cripple studs are then toe-nailed together.
Fasten the header with top plate and corner studs using galvanized nails.
Nail the upper window blocking into place.
Diagonally nail a brace to the front wall for keeping it square.
To brace the front wall as it is being hoisted, nail 2×4 blocks into the floor.
Raise the wall frame and nail the sole plate into the floor.
Craft rear wall as shown in the layout diagram section of the shed building plans.
We will create a triple 2×4 end stud with small blocks.
Nail studs into the sole plate after marking their position and lastly fasten the upper plates.
Assemble side walls similarly, raise them into position and nail them to the front wall.
Lastly raise the back wall and nail it to side walls.
Constructing Roof Frame With Rafters
Install siding over wall frames before crafting roof frame because rafters will overhang the siding over the back wall.
Fasten three 4×8 siding sheets at top end of wall frame using 8d galvanized nails and keep an overhang of 3.5 inches.
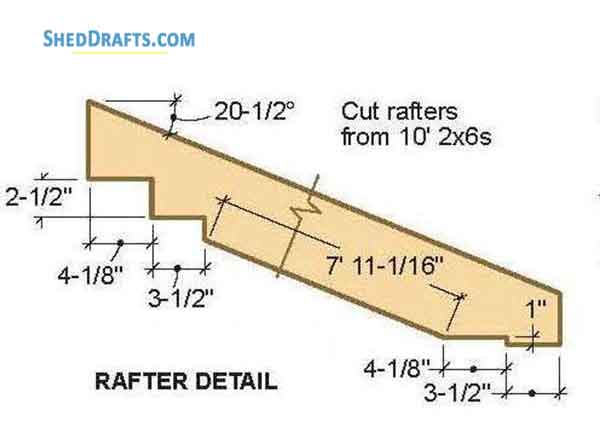
Create one template rafter and use it as reference for crafting other rafters so that all cuts will be of equal depth.
Rafters are constructed from 2×6 timber as shown in the rafter template diagram part of the blueprints.
Assemble the rafters together using nails.
Craft and fasten the 2×4 blocking and then nail metal anchors to the rafters for attaching them to walls.
Two more sheets of siding will be needed to completely cover the shed.
Upper siding edge will remain centered on the 2×4 nailer.
Nail Z flashing onto the siding sheets and remove excess wood from the top edges for fitting it correctly.
Sole plate must be cut and removed for crafting the door opening.
Make cuts in siding and make it fit between the windows and after that nail Z flashing over them.
Install siding over the window headers.
Use the siding pieces cut out from the door opening for creating the door.
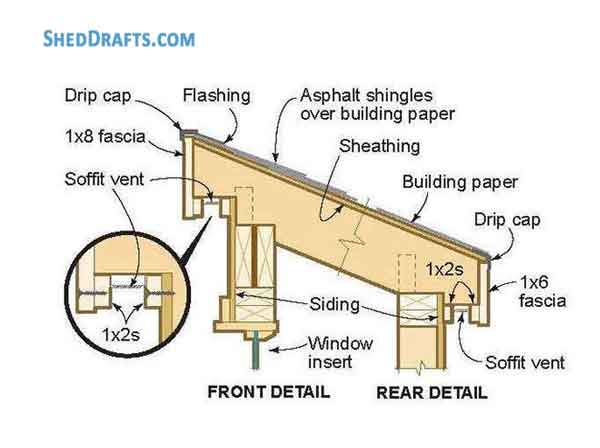
Installing Vents, Fascia and Roofing
Fasten 1/2 inch thick plywood siding on the roof frame with 6d nails.
Attach 1×6 fascia after securing 2 spacers over the upper side.
Secure soffit vents to bottom rafter overhang.
Install 1×2 boards on the vents and the wall’s top end.
Nail another fascia board over the rafter ends and secure a 1×2 support for the vent with the fascia.
Install roofing felt beginning at bottom edge of the roof.
Now lay out asphalt singles over the roof starting at lower edge.
Install metal flashing to seal top of the roof and fold it over fascia.
Lastly attach a drip cap over the roof.
Schematics For Assembling Doors & Windows
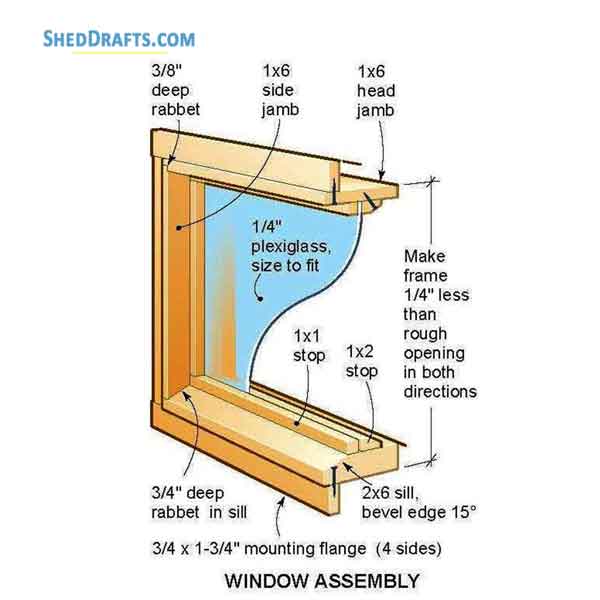
Craft the frames for windows 1/4 inch smaller that wall openings.
Carve out jambs and construct sill of required length.
Create a 15 degree bevel into the upper sill edge at 2.75 inches.
For side jambs you should mark the outline for carving rabbets on the sills and create 3/4 inch deep grooves.
Now make 3/8 inch deep grooves for rabbets on ends of head jamb.
Nail jambs with frame and then install window stops.
Secure mounting flanges and install window glazing.
Smoothen inner edges of windows so the can slide easily into the frame.
Seal the siding faces with water-proof sealant and fasten the window to frame using hinges.
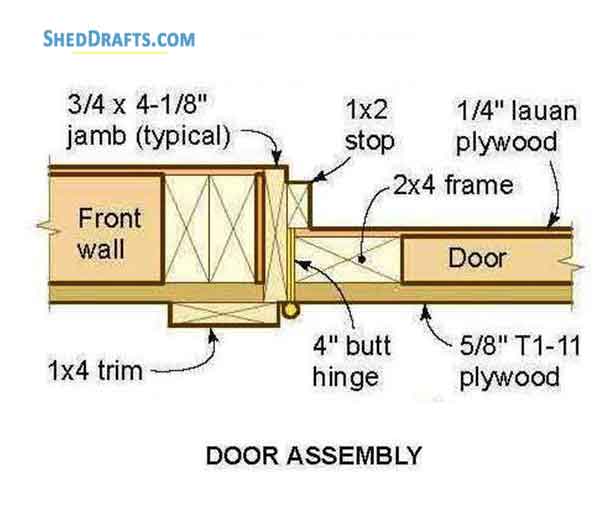
Craft door jambs using 1×6 lumber.
Create rabbet grooves at a depth of 3/4 inch on the side jamb for connecting with top jamb.
Nail top jamb with side jamb and install stops near upper edge of jambs.
Fasten hinges over side jambs using screws.
Secure door frame to studs by installing shims and nailing through the shims.
Check that jambs are plumb and level with edge of siding.
Attach shims to top jambs as needed and nail them to door header.
Keep a space of 1/4 inch around the doors.
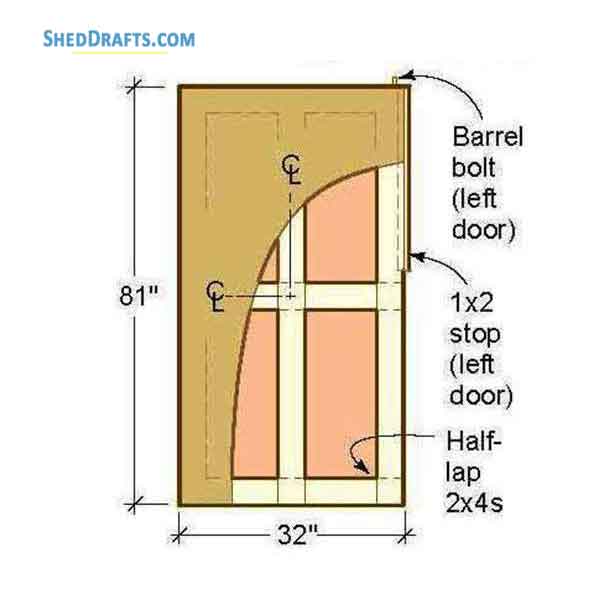
Create door by nailing 2×4 boards to each other at the corners using half lap joints.
Secure 0.25 inch thick siding at back and 1.25 inch plywood at front of door.
Secure 1×4 door trim and then suspend the door on hinges.
Install door stops and attach barrel bolt for the door.
Ramp Construction
Create a six inch deep ditch in the ground where ramp will be constructed and pack it with gravel tightly.
Ramp is constructed using 2×4 lumber and then 2×4 decking is fastened to it with screws.
On the floor header below door opening attach a 2×4 joist ledger.
Cane bolts are inserted into the pipes on sides of ramp for keeping door open.
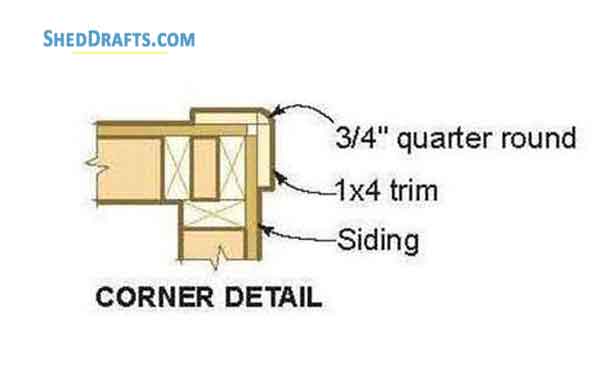
Prevent moisture from damaging the siding by install 1×6 trim over shed’s bottom end.
Finish the corners using 1×4 corner boards.