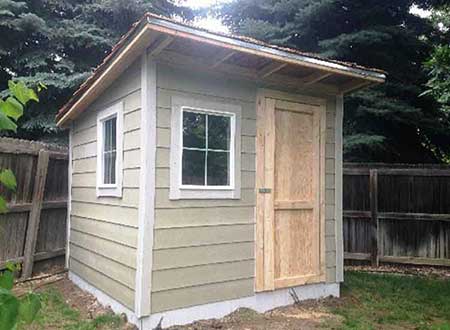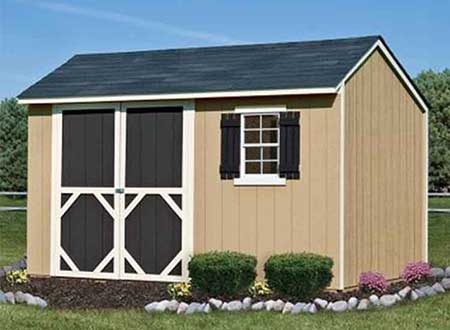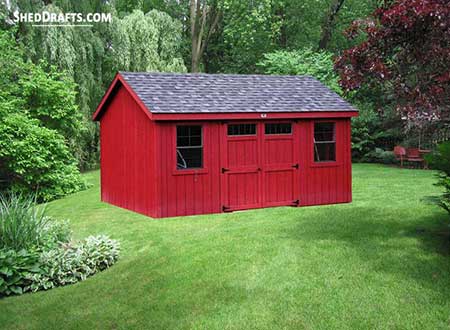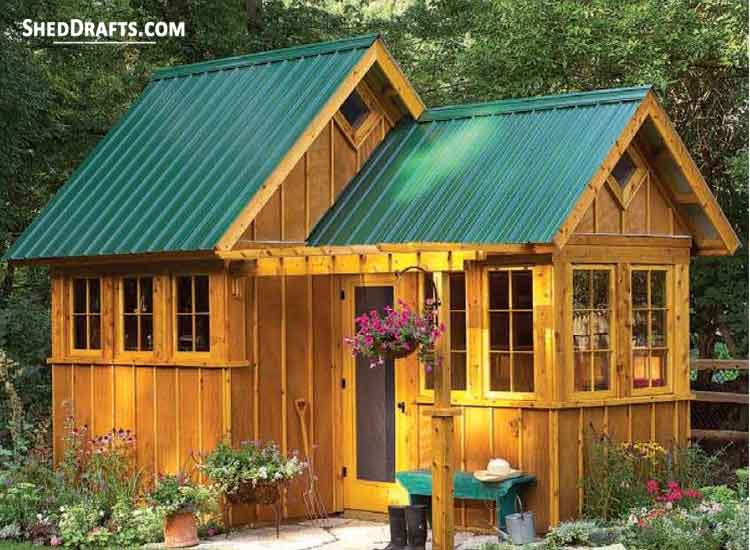
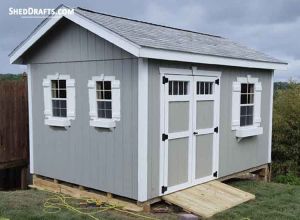
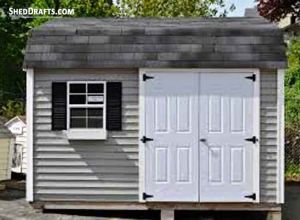
Below are a few 8×10 gable backyard shed blueprints for installing a sturdy garden shed on your patio.
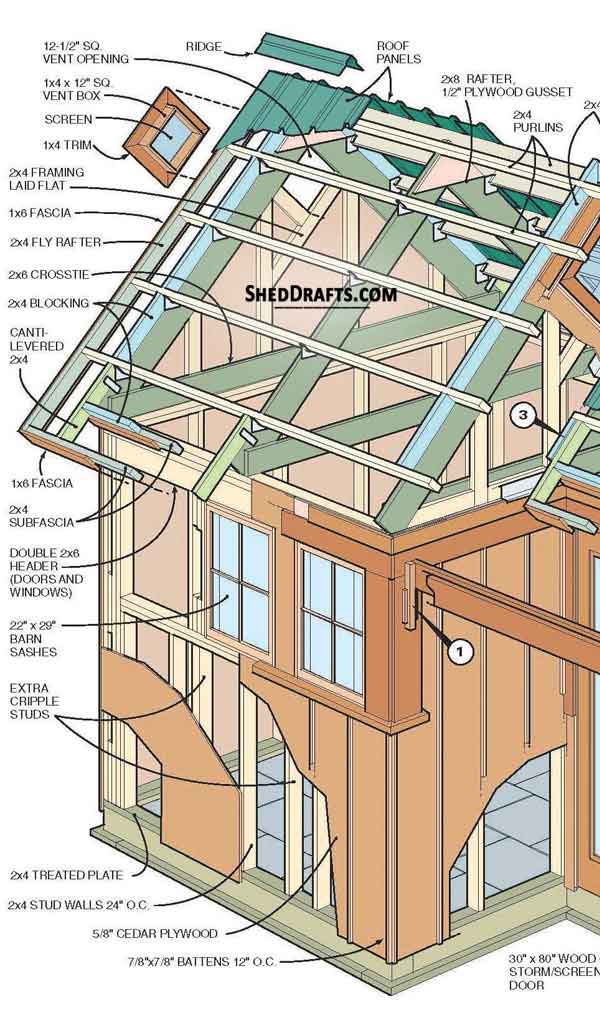
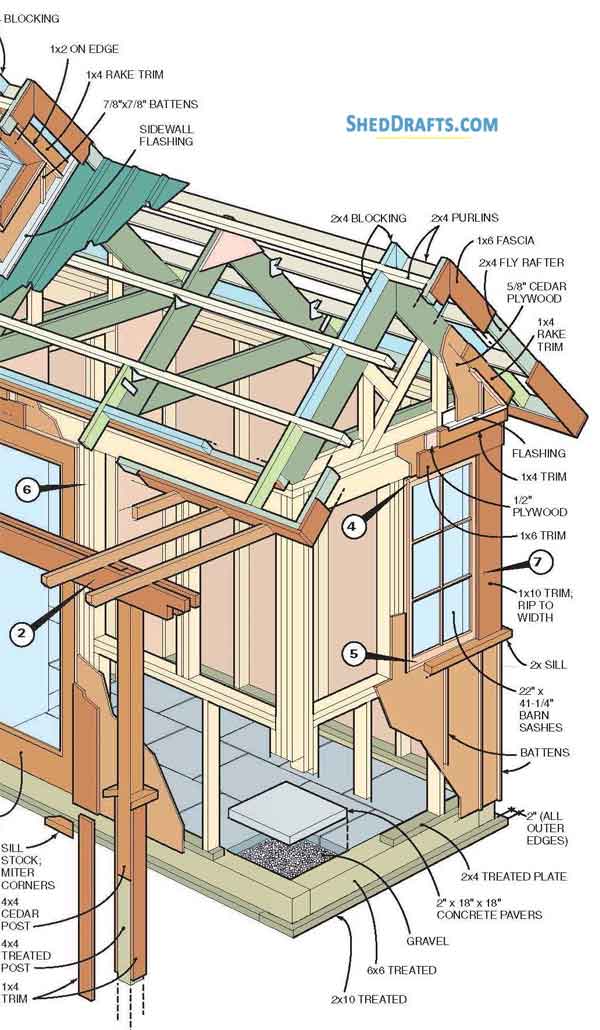
Complete drawings of roof layout, wall frames and floor layout are furnished down.
It can show you how to assemble your building fast and inside a sensible cost margin.
8 Feet By 10 Feet Gable Construction Design & Joint Details
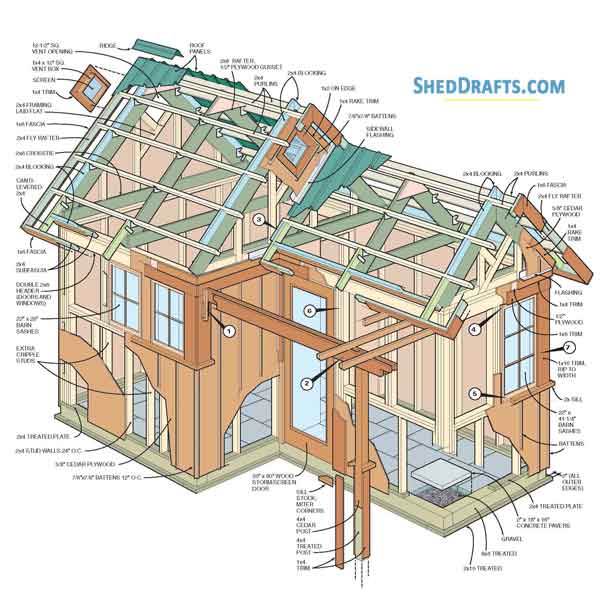
Foundation Details, Floor Crafting Frame And Purlin Details
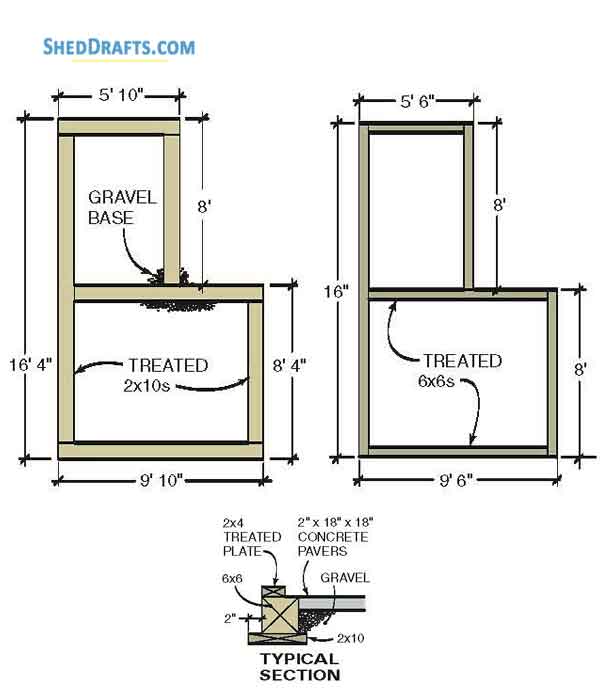
Mark the location of the shed foundation by inserting stakes into the ground.
Confirm that they are accurately square by checking length of diagonals.
Fix and stretch out a string along the stakes to mark out the perimeter of the foundation.
Excavate a pit 1 feet deep pit using the string as the boundary.
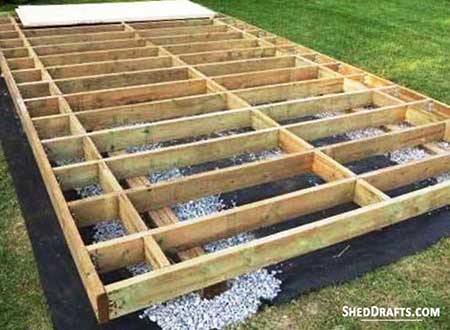
Pour gravel into the pit and fill it to a height of 5 inches and then compact the gravel evenly.
Use 2×10 lumber boards to compress gravel at edges of the foundation by stamping them into the ground till they reach a depth of 5.5 inches.
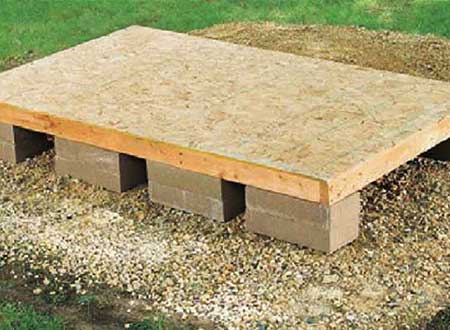
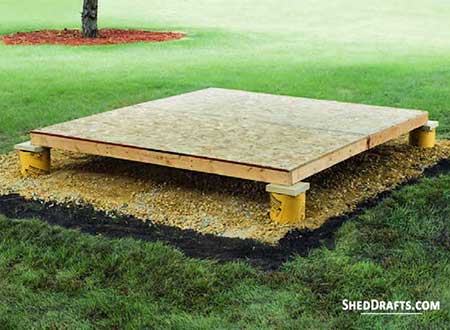
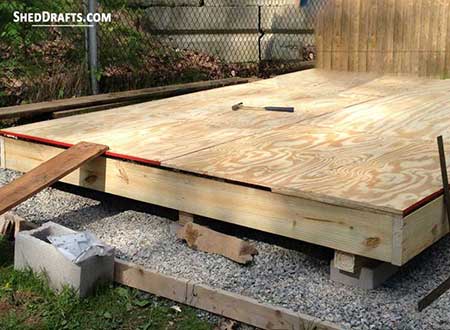
Create the shed perimeter using 6×6 pressure-treated lumber boards.
Use shims to adjust height of any uneven boards and confirm that all boards are at same level.
Fasten the timber boards with each other at the corners using screws after drilling holes into them.
Secure the 2×10 boards and 6×6 boards with each other by toe-screwing them together.
Fill the ditch with another 3 inches of gravel and compress it to a height 2 inches from top of boards.
Flatten the gravel by running a board over it and create an even base for installing the concrete pavers.
Place the pavers over the gravel and adjust their heights by displacing the gravel until all paver tops are at same level.
Carve into the pavers multiple times with a circular saw while gradually increasing the cut depths.
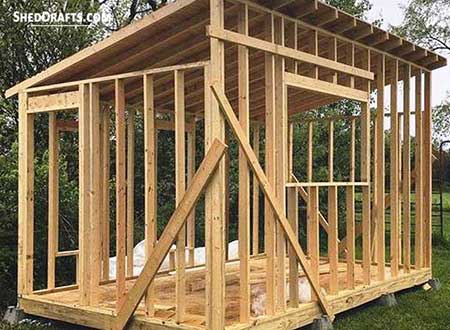
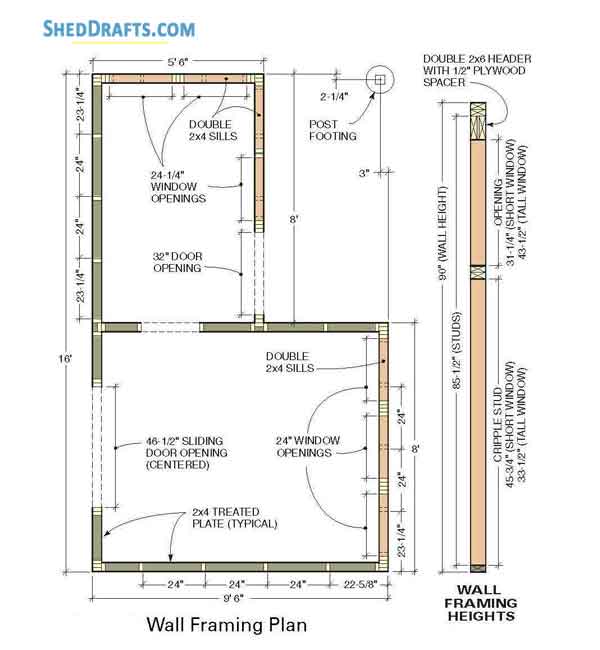
Wall Framing
Craft top and bottom wall plates using 2×4 timber and arrange them around the perimeter of shed.
Create markings on the plates at the positions where doors and windows would be located.
Put together the wall frame on the floor.
Position the long studs over the marks and nail them over the bottom plates.
Craft and install the 2×6 double headers among the king studs using nails.
Create trimmers and nail them under the header ends.
For assembling the window openings, create doubled sills and cripples.
Craft short posts to segregate the windows and then fasten them into position by toenailing.
Erect the forward and backward walls and support them with temporary braces.
Nail down through outer edge of walls into the bottom wall plates with the helps of 6x6s.
Hoist the side walls and fasten their corners with the front and back walls.
Make sure top plates of all walls are at same level.
Fasten the walls to each other by using an additional top plate which extends over adjacent wall’s top plate at the corners.
Drive 16d nails into the ends of this extra top plate and into studs beneath the plate.
Check each wall is level, plumb and square and then attach diagonal bracing to each wall.
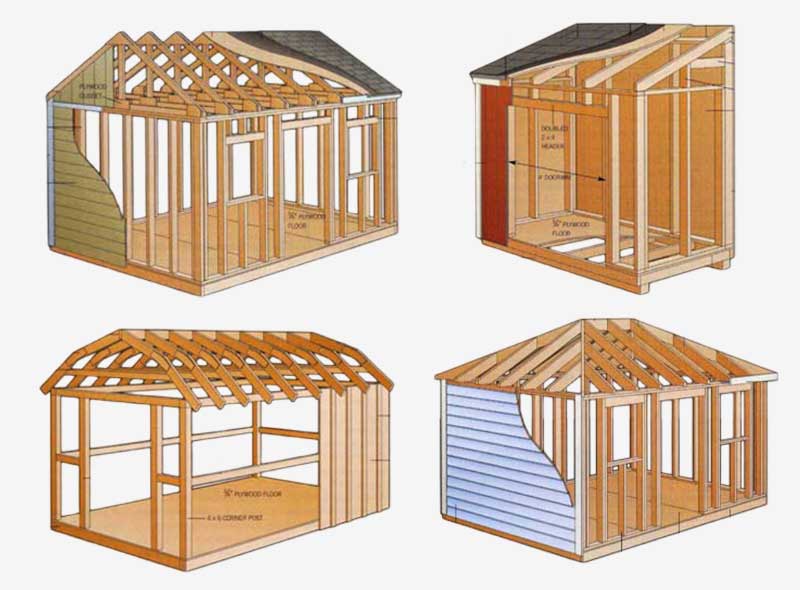
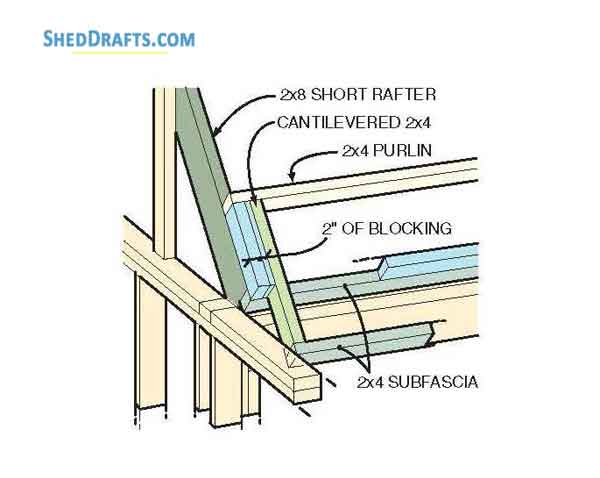
Rafters Assembly & Gable Eaves
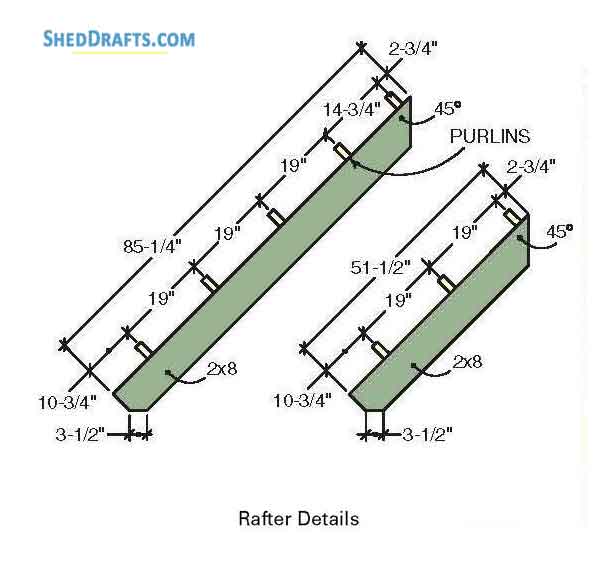
Refer to roof building diagrams and craft a pair of short rafters and long rafters as shown.
Use them as a template to create remaining rafters.
Position rafters in line with outer boundaries of the 6x6s and craft 3 big trusses as shown in the diagram.
Repeat same process at narrow end and craft 3 little trusses.
Nail the rafters with each other using triangular gussets.
Fasten 2x4s to them by nailing at 2 feet intervals and craft two big and one tiny end gable trusses.
Craft one big and two tiny trusses that don’t have studs.
Hoist the end trusses over the wall frames and support them temporarily by nailing 2×4 boards into walls.
Toenail the trusses to the walls after aligning the edges with the walls.
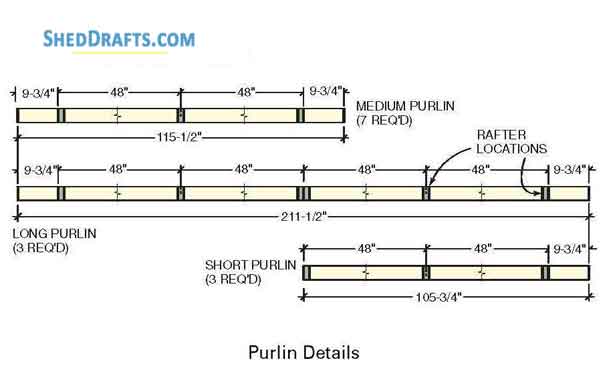
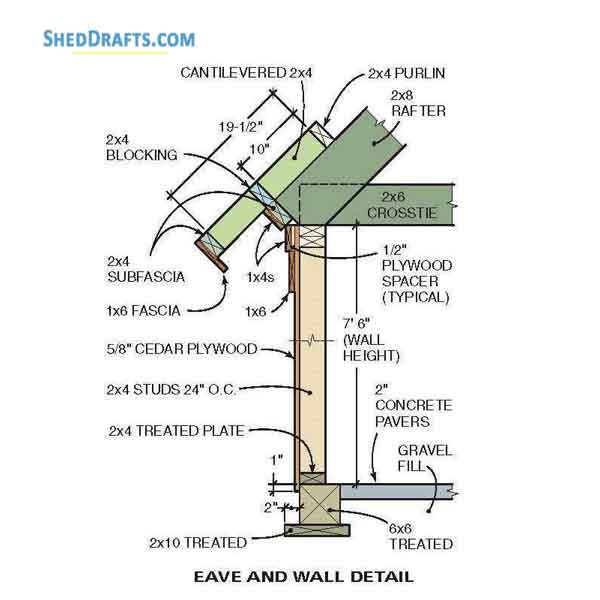
Position and secure the long purlin into the roof framework by toe-nailing.
Fasten remaining trusses with the purlin.
Attach remaining purlins over end walls.
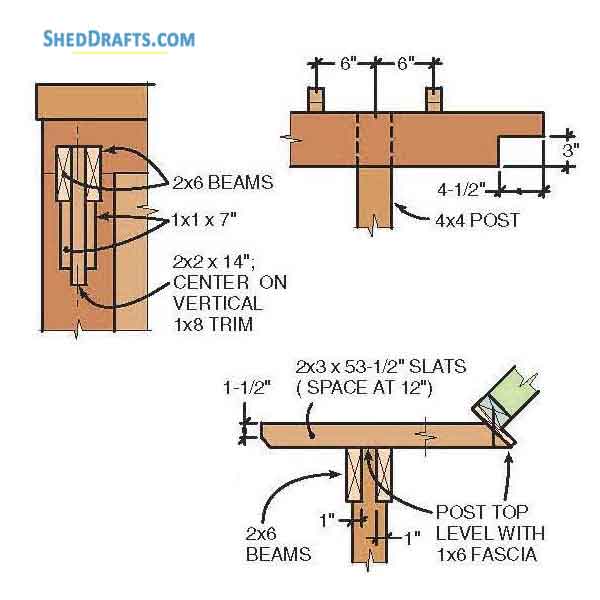
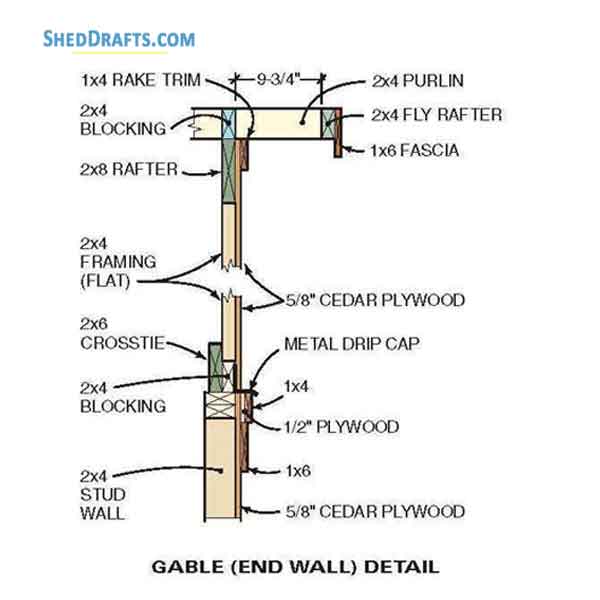
Over the 2×4 sub-fascia boards install 1×6 fascia boards.
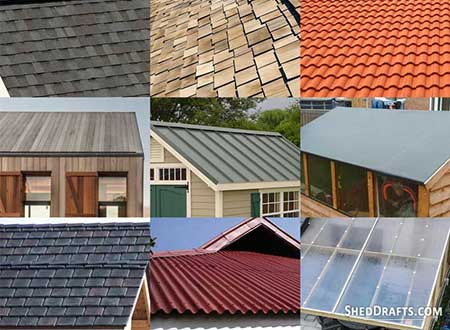
Cut metal roofing panels using a circular saw and overhang them one inch over the end and two inch over the bottom of the roof frame.
Secure it to the purlins using metal screws.
Install the next panel extending over the first one.
Attach the final panel such that it overhangs an inch over the trim.
Lastly install ridge cap at top of roof.
At the places where metal panels overlap, fasten screws on each side of the rib.
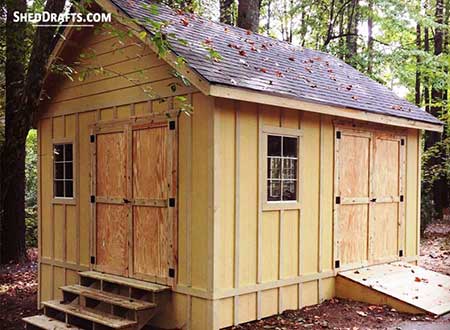
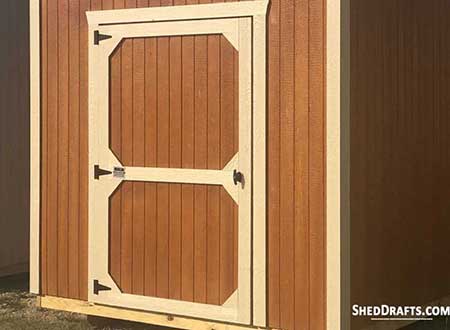
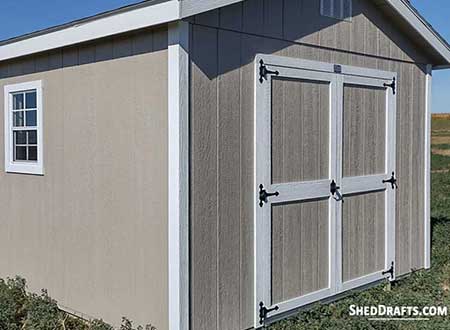
Door & Window Creation Drafts
Craft plywood siding panels to accurately fit the wall frame and secure them to wall frame with nails.
Finish installing the door and window trims before you attach the siding on the end trusses,.
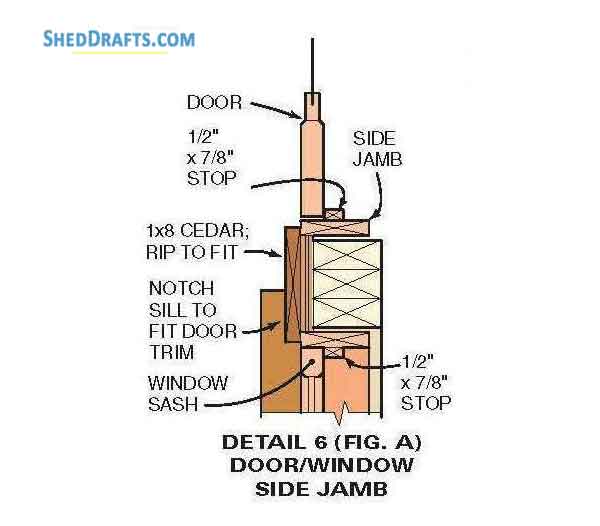
Craft 1×4 timber frames with a 1/8 inch gap for creating barn sash.
Install half inch stops within the sash.
Align the frames inside the openings and position them correctly using shims so that the gap between frame and sash is same around the perimeter.
Drive nails into the frames through shims and fasten the windows.
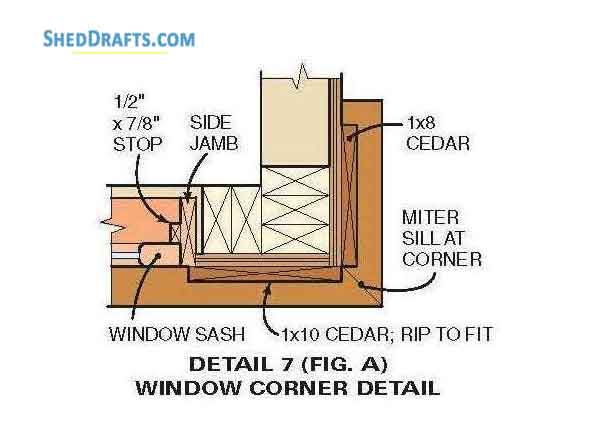
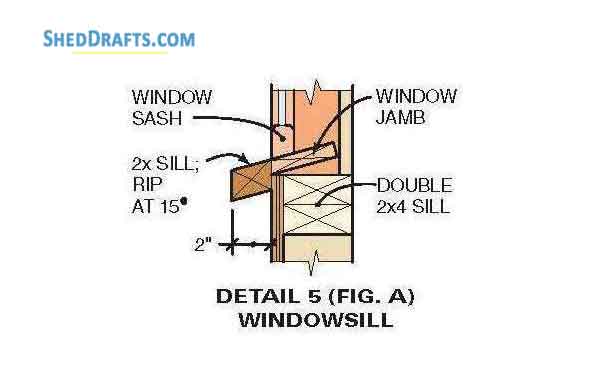
Use a table saw to craft two inch wide sills with a bevel of fifteen degrees on every side.
At the place where the sills will wrap around walls, miter at an angle of 45 degrees.
Fasten the sills below windows by driving nails into them.
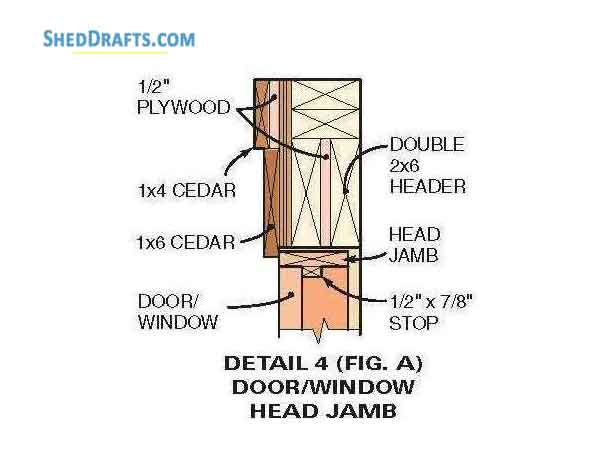
Craft trim boards to install around the doors and windows and nail them in place with shims.
Create the storm door about 0.2 inches less wide and 0.5 inches less tall compared to the door opening in the wall.
Suspend it on strap hinges and install the latch.
Assemble and fasten flashing around the sidewall framing by nailing to the studs, then cover it with trim.
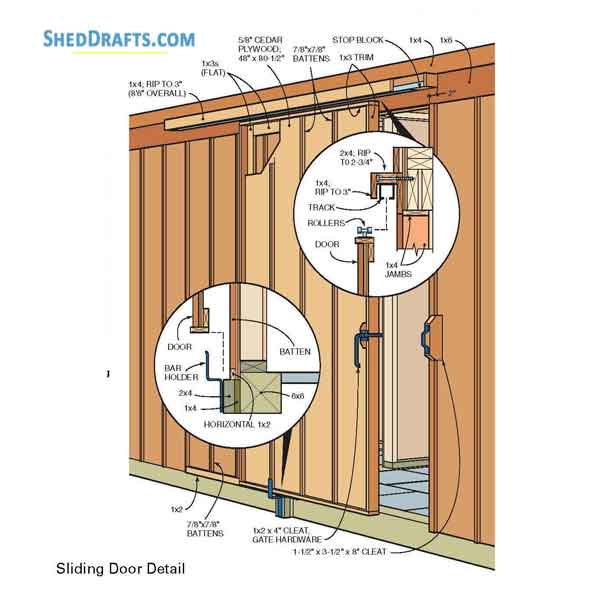
Create sliding door by fastening 1×3 boards to perimeter of a 48×80 sheet of plywood.
Install wheel brackets for the door into the door frame.
After inserting the wheels of the door inside the track, cover them with trim boards.
Attach wooden blocks at both track ends to hold the door into place.