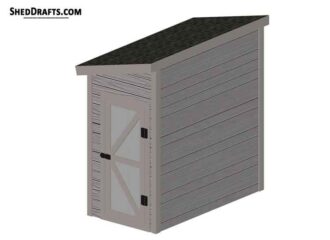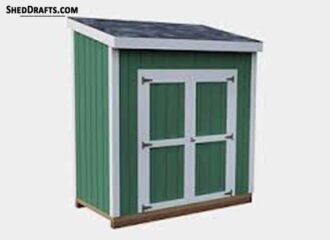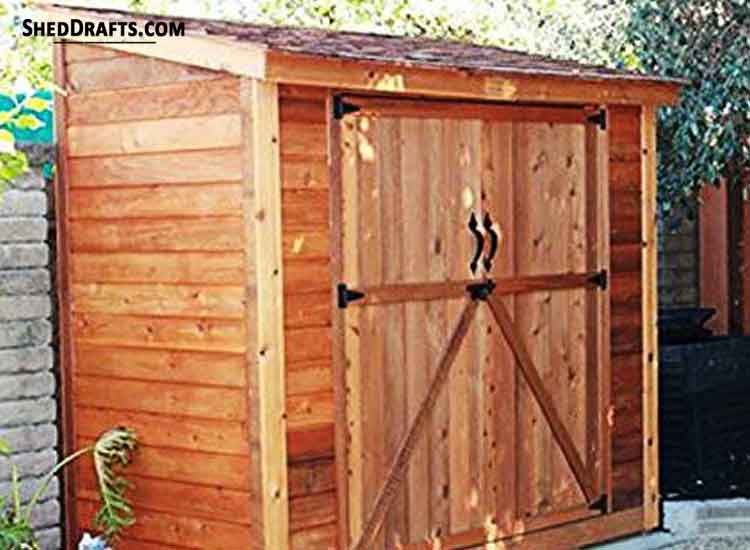
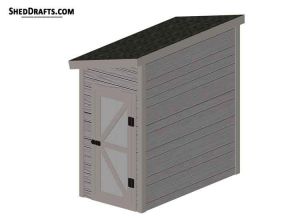
Shown on this page are 4×6 lean to roof tool shed plans for constructing a functional potting shed in your backyard.
Full sketches of rafter frames, floor design and wall frames are given here.
They will show you how to design your outhouse efficiently and finish it while keeping costs minimum.
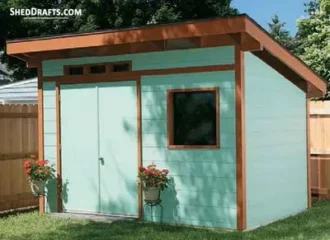
This practical lean-to tool shed is built on a foundation made of skids, that makes it easily portable.
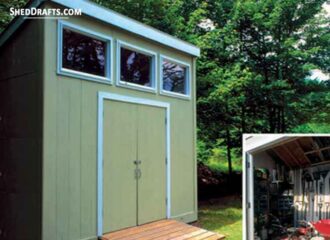
It has large double doors that makes it very easy to move large items into the shed.
The 8 feet tall rear wall can be fitted with shelves for creating additional storage space.
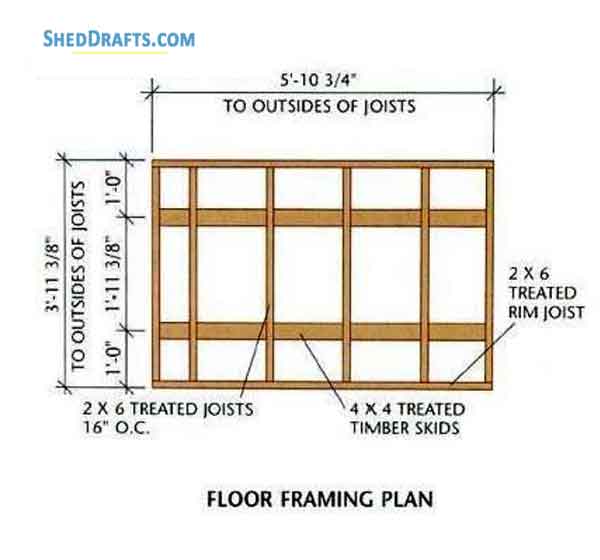
Skillion Shed Design With Floor Framework
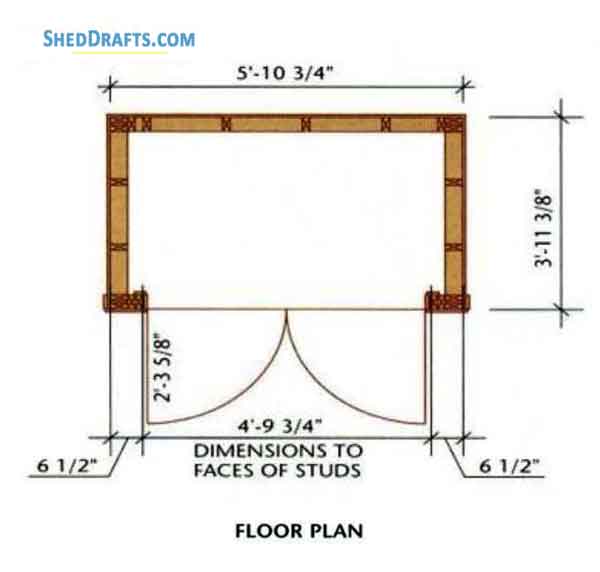
Dig a 4 inch deep pit on the land for the shed foundation and fill it with compacted gravel.
Make the gravel level by pressing it down.
Craft two 4×4 skids of 70.75 inches from pressure treated lumber.
Place the skids on the bed of gravel as shown in the floor plans.
Create six 2×6 joists of 44.5″ length and two joists of 70.75″ length.
Craft the floor frame by secure the joists as shown in the floor plan using galvanized 16d nails.
Setup each joist with the crowned edge facing upwards.
Install the frame over the skids and check the diagonal length to ensure it is accurately square.
Toenail the skids and joists with each other.
Secure metal clips at the meeting point of the skids and outer joists with 1.5 inch hanger nails.
Install floor sheathing made of plywood over the floor frame by driving 8d nails at intervals of six inches along the edges.
Slant Roof Drafts With Elevations And Wall Frame Assembly
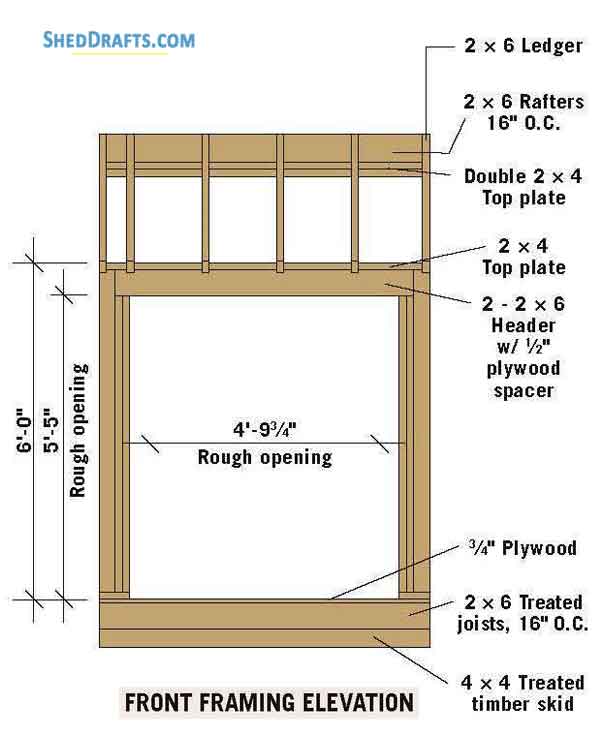
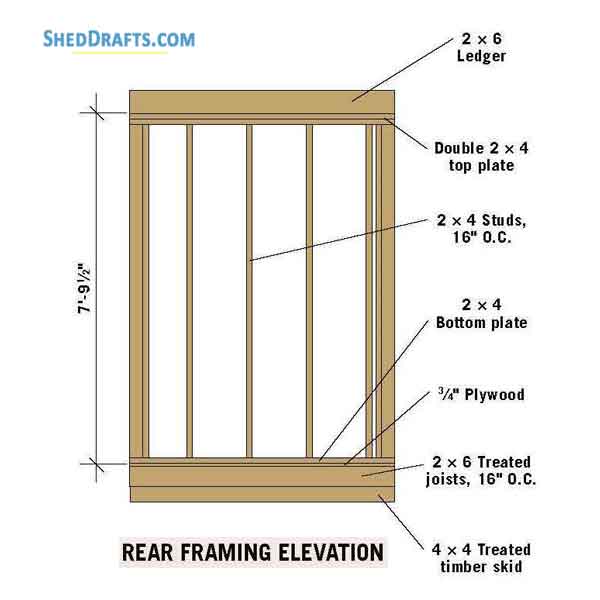

Draw lines on the floor with chalk to mark the positions for the wall plates.
Create four bottom plates using 2x4s.
The plates for side walls will be 47.5 inches long and the plates for front and back would be 63.75 inches long.
Create 6 studs of 89 inches for back wall.
Side walls will require four 89 inch studs and four 69 inch studs.
Front wall needs 4 jack studs of 63.5 inches.
Use half inch thick plywood and two 2x6s to create the 63.75 inch long header.
Trace out the position of the studs on the plates as shown in the building plans.
Secure the studs of each side walls with the bottom wall plate and attach the plates to the floor.
Craft and hoist the front and back walls without their top plates.
Secure adjacent walls by nailing their corner studs to each other and check they are plumb.
Attach the top plate for rear wall between the outer edges of studs from side walls.
Now setup the top plate of the front wall and confirm that opening for door is correctly square.
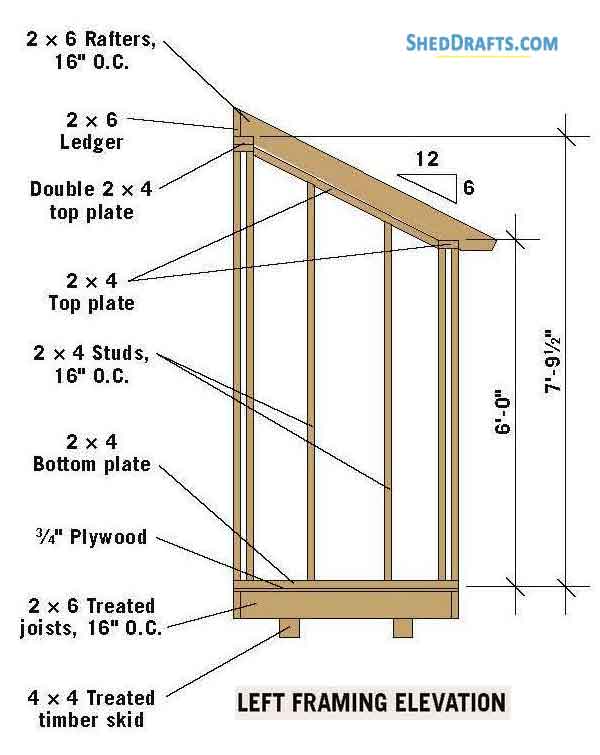
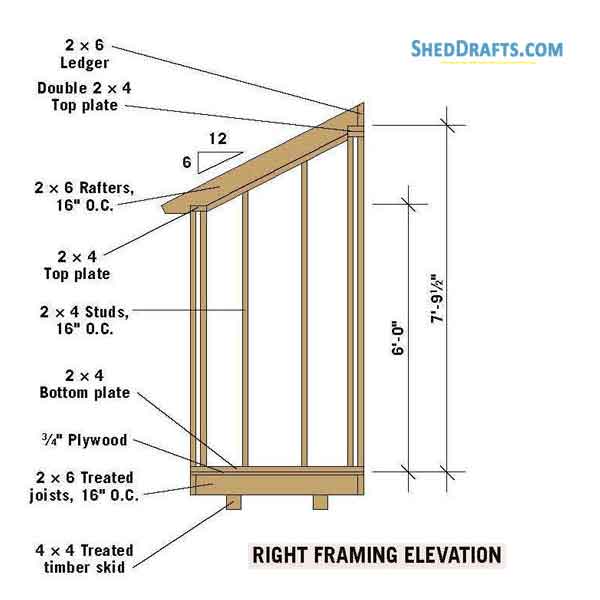
Side Wall Framing
Create a top plate from 2×4 board and angle cut its ends at 26.5 inches such that it fits snugly between front and back walls.
Place the plates over the rafter underside such that their boundaries are parallel with the exterior faces of the rafters.
Nail the rafters to the plates.
Copy the layout of studs from bottom to top plates using a plumb bob.
Craft remaining 4 studs to accommodate between plates and toenail studs to the plates.
Diagrams For Roof Layout, Rafter Design And Overhang Detail
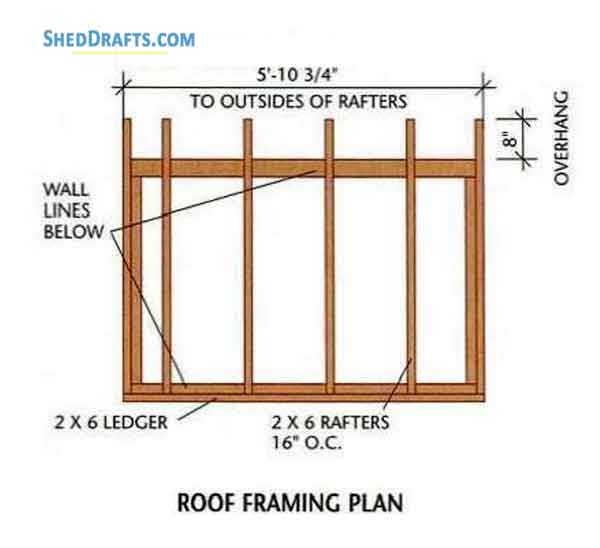
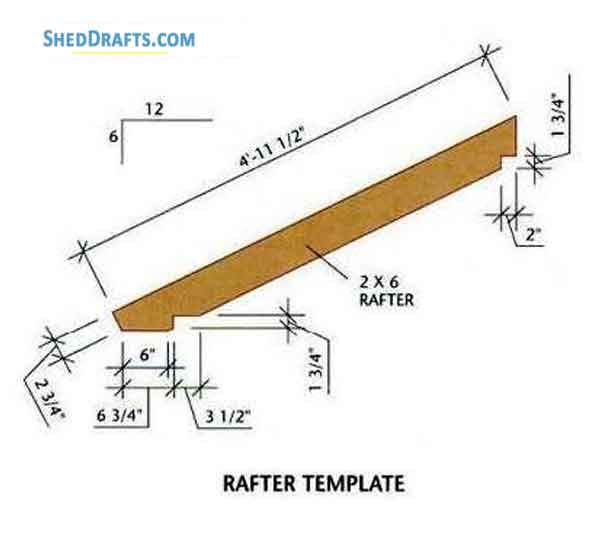
Create 6 rafters using the template and 2×6 boards.
Next create the ledger using 2×6 boards.
Trace the outline of the rafter over the ledger and over the front wall’s top wall plate.
Align ledger over rear wall with its outer edge parallel with outer face of front wall and ends parallel with outer face of side walls.
Toenail the wall plates and ledger with 10d galvanized nails.
Secure rafters by using 16d nails to end-nail with ledger and toe-nail with wall plates.
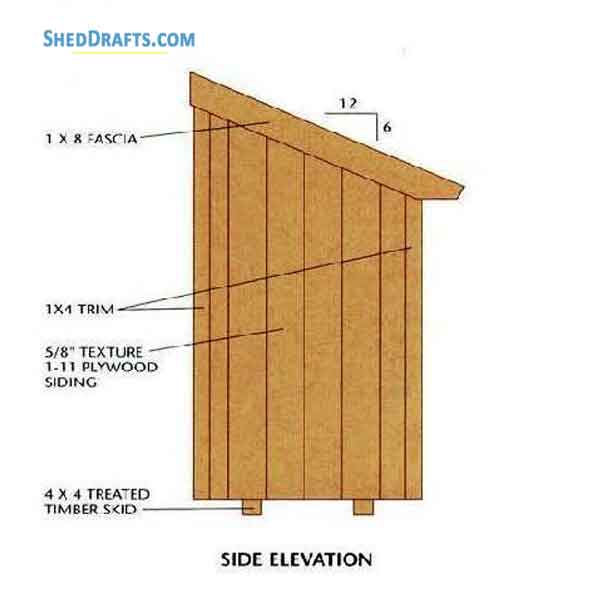
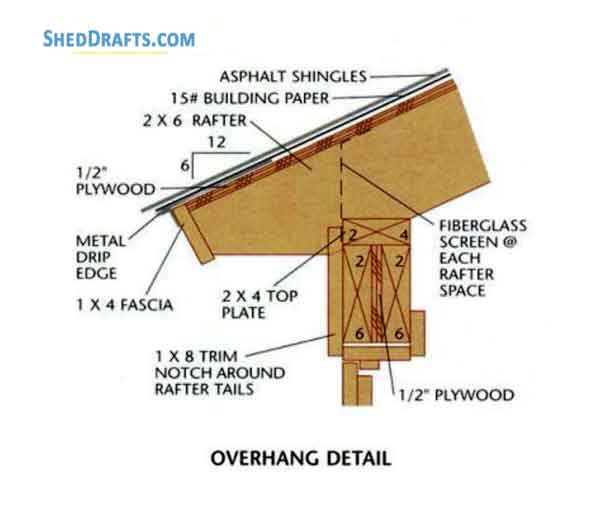
Install Fascia & Siding
Nail plywood siding over the back and side walls.
Keep siding flush with framing of front wall and let it overlap siding at back corners,
Secure 1×4 fascia to fron ends of the rafters and 1×8 fascia to the back ends.
Connect the fascia corners using mitered joints and nail them to the frame.
Craft the bottom ends of 1×8 fascia such that they are flush with the rafter cuts.
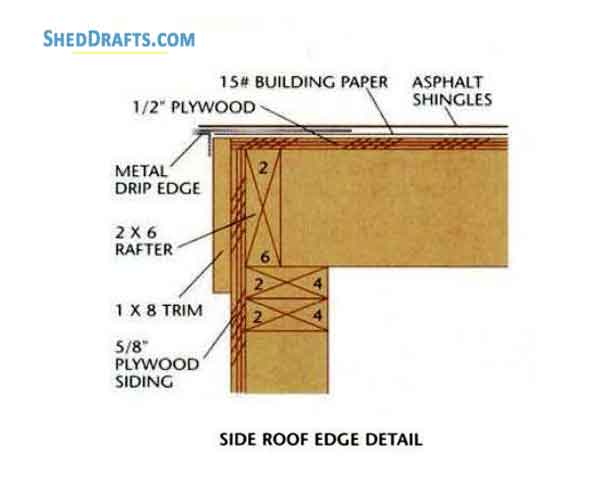
Install Roofing & Sheathing
Attach half inch thick plywood sheathing at 90 degrees with the rafters.
Install the sheathing with box nails secured at 6 inch intervals along the edges.
Install a drip edge over the front roof edge and then secure roofing paper on top of the sheathing.
Then add drip edge over the back and side edges of the roof over the paper.
Attach the shingles over the roof and then fix the roofing strip.
Use roofing cement to cover up all nail heads.
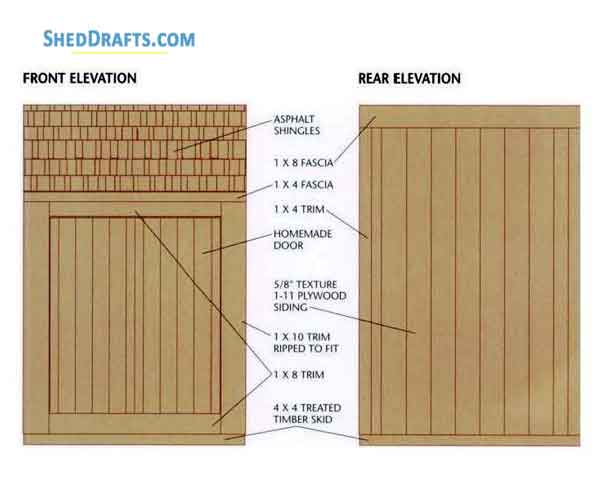
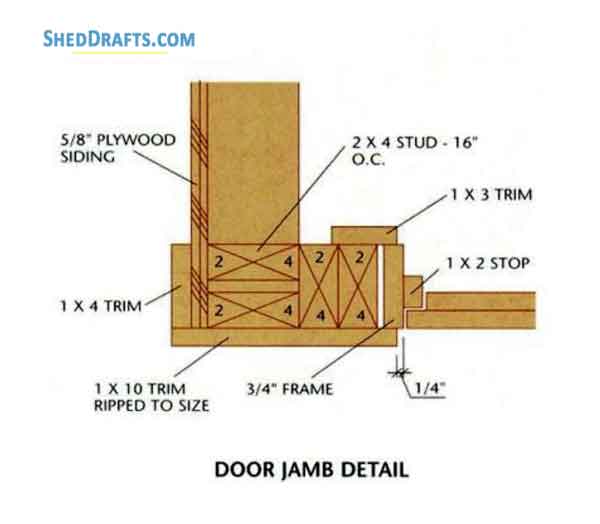
Plans Showing Door Frame And Jamb Details
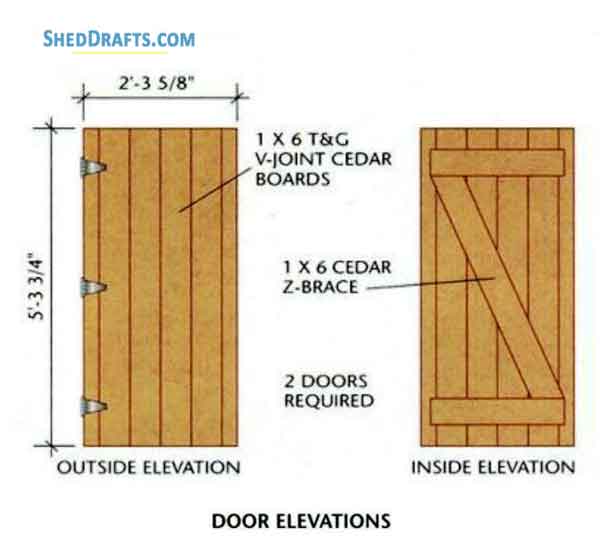
Build & Install Doors
Remove the bottom plate from door opening.
Create a 57 inch long head jamb for door frame and 64″ long side jambs.
Secure the head jamb to side jambs using 2.5 inch deck screws.
Create door stops using 1×2 timber and fasten it 0.75 inches from outer end of frame.
Attach door frame into the opening using galvanized nails and shims.
Check that frame is plumb and square and flush with wall framing.
Create six units of 63.75 inch long siding from 1×6 timber boards.
Secure the boards together and trim the end boards.
Create the Z-brace boards with 1×6 lumber and fasten it to the door using wood screws and adhesive.
Attach the hinges and fasten the door over the frame.
Add the Trim
Install insect screening over the roof sheathing and front wall plate using staples as shown in roof diagrams.
Fasten the 1×8 trim over the door such that it overlaps the side jambs about 0.25 inches on both sides.
Secure the trim with 8d nails.
Cut 2 trim boards for the doors such that it covers about 0.5 inches of the door jamb and the corner trim.
Make sure they extend from the siding’s bottom edge to upper edge of the 1×8 above the door.
Top ends must be notched to fit over the rafters and then secure the trim.
Create a 1×8 trim board to fit at the bottom of the door flush with the floor.
Fasten the corner trim such that it covers the sections at back corners.