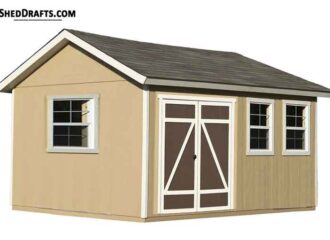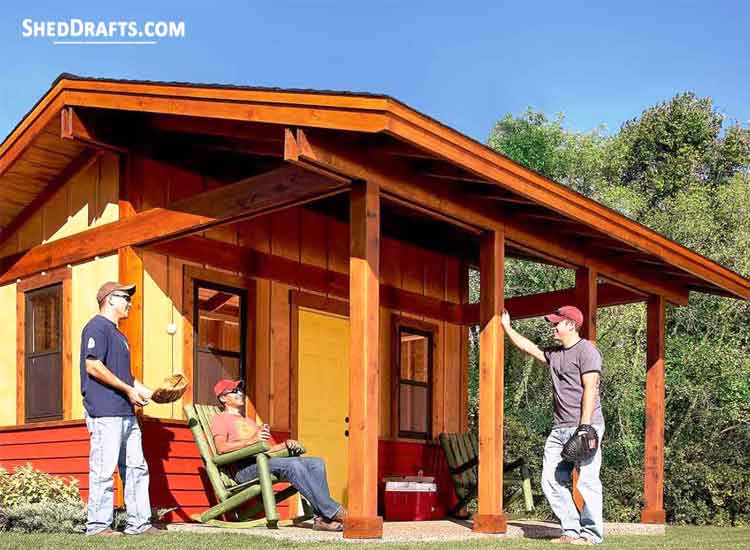
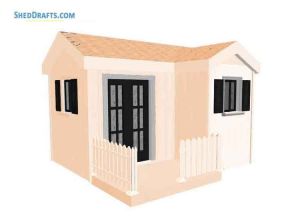
Presented here are some 16×16 large garden shed building plans blueprints with porch for crafting a timber storage shed on your land.
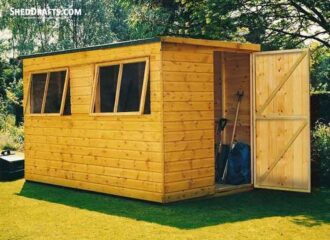
Our large shed plan boasts a big gliding door which provides ample room for moving bulky items in and out of storage.
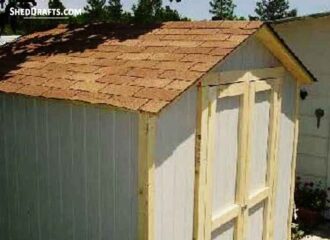
The windows allow ample sunlight into the shed and the door at front provides an easy entry point.
This building also has a front porch covered by roof which can be used as a shady retreat or a convenient work-space.
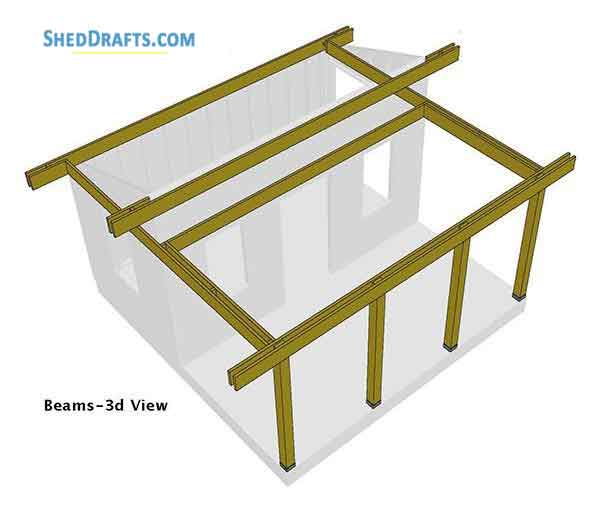
Roof is supported by 2×10 beams and 6×6 posts that are used for the post and beam construction of this structure.
Beams and boards are built using pressure-treated timber and plywood siding is used to give the shed a rustic look.
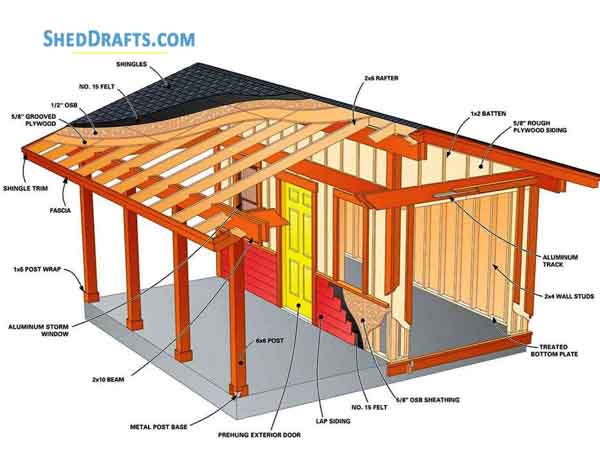
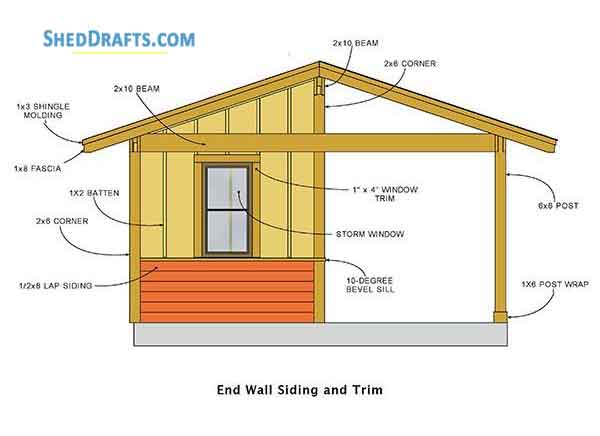
16×16 Large Garden Shed Plans With Porch Showing Structural Design And Trim
Trace out the location for the bottom wall plates on the shed foundation.
Confirm that the lines for opposing walls are perfectly parallel to each other.
Verify that diagonal lengths are equal to confirm adjacent walls are at right angles.
Make adjustment to the lines as required to make the wall positions accurately square.
Craft out the wall plates using 2×4 using the chalk lines as reference for length.
Mark the position for window and door openings into the plates.
Bore pilot holes into bottom wall plates for fixing the anchor bolts.
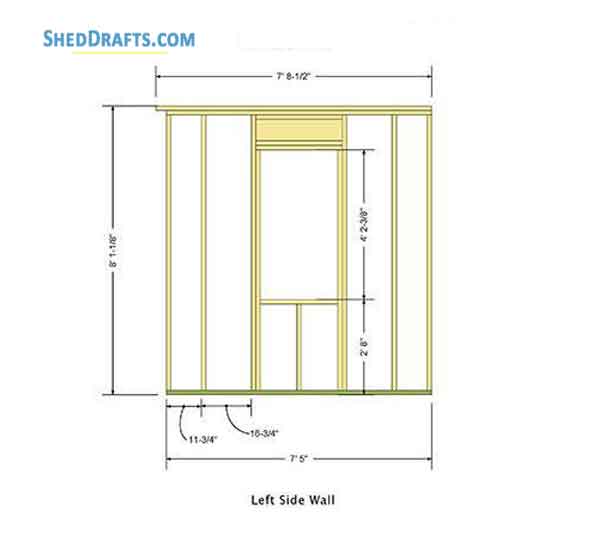
Assemble the wall frames on the floor and hoist them into position.
Check the corners are plumb with a spirit level and use a string to verify that top plate is straight.
Now brace the walls diagonally using timber boards.
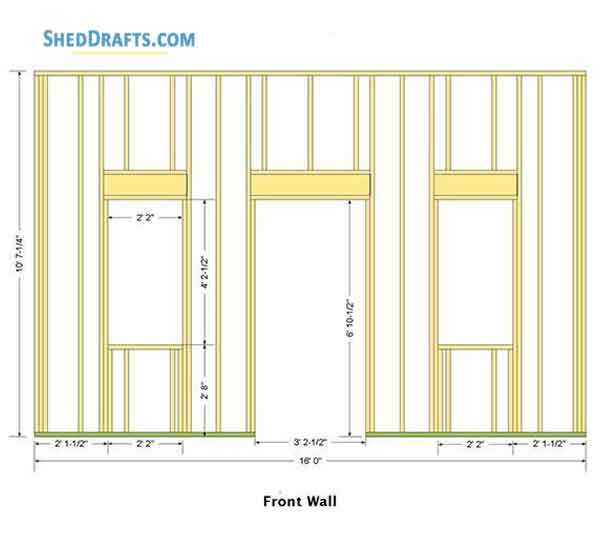
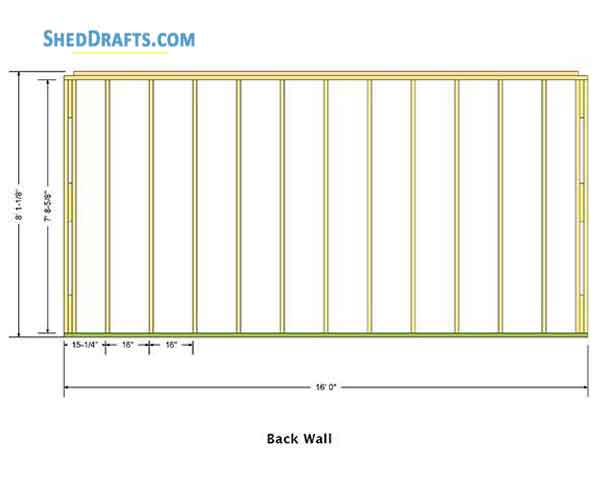
Large Gable Shed Blueprints To Craft Floor Frame And Wall Assembly
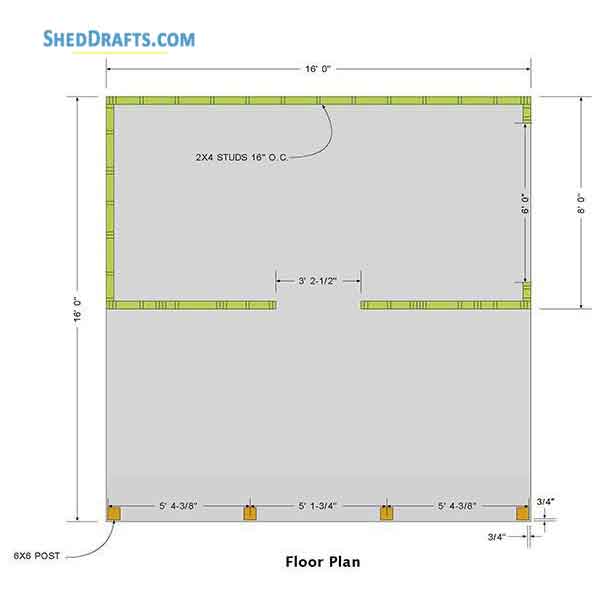
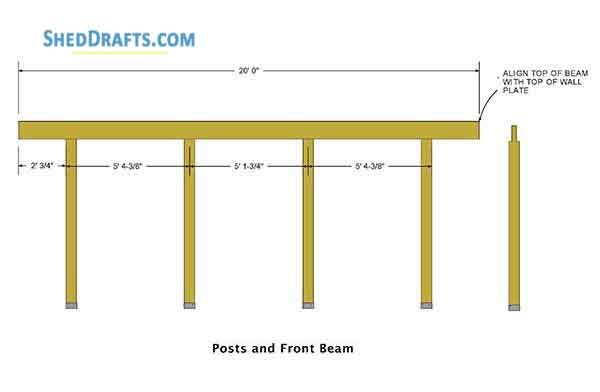

Two posts made of 6×6 timber will support front of the roof.
After hoisting the post into place over the metal brackets they must be braced temporarily using timber boards secured by screws.
Use one 2×10 beam to determine the position of the notch on the end post and repeat from the other end.
Draw a line between the two markings to find the center point where notch will be made.
Bring down the posts and cut 1.5 inch deep notches on both sides.
First use a circular saw and then make fine adjustments with a handsaw.
Hoist the posts back into position and brace them with 2x4s after verifying that they are plumb.
Craft beams by cutting 2×10 timber to proper length and trace the post positions over them.
Align the marks on the beams and posts and then secure them to each other with screws.
16×16 Storage Shed Diagrams For Post Layout With Rafter Design
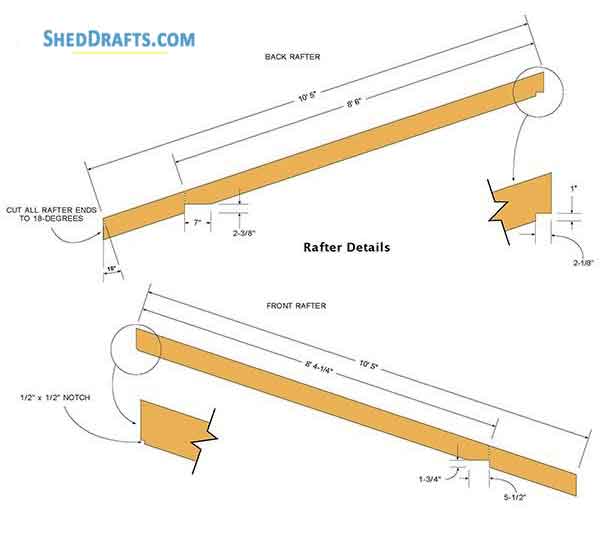
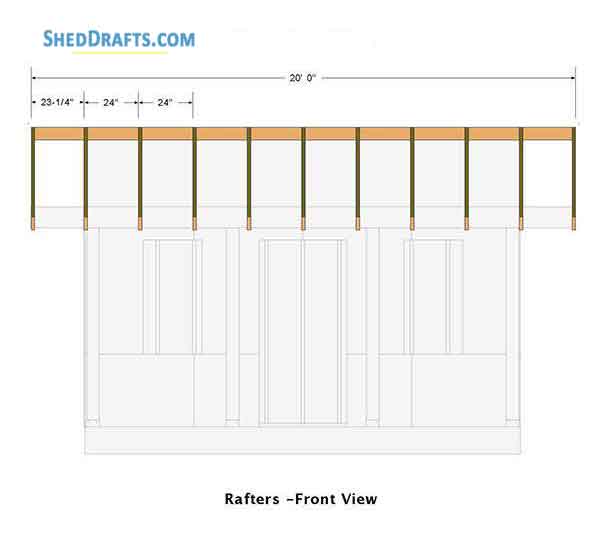
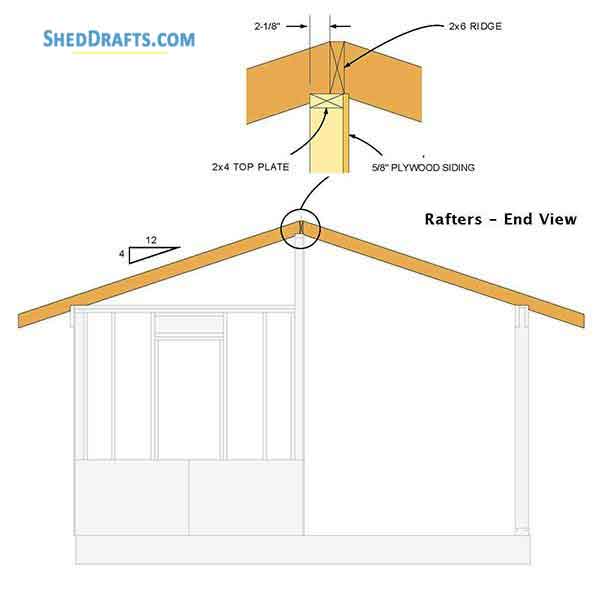
Craft rafters from 2×6 boards as per measurements shown in the diagrams.
Trace the position for roof ridge over the front beam’s top and over back wall’s top plate.
Secure ridge over front wall’s top using nails.
Craft beam using 2×10 lumber and cut it to length so that it extends beyond the wall 2 feet on either end.
Fasten rafters at 2 feet intervals using 16d nails.
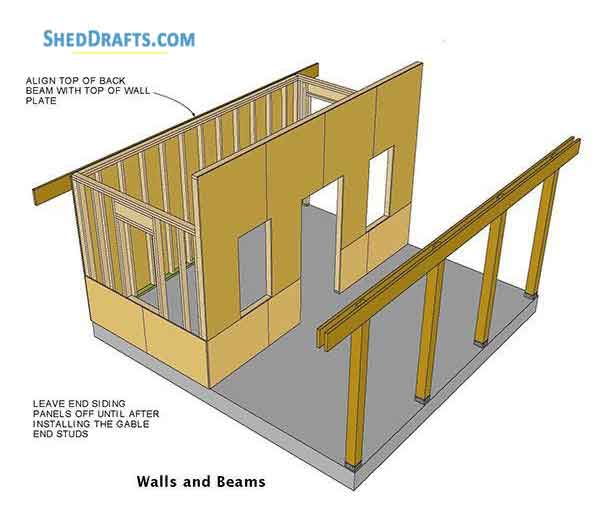
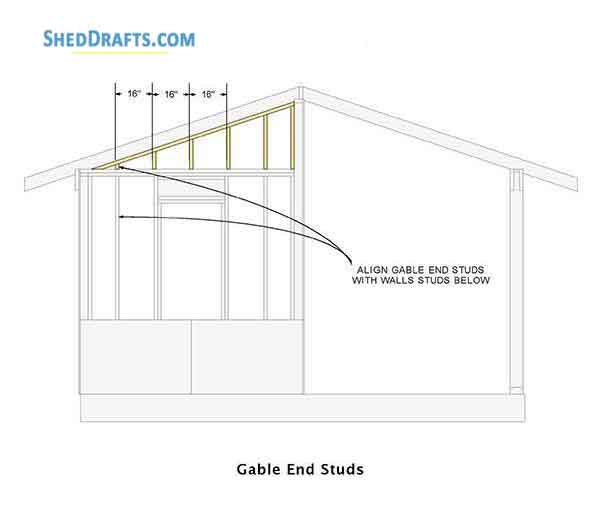
After roof frame has been completed you can install the short studs over both end walls.
Cut out required angles over top plate ends and secure them to rafter undersides.
Mark stud locations, craft studs and fasten them with nails.
Nail plywood siding over side and front walls after cutting openings for doors and windows.
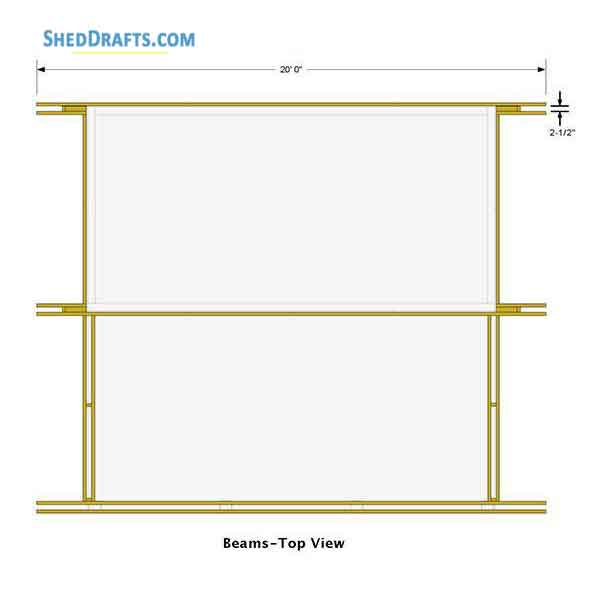
Install remaining beams, they are just for aesthetic purpose.
One beam fits underneath the front wall’s rafters and other two fit under the back and front beams.
Add spacers after positioning beams.
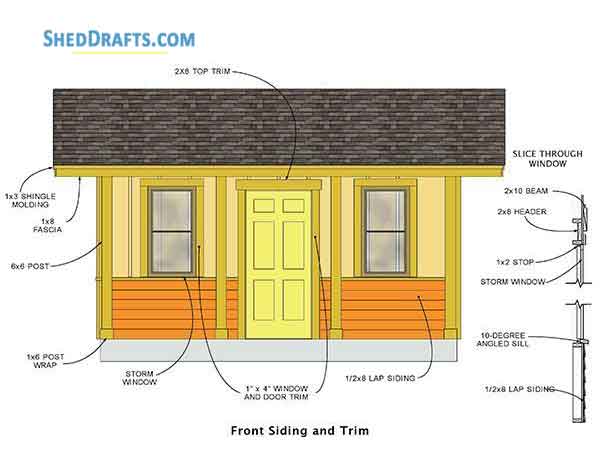
Nail a 2×10 over the windows and doors between side beams.
Install plywood siding over rafters with 8 inch on-center spacing.
Nail half inch thick OSB over the siding.
Secure fascia made from 1×8 boards and fasten the molding for shingles.
Align the shingle molding with surface of roof.
Install roofing paper on the sheathing using a staple gun and keep an overlap of 3 inches between seams.
Secure shingles over roofing paper using nails and install ridge shingles over the ridge.
DIY Shed Building Plans Layout Showing Beam Layout And Door Construction
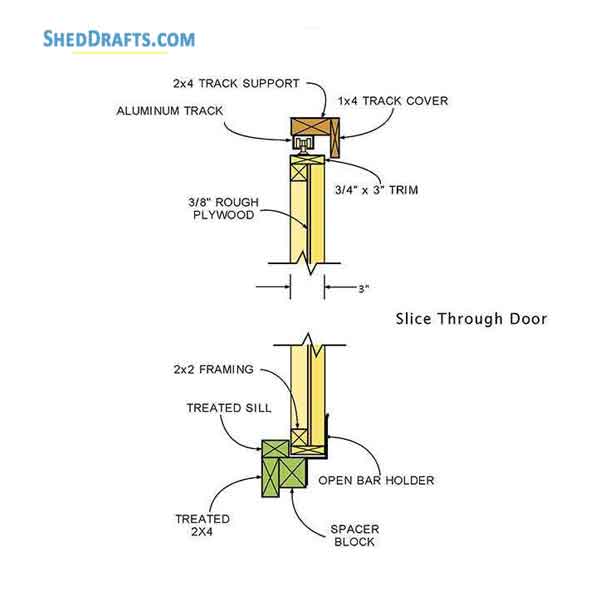
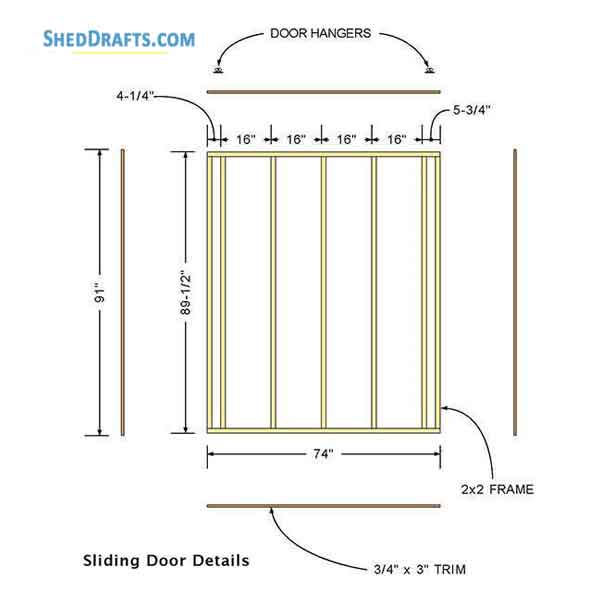
Craft the frame for door frame as per diagrams by fastening 2x2s with each other.
Fasten plywood sheets to the 2×2 framework and nail 1x4s around the perimeter of the frame.
Let the 1x4s extend beyond the siding edges. They will cover the batten ends.
Use high-quality exterior door support hardware for strengthening the outer sliding door.
Secure sliding door track support over the beam with lag screws.
Use screws spaced about 0.25 inch from beam to fasten the tracks with lower side of track support.
Install door hanger brackets.
Glide the wheels arrangement into door track and secure a block at the open track end to hold the door in place.
Fit the wheel arrangement inside the hangar brackets and suspend door over the track.
Use prefabricated aluminum windows by mounting them into a perimeter of stretchable U channels.
Fasten 1×2 boards along the top and sides of the window frame openings about one inch behind from the siding faces.
Nail the windows to these boards.