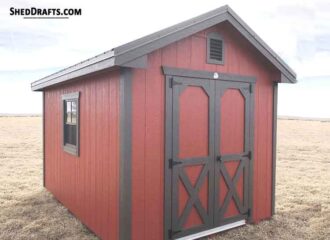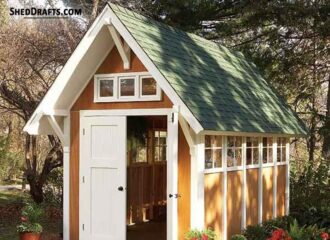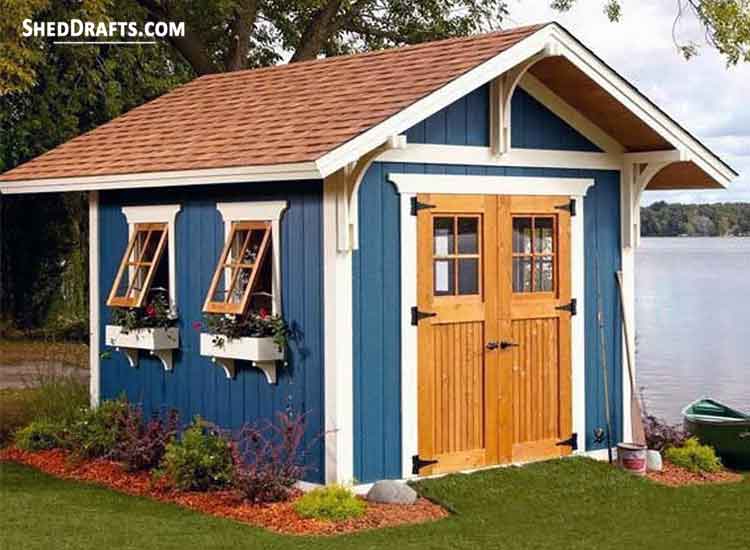
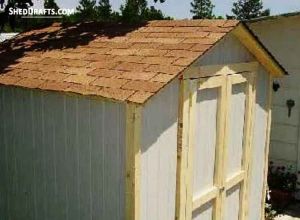
With these 10×12 gable roof shed blueprints, you can construct a sturdy wooden garden shed in your yard quickly.
Double doors in this shed help to move bulky items indoors and outdoors easily.
Big windows allow ample sun and air to enter the building.
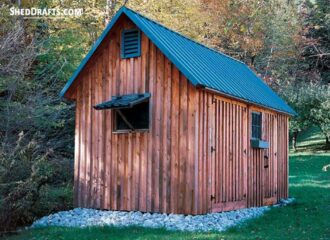
You can easily convert this building into an additional bedroom or workshop.
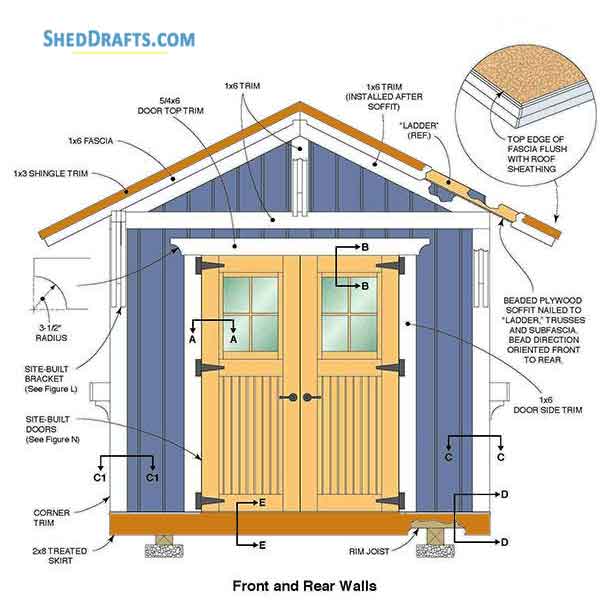
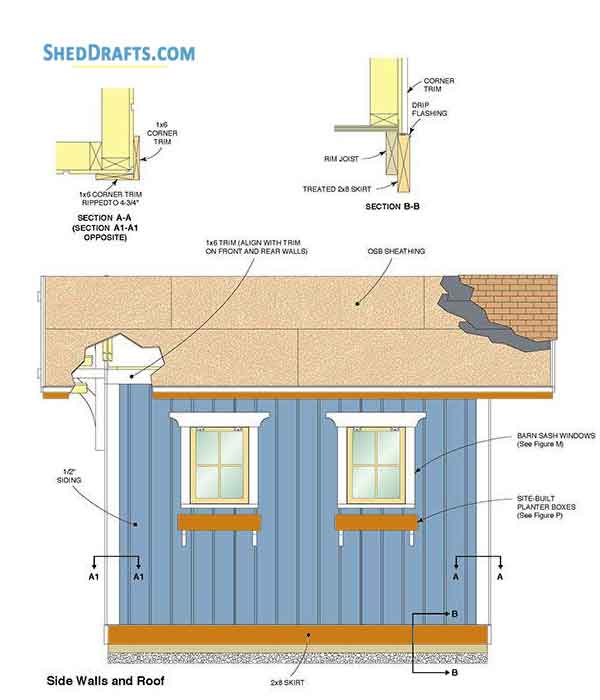
Front & Side Elevation Diagrams
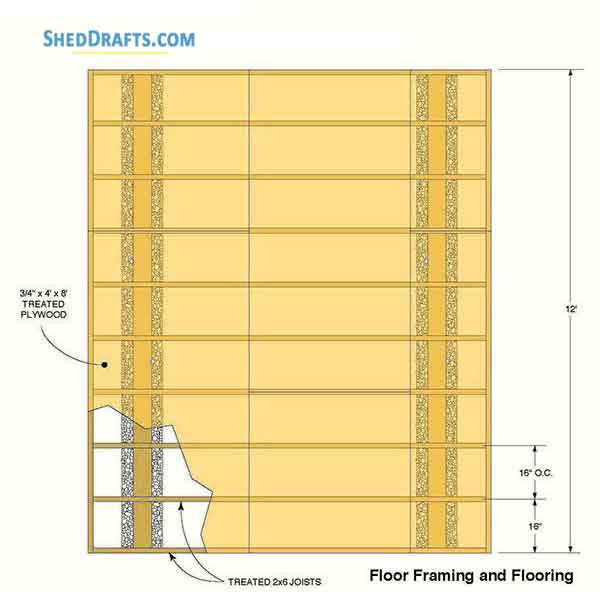
Floor Frame Construction Blueprints With Foundation View
Recommended:
8×8 Diy Gable Shed Building Diagrams Schematics
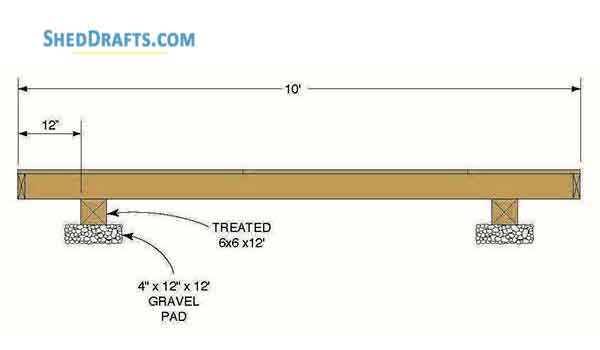
- Pick an easily accessible spot for constructing shed and clear any stones or weeds present on it.
- Level the ground and excavate a ditch for creating shed foundation.
- Keep the depth of ditch at 6 inches and make length and breadth of the ditch one foot more than dimensions of shed.
- Use concrete forms to lay the foundation and then secure stakes into forms with screws after checking they are accurately level.
- Level the soil within the forms and make a 6 inch wide clearing around perimeter of the forms.
- Add concrete mix into forms, fasten anchor bolts and install pavers.
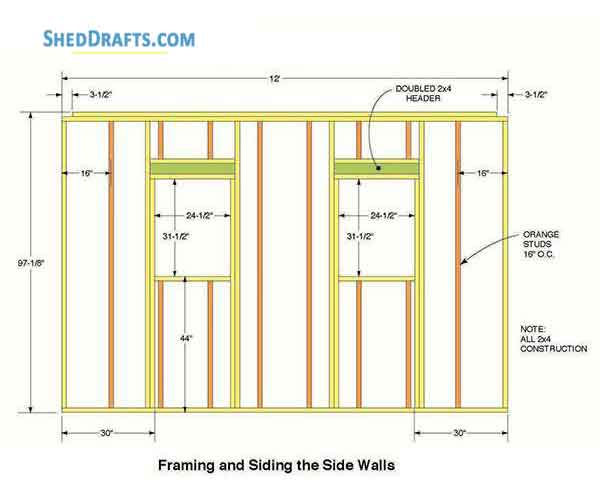
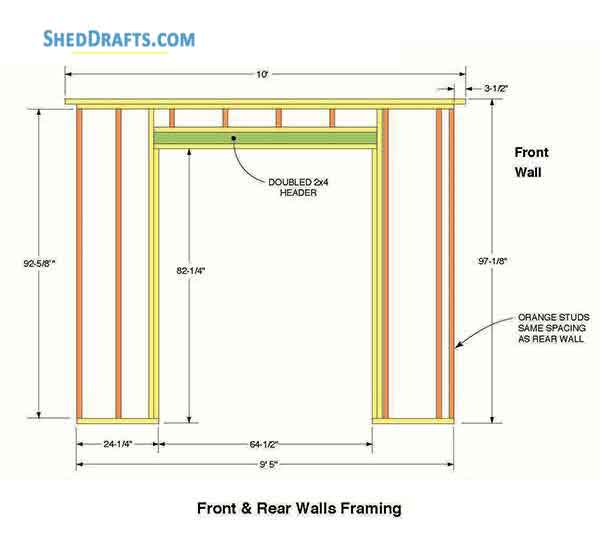
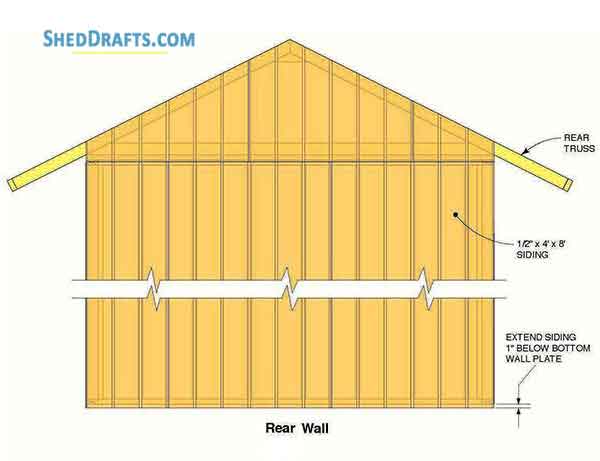
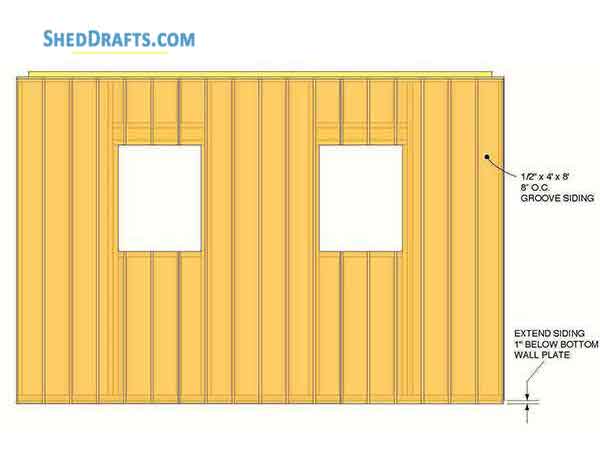
Wall Frame And Siding Sheet Installation
- Mark the location where wall plates would be secured on shed foundation using chalk.
- Create cedar wood wall plates and install them on chalk lines.
- Now mark the location for fastening anchor bolts over the plates.
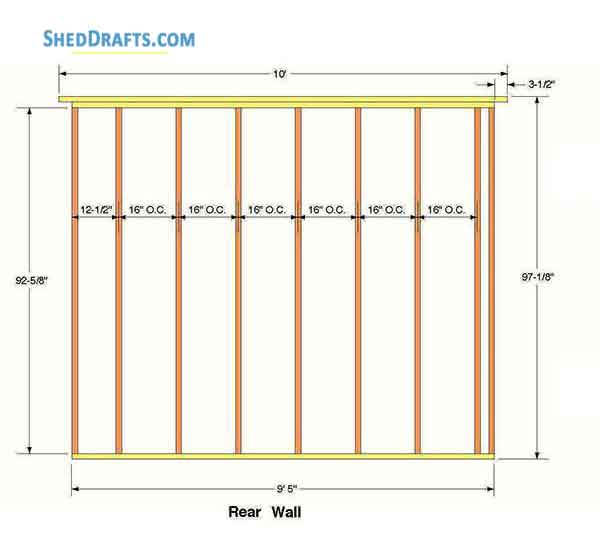
- Craft the studs as per the measures show in the wall framing diagrams and postion the upper and lower plates at the back wall.
- Maintain on-center spacing of 16 inches among the studs.
- Assemble wall frame on the floor and raise it into position.
- Keep space in the wall frames for door and window openings and maintain one inch extra space around perimeter of opening to install shims.
- Once the back and side walls are completed, nail the tie plates with top plates and use 2x4s to brace them.
- Confirm all corner are precisely square.
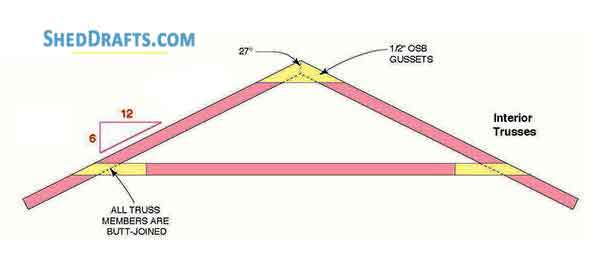
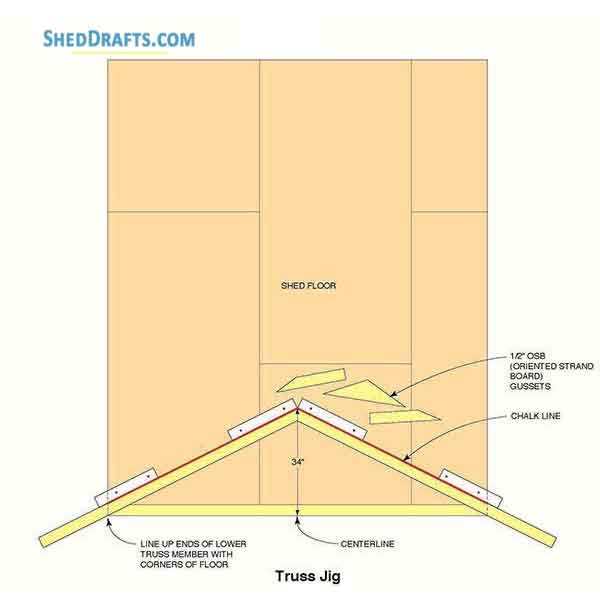
Rafter Template, Roof Diagrams & Truss Layout
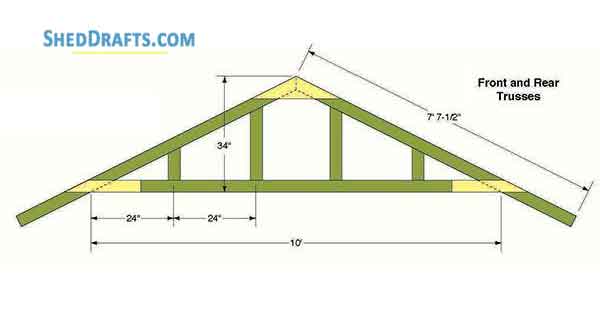
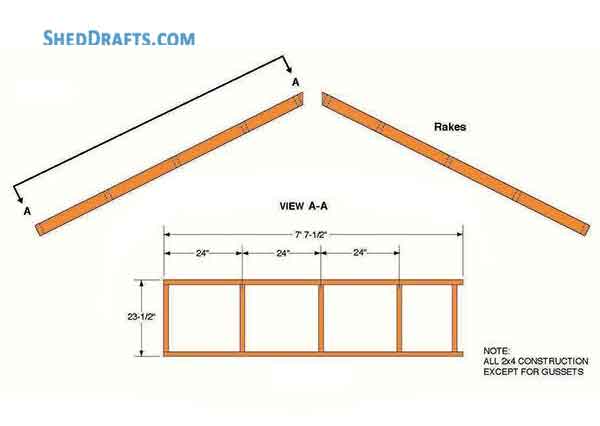

- Create rafters using 2×6 boards by referring to the roofing blueprints.
- Cut out the rafter boards such that any bend in the lumber is raised to top edge and crowns.
- First construct one rafter and the use the outline of this one to craft the remaining rafters.
- Each rafter should have a slope of 6/12 and an angle cut at 27 degrees.
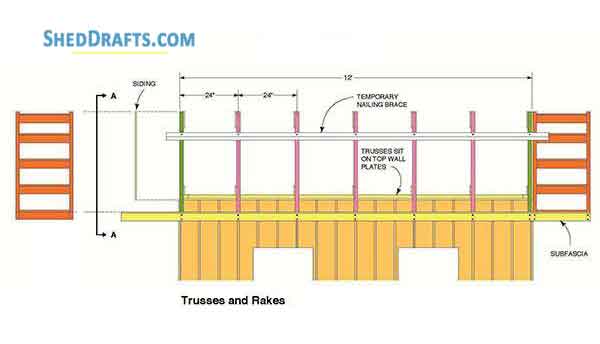
- Mark location of rafters over the wall plates and then nail them at these locations.
- Position each pair of rafters on top of a wall stud by securing rafters at 16 inch on center spacing over the side wall plates.
- Prevent crouching of the side walls by installing braces to support their upper part.
- These braces can be removed after installing collar tie joists.
- Ensure even spacing between rafters by fastening the top of each rafter pair with a 1×3 board.
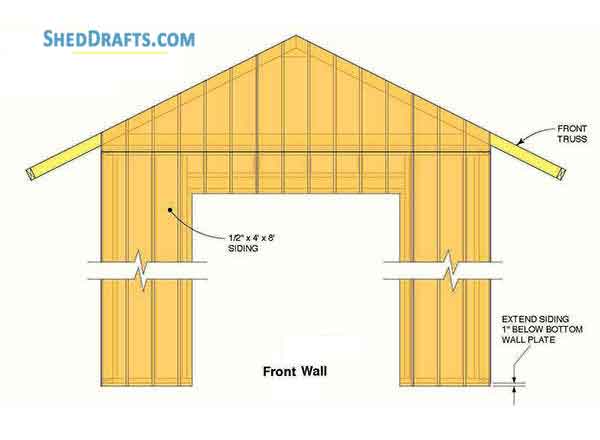
- Install plywood siding over the rafters using galvanized nails by starting at bottom and moving upwards.
- Toe nail 2×4 studs at 16 inch O.C. spacing to create the gable roof ends.
- Fasten plywood siding over the studs and wall frames using 10d nails.
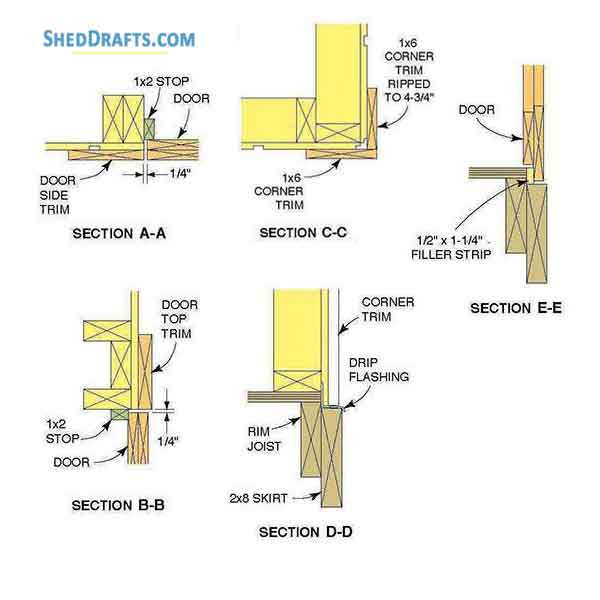
Installing Doors & Windows
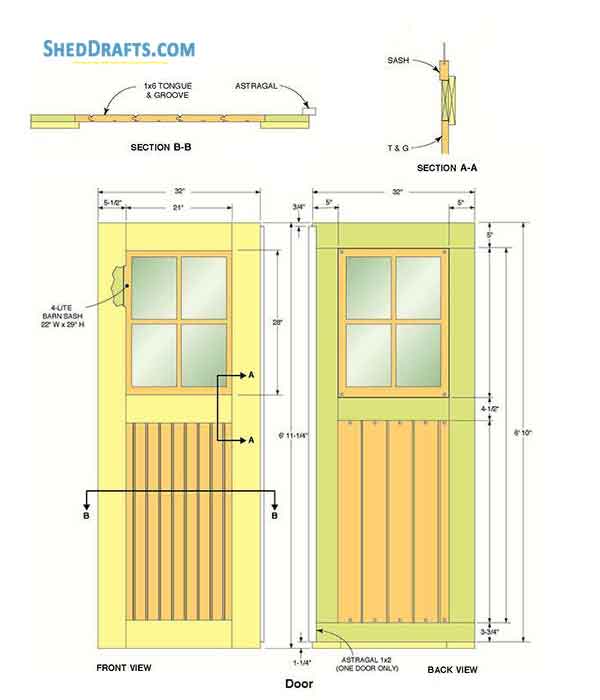
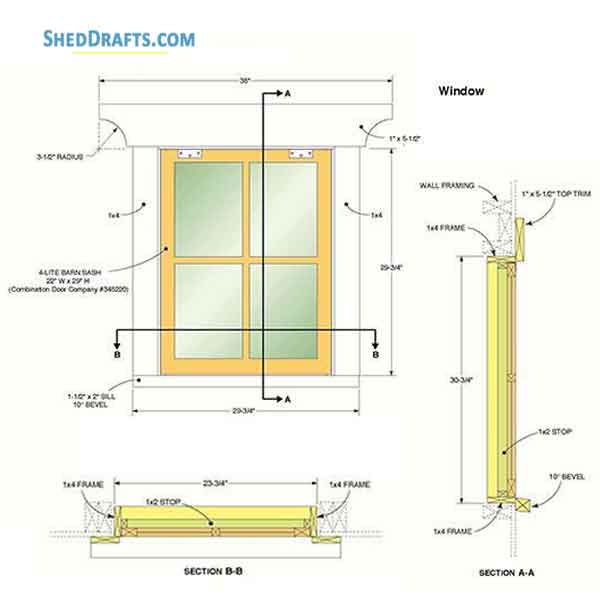
- Craft door jambs from 1×6 timber boards by using a table saw to create 5 inch wide pieces.
- Nail the jambs on door headers and trimmers while keeping them parallel to the sheathing.
- Use 3.5 inch wide plywood to trim the door edges.
- Keep the inner trim edges and door jambs flush with each other.
- Secure doors into the wall frame opening with shims and suspend them on strap hinges.
- Use hinges with broad flanges to ensure the screws will pass through into the stud behind the trim board.
- Finally paint your shed or coat it with wood stain.